
Nobody’s first dehydrator should cost $300. You don’t yet know whether you’ll use it twice a year or twice a week, and the honest answer is that most of what makes an expensive machine better — fifteen square feet, one-degree control, a stainless chamber — solves problems you haven’t met yet.
So this page is deliberately capped. Everything here sits between about $50 and $180, and it’s ranked on one question: how hard is it to get a bad result out of this machine? That means a real thermostat rather than an on-switch, a timer so a forgotten batch doesn’t turn to dust overnight, and the accessories you need already in the box.
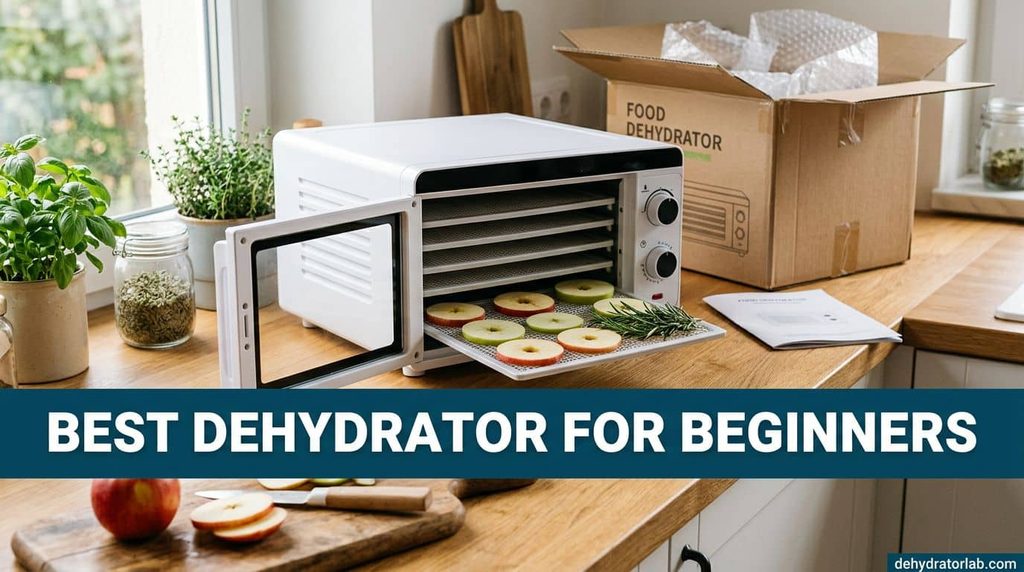
The best dehydrator for beginners is the one that makes your first batch work. Below are seven that do, what to dry first with the temperatures for each, and the four mistakes that ruin almost every first attempt. Let’s get you a win.
As an Amazon Associate, I earn from qualifying purchases. If you make a purchase after clicking on a link I may earn a small commission at no extra cost to you if items are purchased.
Quick Picks: The Best Dehydrator for Beginners, at a Glance
- 🥇 Best Overall: Hamilton Beach 32100A – thermostat, 48-hour timer and both sheets included, for the least money
- 🎯 Best Value: Nesco FD-75A Snackmaster Pro – four accessories in the box and it expands to 12 trays
- 💰 Best Cheap Digital: Presto 06301 Dehydro – digital thermostat and a real timer, 90–165°F
- 📈 Worth Stretching For: COSORI 6-Tray – a glass door, which is the best teaching tool there is
- ✅ Most Trays Covered: L’Equip 528 – a mesh screen for every single tray
- 🥈 Best Stainless: Magic Mill MFD-7070 – dishwasher-safe trays and a clear door
- 🔰 Cheapest That Works: Elite Gourmet EFD319 – three dial zones and a tiny footprint
Best Dehydrator for Beginners: Comparison Table
| Model | Trays / capacity | Drying area | Watts | Temp range | Timer | Airflow | In the box | Price |
|---|---|---|---|---|---|---|---|---|
| Hamilton Beach 32100A | 5 stackable, square | ~4.5 ft² | 500W | 100–160°F | 48 h digital | Bottom-mounted, vertical | Solid sheet + mesh sheet | $ |
| Nesco FD-75A Snackmaster Pro | 5 round (13.5 in), expands to 12 | ~4.5 ft² as shipped | 600W | 95–160°F | None | Top-mounted, vertical | 2 mesh + 2 solid sheets | $ |
| Presto 06301 Dehydro Digital | 6 round, expands to 12 | ~5 ft² as shipped | 750W | 90–165°F | Digital | Bottom-mounted, vertical | Sold separately | $ |
| COSORI 6-Tray Stainless Steel | 6 stainless (12×13 in) | ~6.5 ft² | 600W | 95–165°F (1° steps) | 48 h digital | Rear, horizontal | 1 mesh sheet | $$ |
| L’Equip 528 Six-Tray | 6 plastic, expands to 12 | 7.2 ft² (14.4 expanded) | 500W | 95–158°F | None | Bottom-mounted, vertical | 6 mesh + 2 solid sheets | $$ |
| Magic Mill MFD-7070 7-Tray | 7 stainless (13×12 in) | ~7.6 ft² | 600W | 95–167°F (9° steps) | 24 h, 30-min steps | Rear, horizontal | Fruit-roll trays included | $$ |
| Elite Gourmet EFD319 | 5 round (11.4 in) | ~3.5 ft² | 350W | 94–158°F (3 dial zones) | None | Bottom-mounted, vertical | Sold separately | $ |
You’ll notice there is no $300 machine here. That’s the point. If you already know you’ll be drying a garden every autumn, the vegetables guide and the fruit guide cover the bigger boxes. If you don’t know that yet, buy from this table.
How I Picked These
I didn’t rank these by power or capacity, because a beginner’s first failed batch is almost never caused by either. It’s caused by guessing the temperature, forgetting the machine overnight, losing half the food through the trays, or putting a still-warm batch into a jar. So I ranked on how well each machine prevents those four things.
- A real thermostat. Not an on-off switch. Different foods want genuinely different temperatures, and a fixed-temperature box makes half the recipes on this site impossible to follow.
- A timer that shuts it off. Drying takes 6 to 14 hours. Without a timer you either stay up or you over-dry, and this piece on over-drying explains exactly what that costs you.
- The accessories already in the box. A mesh screen and a solid sheet turn a machine that does two things into one that does everything. Buying them a week later means a week of not using it.
1. 🥇 Best Overall for Beginners: Hamilton Beach 32100A

- 5 STACKABLE, BPA-FREE TRAYS: The food dehydrator machine trays provide up to 4.2 square feet of drying space for making …
- ADJUSTABLE TEMPERATURE CONTROL, DIGITAL TIME & AUTO SHUTOFF: Easily adjust the temperature from 100-160ºF to dry a varie…
- CONSISTENT, EVEN DRYING WITHOUT HAVING TO ROTATE TRAYS: The powerful 500 watt base-mounted heater and quiet fan on this …
Specs at a glance: 5 stackable, square · Drying area: ~4.5 ft² · 500W · 100–160°F · Timer: 48 h digital · Bottom-mounted airflow · In the box: Solid sheet + mesh sheet
Nothing else under $80 has all four of the things a beginner actually needs. The 32100A gives you a digital thermostat from 100°F to 160°F, a 48-hour timer that shuts the machine off on its own, and both a solid sheet and a fine mesh sheet in the box. Most machines at this price give you one of those. My full notes are in the Hamilton Beach 32100A review.
The square trays are a quiet advantage nobody markets. Round trays have a hole in the middle, so a doughnut of apple rings comes out with an empty centre and awkward offcuts. Square trays lay out neatly and cut into strips, which matters most for fruit leather.
Pros
- Digital thermostat and a 48-hour timer with auto shut-off
- Solid sheet and mesh sheet both included
- Square trays waste less space and cut into neat strips
- Small, light, and cheap enough to be a low-risk first buy
Cons
- 4.5 sq ft — you will outgrow it if you take to this
- Bottom-mounted fan means rotating a full stack once
- BPA-free plastic trays, hand wash
Who It’s For
Anyone buying a first dehydrator who wants the highest chance their first batch works. Skip it if you already know you’ll be drying in volume. Otherwise the Hamilton Beach 32100A is the safest first purchase on this page. Start here.
2. 🎯 Best Value (Most in the Box): Nesco FD-75A Snackmaster Pro

- 600‑WATT DRYING SYSTEM WITH CONVERGA‑FLOW AIRFLOW evenly circulates heat without tray rotation, helping home users relia…
- EXPANDABLE FROM 5 UP TO 12 TRAYS lets you dry small portions for quick snacks or scale up for larger batches, making it …
- ADJUSTABLE TEMPERATURE CONTROL (95°F–160°F) allows precise heat selection for different ingredients, ensuring meat dries…
Specs at a glance: 5 round (13.5 in), expands to 12 · Drying area: ~4.5 ft² as shipped · 600W · 95–160°F · Timer: None · Top-mounted airflow · In the box: 2 mesh + 2 solid sheets
The Snackmaster Pro is the machine a lot of people’s grandmothers owned, and it is still the best-equipped box at its price: two Clean-A-Screens and two Fruit Roll sheets come with it. That’s four accessories other makers sell separately, and between them they cover almost everything a beginner will try in the first year. Details in my Nesco Snackmaster Pro review.
It also grows. Five trays expand to twelve, so the machine scales with your enthusiasm rather than becoming the wrong size. The fan sits on top, which keeps drips away from the motor, and the opaque housing keeps light off bright food so colours hold. The whole Nesco range is ranked in Best Nesco Food Dehydrator.
The one real gap is the timer — there isn’t one. A $10 plug-in outlet timer fixes it completely, and at this price that’s a fair trade. Just buy it at the same time, because the first night you forget is the night you learn why.
Pros
- Two mesh screens and two solid sheets included — four accessories free
- Expands from 5 to 12 trays as you get more ambitious
- Top-mounted fan keeps liquid away from the motor
- Cheap, proven, and spare parts are easy to find
Cons
- No timer at all — budget a plug-in one alongside it
- Round trays with a centre hole waste usable area
- Plastic trays, hand wash
Who It’s For
Beginners who’d rather spend the money on accessories than on a display. Skip it if you want the machine to switch itself off. Otherwise the Nesco FD-75A Snackmaster Pro is the most kit per dollar here.
3. 💰 Best Cheap Digital: Presto 06301 Dehydro Digital

- VERSATILE DEHYDRATOR: Dehydrates fruits, vegetables, herbs, spices, and more. Ideal for jerky and fruit roll preparation
- EXPANDABLE CAPACITY: Includes 6 trays, expands to 12 (add-on trays sold separately). Innovative nesting design reduces s…
- PRECISE CONTROL: Digital thermostat and timer with temperatures from 90° to 165°F for customized drying. Shuts off autom…
Specs at a glance: 6 round, expands to 12 · Drying area: ~5 ft² as shipped · 750W · 90–165°F · Timer: Digital · Bottom-mounted airflow · In the box: Sold separately
If the Nesco’s missing timer bothers you, this is the answer at the same kind of price. The 06301 has a digital thermostat and a real timer, and it reaches from 90°F up to 165°F — the widest range of anything under $80 here, which means it can do delicate herbs at the bottom and meat at the top. I went through it in my Presto 06301 review.
Six trays expand to twelve, and 750 watts is generous for the money. The trays nest inside each other for storage, so between batches the whole thing goes in a cupboard instead of colonising the counter — which for a first machine matters more than people expect. The range is ranked in Best Presto Food Dehydrator.
Pros
- Digital thermostat and a real timer at a budget price
- 90–165°F — the widest range under $80 on this page
- Expands from 6 to 12 trays, and the trays nest for storage
- 750W dries a wet load faster than most cheap machines
Cons
- No sheets or screens included — buy them with it
- Bottom-mounted fan means rotating a full stack
- Round trays waste area compared with square
Who It’s For
Beginners who want the timer and don’t mind a small accessory order. Skip it if you’d rather everything arrived in one box. Otherwise the Presto 06301 is the most capable cheap machine here.
4. 📈 Worth Stretching For: COSORI 6-Tray Stainless Steel

- 𝗠𝗔𝗫𝗜𝗠𝗜𝗭𝗘 𝗘𝐕𝗘𝗥𝗬 𝗕𝗔𝗧𝗖𝗛: 6 stainless steel trays offer 6.5 ft² of drying space, giving you plenty of room to dehydrate larg…
- 𝗠𝗢𝗥𝗘 𝗣𝗢𝗪𝗘𝗥𝗙𝗨𝗟 & 𝗘𝗙𝗙𝗜𝗖𝗜𝗘𝗡𝗧: Equipped with a 600 W motor, rear-mounted drying fan, and upgraded airflow technology for fas…
- 𝗦𝗨𝗣𝗘𝗥 𝗤𝗨𝗜𝗘𝗧 𝗢𝗣𝗘𝗥𝗔𝗧𝗜𝗢𝗡: Features an advanced brushless motor with noise levels below 48 dB, letting you dehydrate your fo…
Specs at a glance: 6 stainless (12×13 in) · Drying area: ~6.5 ft² · 600W · 95–165°F (1° steps) · Timer: 48 h digital · Rear airflow · In the box: 1 mesh sheet
This is the one to stretch for, and the reason is not the specs. It’s the glass door. When you are learning, being able to watch food change through the door — glossy to matte, plump to shrunken, pliable to brittle — teaches you more in three batches than any article will. You stop guessing and start recognising. Full notes in my Cosori 6-tray review.
The rest is genuinely nicer too. Six stainless trays that go in the dishwasher, a thermostat that moves in single degrees from 95°F to 165°F, a rear fan so nothing needs rotating, a 48-hour timer, and under 48 dB of noise. It is the only machine on this page you would describe as pleasant.
It costs roughly double the Hamilton Beach. Whether that’s worth it depends on one thing: how confident you are that you’ll still be doing this in a year. If you are, buy it now and skip the upgrade.
Pros
- Glass door — the single best learning tool on this list
- One-degree control from 95°F to 165°F
- Stainless dishwasher-safe trays and rear horizontal airflow
- 48-hour timer, under 48 dB, no tray rotation
Cons
- Roughly double the price of the budget picks
- Only one mesh sheet in the box
- Deep footprint takes most of a counter’s depth
Who It’s For
People fairly sure this will stick, and anyone who learns by watching. Skip it if you’re testing the waters. If you’re not, the Cosori 6-Tray is the machine you won’t need to replace. Hard to regret.
5. ✅ Most Trays Covered: L’Equip 528 Six-Tray

- 500-watt dehydrator for drying food, flowers, and herbs
- More Than Just Hot Air
- 6 stacking trays for a total of 12 square feet of drying space
Specs at a glance: 6 plastic, expands to 12 · Drying area: 7.2 ft² (14.4 expanded) · 500W · 95–158°F · Timer: None · Bottom-mounted airflow · In the box: 6 mesh + 2 solid sheets
The L’Equip solves the accessory problem more completely than anything else here: six mesh screens and two solid sheets, one screen for every tray. Nothing else on this page covers every tray out of the carton, and for a beginner that means no batch is ever ruled out by missing kit. Full write-up in my L’Equip 528 review.
Six trays give 7.2 square feet — more than the Cosori — and it expands to twelve for 14.4. The temperature range of 95–158°F covers everything except meat jerky, which needs a higher ceiling for the finishing step.
Pros
- Six mesh screens and two solid sheets — every tray covered
- 7.2 sq ft, expandable to 14.4
- More drying area than machines costing more
- Simple controls with nothing to misread
Cons
- No timer
- 95–158°F ceiling is short for meat jerky
- 500W is modest for a fully expanded stack
Who It’s For
Beginners who want to try everything immediately without an accessory order. Skip it if jerky is the plan. Otherwise the L’Equip 528 is the best-equipped box under $150.
6. 🥈 Best Stainless: Magic Mill MFD-7070 7-Tray

- REAR MOUNTED FAN FOR SUPERIOR HEAT DISTRIBUTION – Dries food evenly, This electric dehydration machine is equipped with …
- DIGITAL THERMOSTAT AND TIMER- AUTOMATIC SHUT OFF WHEN TIMER DONE — An adjustable temperature and timer ensure you to ha…
- SPACIOUS ADJUSTABLE 7 XL STAINLESS STEEL TRAYS – INCLUDED FRUIT ROLL TRAYS! Use the trays for regular food and the mesh …
Specs at a glance: 7 stainless (13×12 in) · Drying area: ~7.6 ft² · 600W · 95–167°F (9° steps) · Timer: 24 h, 30-min steps · Rear airflow · In the box: Fruit-roll trays included
If you want the machine to look and feel like a proper appliance rather than a starter kit, this is the cheapest way there. Seven stainless trays that go in the dishwasher, a rear fan so nothing needs rotating, a clear door, and a 24-hour timer. I covered it in my Magic Mill MFD-7070 review.
The stainless is not just cosmetic, and it is the main reason people end up stepping up to stainless on a second machine. Plastic trays hold the smell of onions and garlic for weeks and stain from beetroot and berries; steel rinses clean. If your first year includes anything strongly flavoured, you’ll notice.
Pros
- Seven stainless dishwasher-safe trays, ~7.6 sq ft
- Rear horizontal airflow — no rotating trays
- Clear door and a 24-hour timer
- Ceiling of 167°F, so meat jerky is on the table
Cons
- 9°F temperature steps and 30-minute timer steps
- Costs more than three of the machines above
- Only fruit-roll trays listed as included
Who It’s For
Beginners who’d rather buy once and keep it. Skip it if you’re unsure you’ll use it. Otherwise the Magic Mill MFD-7070 is the grown-up option here.
7. 🔰 Cheapest That Still Works: Elite Gourmet EFD319
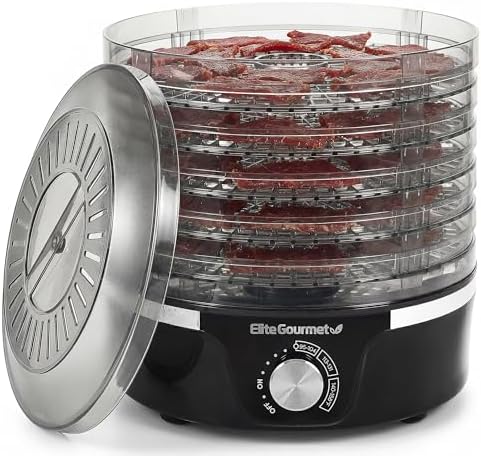
- ADJUSTABLE TEMPERATURE DIAL + POWER INDICATOR: Turn the dial to select the desired temperature range from 95°F–158°F for…
- 5 EXPANDABLE BPA-FREE TRAYS: Includes five 11.4” clear drying trays that stack from 8.5” to 10.75” tall to fit thicker c…
- MAKE HEALTHY SNACKS AT HOME: Create preservative-free fruit chips, veggie crisps, beef jerky, fruit rolls, granola, trai…
Specs at a glance: 5 round (11.4 in) · Drying area: ~3.5 ft² · 350W · 94–158°F (3 dial zones) · Timer: None · Bottom-mounted airflow · In the box: Sold separately
Sometimes the honest answer is: spend as little as possible and find out. The EFD319 is the cheapest machine on this page that still does the essential job, because it has an adjustable dial rather than a single fixed temperature. Its lowest zone sits around 94–104°F, which is correct for herbs, and it tops out near 158°F. Full details in the Elite Gourmet EFD319 review.
Be clear about what you’re giving up: no timer, no digital readout, three dial zones rather than a temperature you set, and uneven drying that needs tray rotation. It is a way in, not a machine you keep.
Pros
- Cheapest machine here that still has an adjustable dial
- 94°F low zone — correct for herbs
- Tiny, light, stores in any cupboard
- Low enough risk to buy on a whim
Cons
- Three dial zones, not a set temperature
- No timer and no display
- 3.5 sq ft and uneven drying — expect to rotate trays
Who It’s For
One-person households and anyone who wants to spend the least possible to find out. Skip it if you already suspect you’ll like this. If you don’t, the Elite Gourmet EFD319 answers the question for the price of a takeaway.
The First Five Things to Dry, in Order
Start easy and build confidence. These five are ordered from hardest-to-ruin to slightly fussier, and each one teaches you something the next one needs.
- 1. Herbs — 95–115°F, 4 to 12 hours. Nothing to prepare beyond a rinse and a shake dry, and the payoff is immediate: a jar of basil that actually smells of basil. Start with basil. This is the batch that convinces you.
- 2. Apple rings — 135°F, 7 to 14 hours. A quarter inch thick, cored, and dipped in lemon water if you want them pale. The full method is in dehydrating apples. This is where you learn what “leathery, not brittle” feels like.
- 3. Mushrooms — 110–135°F, 6 to 10 hours. No blanching, no pretreatment, just brush and slice. See how to dehydrate mushrooms. This teaches you that some things shrink to a third of their size, which changes how you load a tray forever.
- 4. Fruit leather — 140°F, 6 to 8 hours. Purée spread an eighth of an inch thick on a solid sheet. How to make fruit leather has the method. This is the first batch anyone else in the house gets excited about.
- 5. Jerky — last, and only after reading the safety step. The USDA Food Safety and Inspection Service says to heat meat to 160°F, or poultry to 165°F, before it goes in the dehydrator, because the machine may never get the meat that hot. Everything you need is in the jerky buying guide.
More starter ideas in 10 easy dehydrating projects for beginners.
The Four Mistakes That Ruin a First Batch
Almost every disappointing first attempt comes down to one of these, and all four are easy to avoid once somebody tells you.
- Slices of different thicknesses. This is the big one. Thin pieces finish hours before thick ones, so half the tray is brittle and half is still damp — and the damp half is what spoils in the jar. Aim for a uniform quarter inch and use the thinnest piece as your guide, not the thickest.
- Crowding the trays. Food needs air on both sides. Pieces that touch dry where they’re exposed and stay wet where they meet, and that hidden wet spot is where mould starts. Leave a slice’s width between everything.
- Calling it done too early. Vegetables should snap. Fruit should be leathery with no visible moisture when you tear a piece. University of Minnesota Extension draws the line simply: vegetables are ready when brittle, fruit when it feels like leather. Anything that bends and leaves a damp mark needs more time.
- Jarring it while it’s warm. Warm food releases moisture into a sealed jar and that moisture has nowhere to go. Cool everything completely first — University of Minnesota Extension says 30 to 60 minutes. Then, for fruit and vegetables, condition it: pack the jars about two-thirds full, stir daily for a week, and put the batch back in the machine if you see any condensation, which is what Utah State University Extension recommends.
Storage after that is simple: glass jars with tight lids, somewhere cool and dark. How long dehydrated food lasts has the full timeline, and 6 essential beginner tips covers the beginner habits worth building early.
What to Look For in a First Dehydrator
Ignore most of the spec sheet. Four things decide whether your first machine is a pleasure or a regret.
A thermostat, not a switch
Some very cheap dehydrators run at one fixed temperature. They work for exactly one kind of food and make every recipe with a number in it impossible to follow. An adjustable dial is the minimum; a digital setting is better. Everything on this page clears that bar, which is why several cheaper machines aren’t here.
A timer with auto shut-off
Batches run 6 to 14 hours, which means most of them run overnight or while you’re at work. Without a timer your options are setting an alarm or over-drying, and over-dried food is genuinely worse — brittle, flavourless and impossible to rehydrate. A $10 plug-in outlet timer is a perfectly good substitute if the machine you want lacks one.
A mesh screen and a solid sheet, ideally included
The mesh stops small things — herbs, berries, diced anything — falling through. The solid sheet is what lets you make fruit leather and dry anything liquid. Without them a dehydrator does maybe half of what it’s capable of, and this guide explains the sticking problem they solve.
Room to grow, or cheap enough not to mind
Two sensible strategies, and they’re opposites. Either buy something expandable — the Nesco, Presto and L’Equip all take more trays — or buy something cheap enough that replacing it in a year costs nothing. The expensive mistake is a mid-priced machine that’s fixed at a size you outgrow.
What you can safely ignore for now
Horizontal airflow, stainless trays, fifteen square feet, one-degree precision and a 48-hour two-stage timer are all real advantages. None of them will make your first batch of apple rings better. Come back to them when you know what you dry most, and this piece on the benefits explains what dehydrating actually gets you.
Best Dehydrator for Beginners FAQs
How much should I spend on my first dehydrator?
Between about $50 and $80 is enough to get a real thermostat, a timer and the basic accessories, which is everything a first batch needs. Stretching to roughly $150 buys stainless trays, a glass door and horizontal airflow, which are genuinely nicer but solve problems you have not met yet. Spending more than that before you know your habits is how machines end up in cupboards.
What should I dehydrate first?
Herbs. They take 4 to 12 hours at 95 to 115°F, need no preparation beyond a rinse, and the result is obviously better than anything in a supermarket jar. Apple rings at 135°F are the natural second, because they teach you what properly dried fruit feels like. Leave jerky until last, because it is the only one with a food-safety step.
Do I really need a timer?
You need one or a substitute. Batches run 6 to 14 hours, so most of them finish while you are asleep or out, and a machine with no timer keeps running until you unplug it. Over-dried food is brittle, loses flavour and will not rehydrate properly. A $10 plug-in outlet timer works just as well as a built-in one and costs less than one wasted batch.
Why is half my batch dry and half still soft?
Almost always uneven slices, or crowded trays. Thin pieces finish hours before thick ones, and pieces that touch each other stay wet where they meet. Cut everything to a uniform thickness — a quarter inch is a good default — and leave a slice’s width of space between pieces so air reaches both sides.
How do I know when something is properly dry?
Vegetables should be brittle and snap. Fruit should feel like leather with no beads of moisture when you tear a piece. Tear one open from the middle of the tray rather than the edge, because edges always finish first. If it bends and leaves a damp mark, it needs longer.
Can I use the cheapest dehydrator I can find?
Only if it has an adjustable temperature. The very cheapest machines run at one fixed temperature, which suits one kind of food and makes any recipe with a number in it unusable. An adjustable dial is the real minimum. Everything else — stainless trays, horizontal airflow, digital displays — is comfort you can add later.
Final Verdict: Which Dehydrator Should a Beginner Buy?
- If you want the highest chance your first batch works, get the Hamilton Beach 32100A. Thermostat, timer and both sheets, for under $80.
- If you’d rather have accessories than a display, get the Nesco FD-75A Snackmaster Pro and a $10 plug-in timer. Four accessories included and it grows to twelve trays.
- If you want a timer without the accessory order, get the Presto 06301 — the widest temperature range under $80 here.
- If you’re fairly sure this will stick, stretch to the Cosori 6-Tray for the glass door, or the Magic Mill MFD-7070 for stainless. Either one you’ll still be using in five years.
Personal Tips You Can Steal
I tell everyone to dry herbs first, because it takes an afternoon rather than a day and the result is obviously worth it — that’s what gets someone to run a second batch. I keep a cheap notebook next to the machine and write down food, temperature, thickness and hours, which after five batches is worth more than any guide.
And I always cut one slice thinner than the rest deliberately, because it tells me when to start checking.
More Dehydrator Buying Guides
- Best Dehydrator for Herbs — the easiest place to start, and where a low temperature floor matters.
- Best Dehydrator for Fruit — apple rings, mango and banana, where capacity decides it.
- Best Dehydrator for Fruit Leather — the snack that converts the rest of the household.
- Best Dehydrator for Jerky — save this one for later, and read the safety section first.
P.S. Dry a tray of herbs this week. It takes an afternoon, it costs nothing, and it’s the batch that decides whether the machine lives on the counter or in the cupboard 🙂