Homemade bone broth is a versatile staple in many kitchens. It’s known for its robust flavor and health benefits, including improved digestion, joint health, and immune function. However, storing bone broth can be a challenge, particularly if you have limited freezer space. This is where dehydrating comes in.
Dehydrating bone broth reduces it to a compact, shelf-stable form that can be rehydrated when needed. In this article, we’ll cover a simple yet effective process for dehydrating bone broth.
As an Amazon Associate, I earn from qualifying purchases. If you make a purchase after clicking on a link I may earn a small commission at no extra cost to you if items are purchased.
In this article:
Key Points on How to Dehydrate Bone Broth [TL;DR]
- 🍲 Dehydrating homemade bone broth can be done using a wood stove, solar oven, or hot plate, providing flexibility based on the season and available resources.
- 🌱 Using silicone trays for dehydrating bone broth is a safer and reusable alternative to plastic trays, providing a more sustainable option for food preservation.
- 💧 The drying process of bone broth can be uneven due to variations in thickness and water content, requiring extra time and attention to ensure thorough dehydration.
- 🦴 Dehydrating bone broth can significantly reduce its size, making it more space-efficient for storage.
- 🍲 Dehydrating bone broth allows for customization of flavor and consistency, making it beneficial for tailoring to individual preferences and recipes.
Why Dehydrate Bone Broth?
For many years, I froze the excess broth that I wasn’t immediately turning into soup. But storage space can be at a premium, especially in the freezer, which led me to explore dehydrating the broth.
My initial thought was to can the broth, but as I started dehydrating other ingredients, such as eggs from my chickens, the idea of dehydrating the broth became more appealing.
Not only did it preserve the broth well, but it also saved precious space in the freezer or pantry. This was the major bonus that prompted me to start dehydrating my bone broth.
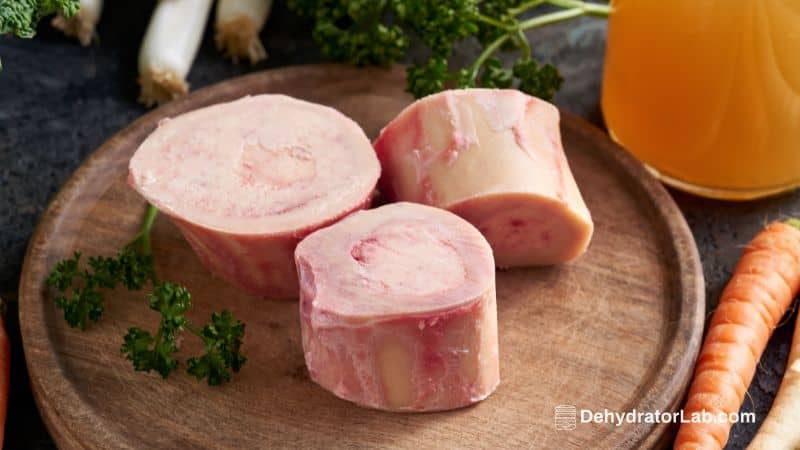
Making the Bone Broth
Before we get into the specifics of dehydrating broth, let’s briefly go over my unpretentious method of making bone broth. When I find myself with leftover turkey from Thanksgiving or bones from a roasted chicken, I toss them into a pot with water.
There’s usually a mix of spices already, and a splash of homemade wine rounds off the recipe nicely, which I prefer to vinegar. After letting it simmer for two days on the wood stove, we have our broth.
The warmer months might see me using the solar oven or a hot plate plugged into our solar power, but no matter the method, the result is often the same — delicious homemade broth.
When working with chicken, I usually turn the broth into a soup right away. I strain out the bones, add some more herbs and spices, toss in vegetables, potatoes, and maybe some barley, and put it back on the wood stove. But during the winter, when we make a big batch of turkey bones for Thanksgiving, I store the broth for later use.
Dehydrating the Broth Quick Step-by-Step Guide
Here’s a quick step-by-step guide to dehydrating your broth. We will expand on each afterward.
Step 1: Prepare Your Dehydrator Trays
Invest in edged silicone trays compatible with your dehydrator model, as they are safer than plastic trays. For liquid items like broth, silicone trays effectively contain the liquid.

Step 2: Fill the Trays
Once your dehydrator is set up where you want it to stay throughout the dehydrating process, fill the trays with your broth. For an average tray, it can hold approximately two to three cups of broth. Ensure the broth is evenly distributed across the tray.
Step 3: Set the Heat
Keep the heat at the lowest setting. This preserves the nutrients in your broth and reduces the risk of toxins seeping into your food from the silicone trays. It typically takes a minimum of 12 hours to fully dry the broth at this temperature.
Step 4: Dry the Broth
Ensure the broth is completely dry before moving to the next step. To test this, try crunching it – if it folds like fruit leather, it needs more time in the food dehydrator.
Preparing for Dehydration: Equipment Needed
Before you start dehydrating, make sure you have the right equipment. You need a dehydrator. Nesco, Cosori, and Excalibur are all suitable brands. Additionally, consider investing in silicone trays. They are safer than plastic ones and are available in various shapes to fit different dehydrators.
Silicone trays are particularly handy when dealing with liquids, as they keep the liquid contained. You can find them in different sizes to fit various dehydrator models, including Excalibur, Nesco, and Cosori.
If you’re dehydrating a liquid, like broth, ensure that your trays are level to prevent spills.
Dehydrating the Bone Broth
To start the dehydration process, I first thaw out the jars of broth. The exact quantity of broth I use is not measured precisely; however, I estimate that there are at least eight pints of broth in each pint jar.
Start by pouring your thawed-out broth onto the trays. Pouring the thawed broth onto the trays must be done carefully to prevent spillage.
I fill the trays partially into the dehydrator, supporting them with one hand to keep them level. I aim to distribute the broth evenly across the tray. The trays can typically hold up to two cups of broth, with larger trays accommodating up to three cups.
Dehydrating Temperature and Time
When dehydrating any items on silicone, I always set the temperature at the lowest setting. The main reason for this is to prevent the silicone or plastic from getting too hot and potentially releasing toxins into the food.
For this low temperature, I’ve found that it takes a minimum of 12 hours for the broth to fully dry. If the tray is very full, sometimes it requires longer.
Fat in the Broth
If you like to leave the fat in your bone broth, as I do, you’ll find that the end product will be oily, even when dry. You can choose to dab some of it off once it’s dry if it’s too much fat for your liking, or you can leave it as it is. The oil does not negatively affect the dehydration process and adds flavor and nutrition to the dehydrated broth.
If you’re concerned about the amount of fat, you have a few options. You can skim it off before dehydrating, dab off the oil after it’s dried, or simply leave it in. The fat can enhance the flavor and provide added health benefits.
To check if it’s fully dried, try crunching it. If it folds like fruit leather, it needs more time in the dehydrator.
Turning Your Broth into Powder
Once your broth is dried and cooled, you can turn it into a powder. You can use a blender or a coffee grinder to do this. The resulting powder doesn’t have to be perfect and may clump together due to the fat content.
Grinding and Storing Your Dehydrated Broth
Once the broth is adequately dried, I grind it into a powder. The final product doesn’t have to be a perfect powder. It may clump together, especially if there’s a lot of fat in it.
Now that your dehydrated broth is ground, it can be stored in jars to save space. Vacuum sealing the jars can help to keep them fresh. However, if you’ve left the fat in, you may prefer to store your dehydrated broth in the fridge or freezer to prevent it from going rancid.
The longevity of your dehydrated broth depends on factors like storage conditions and climate.
Rehydrating Your Broth
When it’s time to use your dehydrated broth, simply rehydrate it with water. A rough guideline is to use 1/8 of a cup of powder to one cup of water to make approximately one cup of broth. However, this ratio can be adjusted based on your personal preference for flavor and thickness.
FAQs
1. How long does it take to dehydrate bone broth?
The dehydration time for bone broth can vary based on the dehydration method used. Typically, when using a food dehydrator at about 135°F, it can take between 12 to 48 hours. The exact time will depend on the thickness of your broth spread.
2. Is dehydrated bone broth as good as fresh?
Dehydrated bone broth, when properly stored, can retain most of the nutritional content found in fresh bone broth. The dehydration process may alter the texture and the flavor slightly, but it’s a great way to have a long-lasting and easy-to-use form of bone broth.
3. How do you dehydrate bone broth into powder?
To dehydrate bone broth into a powder, you need to first freeze the broth and then put it in a food dehydrator or an oven in the lowest setting. After the broth is completely dehydrated, it can be ground into a powder using a food processor or a coffee grinder.
4. How do you store dehydrated bone broth?
Store the dehydrated bone broth in a sealed container in a cool, dark place. It can last up to a year if properly stored. Make sure it’s completely dehydrated before storing it to prevent any possible spoilage.
Conclusion
Dehydrating your homemade bone broth can be a straightforward process that allows you to conveniently store and use this nutritious and flavorful staple.
Remember, the methods you choose for dehydration, storage, and rehydration may vary based on your personal preference and what works best in your kitchen. However, with these steps, you can start enjoying the benefits of dehydrated bone broth.