It’s very likely that you’ve heard about food dehydrators. These units’ life-changing benefits are simply indispensable.
I’ve already written extensively on the best food dehydrators for jerky to buy on this site. Here, in this article, I’ll be sharing several tips on how to make a simple DIY dehydrator at home.
If you are an enthusiastic DIYer and you like saving some bucks on things that you can easily craft on a free afternoon, this article is yours!

In this article:
Two Types Of DIY Food Dehydrators
There are a few reasons why you might want to make a food dehydrator rather than purchasing one; budget, hobby, and the desire to craft something.
Whatever your reasons, a homemade DIY dehydrator can either use solar or electricity.
DIY solar dehydrator will definitely fit the bill if you are after saving money on power. It’s also the easiest to make.
DIY electric food dehydrators, on the other hand, are a little bit technical to design and make. They also require power to operate. On the upside, they are fast and remain operational throughout the year whether there is solar or not.
Whichever the design that you opt to construct, ensure that:
- It has ventilation to allow an easy and even airflow that circulates all over the food.
- The trays are easy to remove or rotate for maximum drying capability and easy cleaning.
- It is pest-proof. For solar food dryers, ensure that it can withstand the elements.
Also you can check our article on electric versus solar dehydrator and conclude for yourself which will be the right one for you.
How To Make A Simple DIY Electric Food Dehydrator
Making an diy electric food dehydrator at home is a little bit involving than a solar model. But as you’ll soon find out, crafting one isn’t necessarily too complicated.
I bet you’ll find the first model in this category much simpler to make than our first recommendations.
1. Electric Home Made Dehydrator By Alpharubicon

I found this electric home made dehydrator the simplest DIY to make.
If the original designer’s claim is anything to go by, then you’ll be excited to know that this model works much faster than most bought dehydrators.
This means that you can dry your jerky on a short notice without any worry.
Here Is What You Require To Make This DIY Electric Dehydrator:
- A heavy cardboard box
- Aluminum foil
- Masking tape
- Light Socket
- Bulb
- Aluminum cookie sheets
- A plug
- Wooden strips (for the shelves)
- A fan (optional but very crucial: if your model will have more than 2 shelves, a small fan will come in handy in ensuring an even airflow all over the food for excellent and speedy drying).
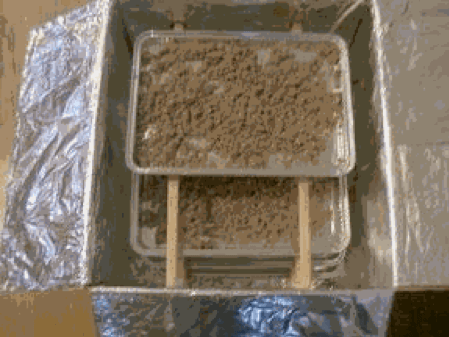
Visit alpharubicon.com for the complete guide on how to make this dehydrator.
2. DIY Large Capacity Electric Food Dehydrator
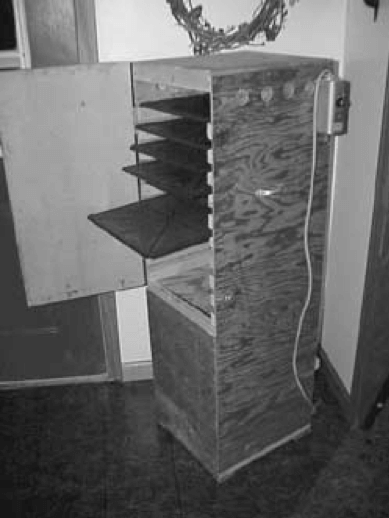
If you have a large family that loves dehydrated foods, a large capacity food dehydrator is definitely what you require.
Backwoods Home has a design that you might want to go by.
Besides its large yet practical design, I like that this model can be expanded to hold several trays of different foods at a go.
It’s also surprising that you can also add a thermostat into the design to eliminate the need of babysitting the device as it does its work.
What You’ll Require:
- Light polycarbonate trays
- 600-watt Ceramic heat coil
- Porcelain lamp
- A lamp base
- Thermostat
Learn how to construct this large electric food dehydrator at Backwoods Home.
How To Make A Simple DIY Dehydrator Using Solar Power – 5 Methods
1. Thin Plywood And Glass Solar Dehydrator
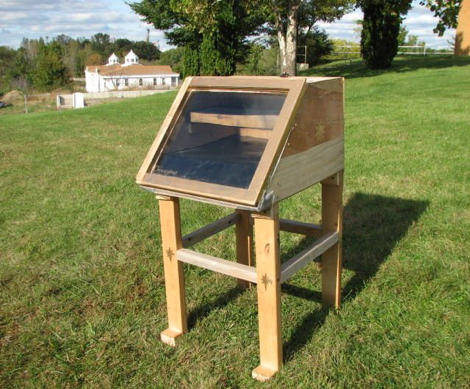
This solar food dehydrator was designed by Maharishi University of Management’s students, Fairfield, as a project.
The best part about this model is that it can be crafted from materials that are considered trash around your home.
What You’ll Need:
- Thin plywood (for the sides)
- Wood (for the legs and shelf support)
- A glass pane or clear plastic
- Stretchable cloth/material (used for the drying rack)
- Screen
- 2 hinges
- A thermometer
- Staples
- Hook and string
Click here for a detailed guide on the exact measurements of the construction materials and detailed plan.
2. Simple But Stylish Solar Food Dehydrator
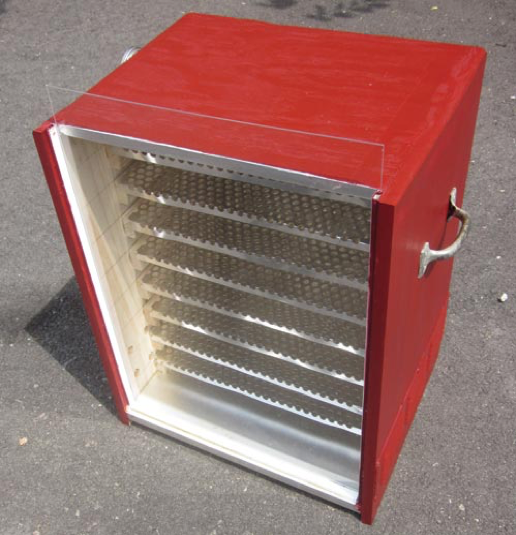
For those who would like something simple yet stylish, then this model by Jeffery Yago, Engineer and Energy Manager, might interest you.
This model has been constructed using pine wood but I bet any other wood will do the trick.
While the original designer of this dehydrator uses manufactured metal rack, he also adds that you can use metallic racks from an old stove and discarded refrigerators.
What You’ll Need:
- Master forge grill topper racks
- Pine shelving
- Pine plywood
- Long white pine
- Metal screen frame rail
- Acrylic clear sheet
- Screened louver vent
- Tube construction adhesive
- Roll heavy oven aluminum foil
- Dial thermometer
See here the detailed guide.
3. Durable Metallic Food Dehydrator
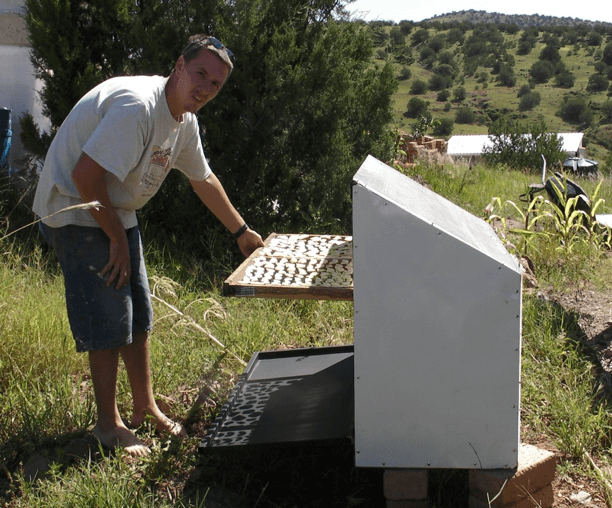
Anyone who wants a food dehydrator definitely has cost-efficiency in mind. Nothing does that well than a metallic frame solar food dehydrator. The essence here is to construct a simple yet strong and effective model that will serve you for years.
You are not limited to metal though. You could also use wood only that you’ll need to adjust the measurements accordingly.
To construct this metallic solar dehydrator, you’ll need:
- Metallic tubing
- Polycarbonate panel
- Welding machine
Here is the complete guide of how to construct this metallic dehydrator.
4. Compact Solar Food Dryer
All the above solar food dehydrators have one thing in common: bulkiness. They might be quite hard to deal with in terms of storage especially if you live in tight quarters.
While they offer an enormous drying space, these models also require more materials and time.
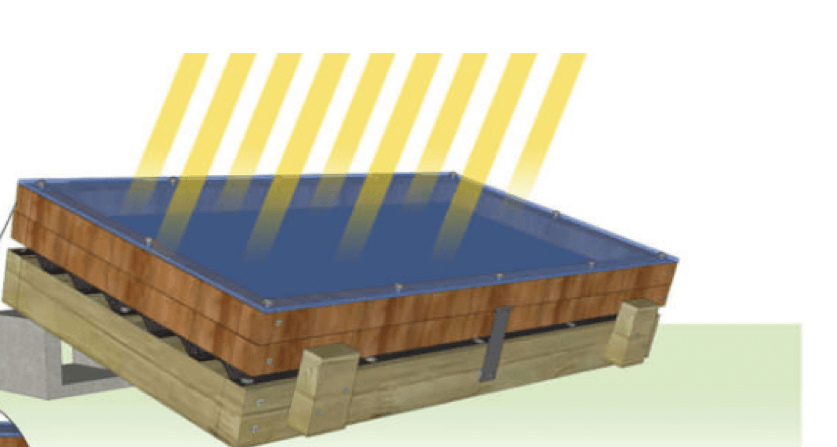
If a compact yet effective food dehydrator is what you have in mind, the model below might meet your needs.
This dehydrators’ small footprint is its real advantage for people with minimal storage space. Moving it around is also quite easy thanks to its lightweight design.
On the flipside, it has minimal drying space and might take some time to dry enough food for a large family. You can, however, adjust the construction design to make it bigger.
What You’ll Need:
- 28-gauge metallic sheet (steel or aluminum)
- Cedar wood
- Corrugated galvanized metal roofing
- A pack of exterior-grade wood screws
- Clear polycarbonate sheet
- Roofing screws with rubber washers
- Food-grade stainless steel screen
- Steel flat-head sheet-metal screws
- 1 can black BBQ-grill spray paint
- 3/8’’ stainless steel staples
- Heavy duty galvanized T hinges
- 1 tube squeezable silicone caulk
- 1 5-inch Galvanized gate hasp
- One 5″ galvanized gate hasp
Click here for the how-to guide.
A solar food dehydrator offers a cost-efficient way of extending the summer’s bounty of fruits and vegetables throughout the year without hiking your electricity bills. These models are easy to make and to use too.
They do come with a few drawbacks though. First, they are limited to the availability of sunlight. Thus, your fruits and vegetables might take quite some time to dry well. Secondly, it’s easy for the products to go bad in case there isn’t enough sun to complete the drying process.
On the same note, you’ll need to dry enough food in summer to take you throughout the rainy and sunless seasons.
If you want the freedom of dehydrating your food any time you wish, then an electric model might serve you better.
Conclusion
A DIY food dehydrator is a great way to dry your food for long-term use. These models are inexpensive and can be made in a day.
The best part is that they can be made from recycled materials around your home. Thus, you’ll not only be saving some bucks for other uses, but you’ll also be living green. It also allows you to utilize your DIY skills besides keeping you busy on a free afternoon.
Caution: If you wish to construct an electric food dryer, it’s important that you follow the instructions carefully and ask for advice where necessary to avoid the risk of fire and injuries.
Do you know that it’s possible to dehydrate food without a dehydrator? Learn how to do it in this article.

![Sweet and Spicy Beef Jerky Recipe for Dehydrator [Korean Style]](https://dehydratorlab.com/wp-content/uploads/2023/08/Sweet-and-Spicy-Beef-Jerky.jpg)
