When it comes to satisfying our cravings for a great snack, few treats rival the delectable chewiness of jerky. This age-old tradition of preserving meat has been around for centuries, tracing its roots back to ancient civilizations.
While beef jerky may be the most popular variety today, chicken jerky is rapidly gaining recognition as a healthier alternative.

As an Amazon Associate, I earn from qualifying purchases. If you make a purchase after clicking on a link I may earn a small commission at no extra cost to you if items are purchased.
With a growing emphasis on wellness and nutrition, more people are turning to leaner protein options without compromising taste or convenience. Chicken jerky offers just what health-conscious consumers crave – a guilt-free snacking experience packed with flavor.
In this article:
Why Chicken Jerky Takes the Crown: A Healthier Alternative
If you’re looking for a leaner option than traditional beef jerky without sacrificing taste, then chicken jerky is an excellent choice. Using breast meat or even ground chicken in your homemade jerky helps reduce fat content while maintaining that irresistible chewy texture we all love.
Compared to beef or pork jerky, chicken boasts lower levels of saturated fats and cholesterol while providing ample amounts of essential nutrients like protein, vitamins B6 and B12. Despite being lower in fat and calories than its beef counterpart, chicken jerky still delivers an impressive punch of flavor.
When marinated in a blend of seasonings like soy sauce, lemon juice, or even liquid smoke, dehydrated chicken absorbs these delicious flavors enhancing each bite with tangy accents and savory notes. Plus, making your chicken jerky affords you control over the ingredients used, ensuring a healthier and more personalized snacking experience.
You might be interested in: Best Dehydrator for Jerky
So, roll up your sleeves, preheat your dehydrator, and get ready to savor the delightful flavors of homemade chicken jerky!
Choosing the Right Chicken
Selecting Lean Cuts of Chicken for Optimal Jerky Texture
When it comes to making homemade chicken jerky, the choice of chicken cuts plays a crucial role in achieving that perfect, mouthwatering texture. Opting for lean cuts of chicken is essential because excess fat can hinder the drying process and affect the overall taste and texture of your jerky.
Boneless, skinless chicken breasts are often considered an ideal choice due to their low-fat content and uniform thickness. To ensure your jerky turns out irresistibly tender and flavorful, it is important to trim away any visible fat from the boneless skinless chicken breast pieces before slicing them into strips.
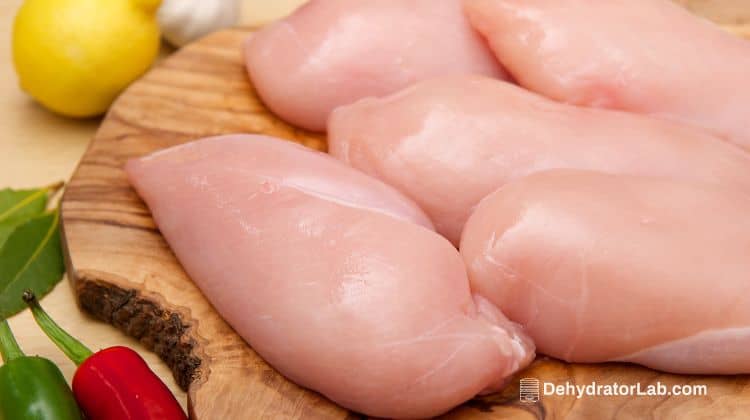
This will not only help with the drying process but also prevent unwanted greasiness in your final product. Remember, dehydrated chicken jerky relies on moisture reduction for preservation, so starting with lean cuts will give you a head start in achieving that desirable chewy texture.
Considering Organic or Free-Range Options for Enhanced Flavor
For those seeking an extra touch of gastronomic satisfaction and ethical considerations while making their own chicken jerky, organic or free-range options come into play. While opting for organic or free-range chickens may not directly impact the final texture of your homemade chicken jerky recipe, they can certainly enhance its flavor profile.
Organic chickens are raised without antibiotics or hormones on certified farms adhering to strict standards. Choosing organic meat ensures that you are consuming high-quality poultry free from potentially harmful additives.
Preparing the Chicken
Removing the skin and excess fat from the chicken cuts
Before embarking on your jerky-making journey, it’s crucial to ensure that your chicken is in prime condition for dehydration.
Start by removing the skin and excess fat from the chicken pieces. This step is essential as it aids in preventing spoilage and allows for better flavor absorption during the marinating process.
To remove the skin, simply locate a corner of the skin with your fingertips and gently pull it away from the flesh. Work your way around until all of the skin is removed.
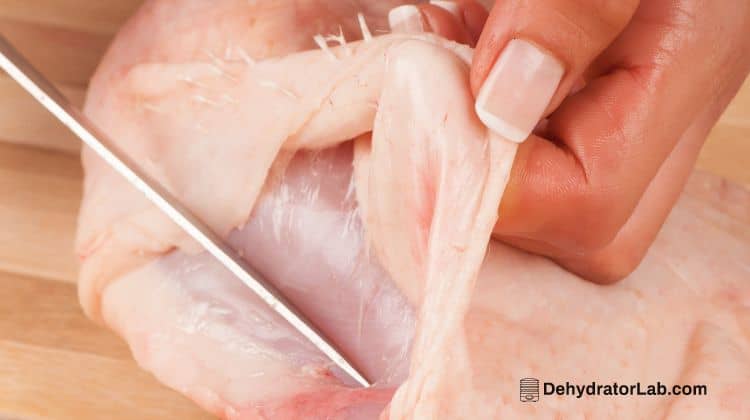
Remember, you want to expose as much surface area as possible to promote efficient drying. Next, take a sharp knife and carefully trim any visible fat from the chicken pieces.
Excessive fat can lead to an oily texture or even spoilage when dehydrating meat, so it’s crucial to be thorough. After removing both the skin and excess fat, pat dry each piece with paper towels to remove any moisture that could impede proper dehydration.
Slicing the chicken into thin, uniform strips for even dehydration
Once your chicken is prepared by removing unwanted layers, it’s time to transform those lean pieces into thin strips fit for jerky making.
The key here is uniformity – slicing each piece into consistent thicknesses ensures even dehydration throughout. To achieve this, grab a sharp knife and cut against the grain of the meat (if visible) into strips roughly 1/8 to 1/4 inch thick.
This thickness strikes a balance between allowing enough surface area for flavor absorption while still facilitating efficient drying without overcooking. For added convenience and precision while cutting, place a sheet of parchment paper on a cutting board before slicing.

The parchment paper prevents any sticking while allowing easy transfer of sliced chicken onto trays. Whether you prefer long, slender strips or bite-sized chunks, strive for consistency in size to guarantee even drying.
Remember, the goal is to create a delectable batch of homemade chicken jerky, and thin, uniform strips are the way to go.
Now that you’ve successfully prepared your chicken by removing the skin and excess fat, as well as slicing it into thin and uniform strips, you’re well on your way to mastering the art of how to make chicken jerky in a dehydrator.
These preparatory steps set the foundation for a flavorful and satisfying jerky experience. In the next section, we’ll dive into the exciting world of marinades and explore various options to infuse your chicken with tantalizing flavors.
Marinating the Chicken Strips
Exploring Flavorful Marinade Options
Marinating chicken strips is an essential step in creating tantalizing chicken and other jerky recipes. The marinade not only enhances the taste but also helps tenderize the meat.
When it comes to flavoring your dehydrated chicken, the possibilities are endless. You can experiment with different marinade options such as teriyaki, BBQ, or even spicy flavors to suit your unique palate.
The rich and sweet notes of teriyaki create a delightful balance with the savory taste of dehydrated chicken, while BBQ marinades bring that smoky and tangy goodness to every bite. If you enjoy a bit of heat, consider adding some spices or chili flakes for that extra kick.
Allowing Flavors to Infuse through Adequate Marinating Time
While it may be tempting to rush through the marinating process in anticipation of devouring your homemade chicken jerky, patience is key here. The more time you allow for marination, the more intense and well-rounded the flavors will become.
As a general rule of thumb for making chicken jerky, marinate your chicken pieces for at least 4-6 hours or overnight if possible.
This extended marinating time ensures that every fiber of the lean chicken breast absorbs the marinade’s essence fully. For an added burst of freshness and tenderness, consider incorporating ingredients like lemon juice or a splash of citrus into your marinades.
These acidic components not only infuse vibrant flavors into the meat but also help break down its fibers slightly during marination. Remember to gently massage and flip the chicken pieces occasionally while they soak in their flavorful bath to ensure the even distribution of all those delicious seasonings.
So go ahead and unleash your culinary creativity by trying out various combinations for marinades! With each batch you make, you’ll discover just what flavors make your taste buds dance and crave more of that delectable chicken jerky.
Loading and Operating the Dehydrator
Arranging chicken strips on trays without overlapping
Once you have prepared your dehydrator trays, it’s time to artfully arrange your seasoned chicken strips. Picture this: a harmonious dance of meaty perfection, as each strip finds its place on the stage of the dehydrator tray.
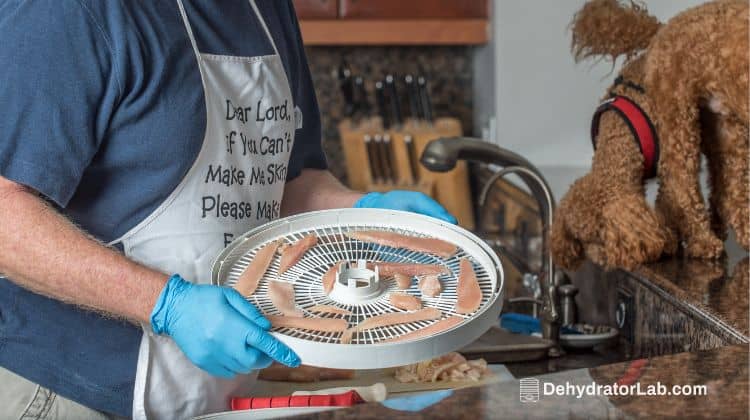
The key here is to ensure that none of the strips overlap, allowing the hot air to circulate freely around them during the drying process. Overlapping can lead to uneven dehydration and result in some jerky being underdone while others are dried out like a desert mirage.
Setting appropriate temperature and time settings for optimal drying
To achieve jerky nirvana, mastering the balance between temperature and time is essential. Set your dehydrator’s temperature according to manufacturer guidelines or recipe specifications.
For chicken jerky, a safe starting point is around 165°F (75°C). This ensures that any bacteria growth is thoroughly squashed in its tracks, providing you with a shelf life worth envying.
When it comes to marinating flavors melding with tenderized meat, patience becomes paramount. Letting your dehydrator do its magic at this steady temperature for 4-6 hours will help transform those raw strips into mouthwatering homemade jerky that would make even the most ardent carnivore waltz with delight.
Remember, these guidelines may vary depending on factors such as the thickness of your dehydrated chicken slices or personal preference for chewiness. Adjust accordingly based on how you like your jerky experience – whether it’s melt-in-your-mouth tenderness or teeth-testing resilience.
By respecting both spacing between strips and selecting optimal temperatures and drying times, you’re setting the stage for a culinary masterpiece. The result?
Irresistible, flavorful chicken jerky that will elevate your snacking game to new heights. So, open up that dehydrator door and let the drying symphony begin!
Monitoring and Adjusting Drying Process
Checking periodically to ensure even drying across all trays
To achieve perfectly dehydrated chicken jerky, it’s crucial to keep a close eye on the drying process. Throughout the dehydration period, take a moment every hour or so to inspect the trays in your food dehydrator. Look for any signs of uneven drying or areas where some thin slices may be drying faster than others.
If you notice discrepancies, gently rearrange the trays, ensuring that no overlapping occurs. This simple step will promote consistent dehydration and result in uniformly dried chicken jerky.
Rotating trays if necessary to promote uniform dehydration
Sometimes, despite careful placement, certain areas of the dehydrator may experience variations in temperature or air circulation. To tackle this issue head-on, consider rotating the trays during the drying process.
By rotating them every few hours or as needed, you can help achieve that coveted uniform texture throughout your homemade chicken jerky. Remember that different dehydrators may have slightly varying heat distribution patterns, so this step becomes particularly important if it’s your first time using a specific machine.
An extra tip for achieving the mouthwatering flavor
While monitoring and adjusting the drying process for evenness is essential for consistent results, here’s an additional trick to enhance the taste of your homemade chicken jerky: consider marinating your chicken overnight in a mixture of low-sodium soy sauce, apple cider vinegar, and any other complimentary seasonings you desire before placing it on the dehydrator trays.
This marinade not only tenderizes the meat but also infuses it with a delightful smoky flavor when combined with low heat during dehydration.
Determining When Chicken Jerky is Done
Understanding Visual Cues: A Window into Perfect Jerky
The visual appearance of your chicken jerky plays a crucial role in determining its doneness. As the dehydration process progresses, keep an eye out for notable changes in texture and color. In the initial stages, your marinated chicken strips will be moist and pliable.
However, as excess moisture evaporates, the jerky will gradually transform into a drier state. One of the primary visual cues to look for is a dry appearance—a shift from its original glossy texture to a more matte finish.
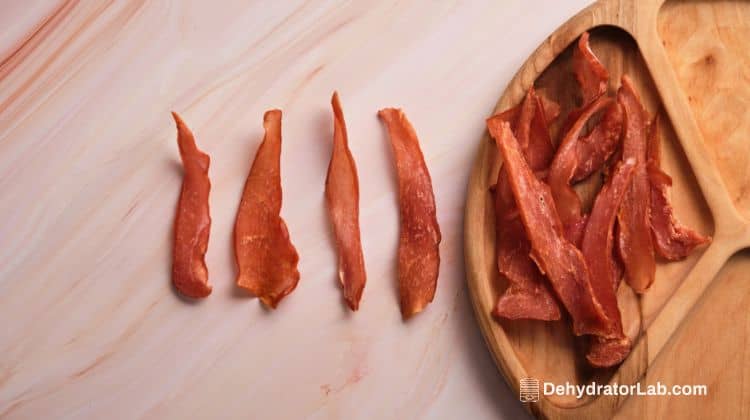
The surface of your chicken jerky should no longer feel sticky or tacky when touched lightly with clean hands. Additionally, observe if the color deepens during drying; you can expect your raw pinkish chicken strips to develop a darker shade as they transform into flavorful jerky.
Performing a Bend Test: Flexibility and Moisture Content Evaluation
To ensure that your chicken jerky has reached optimal doneness, perform a simple yet effective bend test. Take one piece of jerky and gently bend it using your fingers or apply slight pressure with two hands. Ideally, it should flex without breaking—similar to how you would expect a well-dried tobacco leaf to behave.
While some flexibility is desired, if the jerky snaps easily or breaks apart when bent even subtly, it may be an indication that it needs additional drying time. Remember that different slicing thicknesses and marinades can impact the drying process; therefore, thorough evaluation becomes essential for consistent results in each batch.
Cooling and Storing Chicken Jerky
Allowing jerky to cool completely before packaging
Once your homemade chicken jerky is done and has achieved that perfect balance of chewiness and tenderness, it’s essential to let it cool down completely before you think about storing it. Patience is key here, my friends. The cooling process allows any excess moisture in the jerky to evaporate, ensuring that your hard work won’t go to waste by trapping moisture inside the packaging.
So, resist the temptation to dive right in – give your jerky some time to rest. So how long should you let it cool?
Well, it depends on a few factors like room temperature and humidity levels. In general, you can allow your chicken jerky to cool at room temperature for about an hour or until it feels scorched and no longer warm to the touch.
A good indicator is if no condensation or moisture is forming on the surface of the jerky. Remember, proper cooling is as crucial as the drying time itself when it comes to ensuring optimum texture and flavor.
Storing in airtight containers or vacuum-sealed bags for freshness
Now that your mouthwatering chicken jerky has cooled down sufficiently, it’s time to think about storing it properly for long-lasting freshness. The last thing you want is all that deliciousness going stale before you have a chance to fully enjoy it! To keep your chicken jerky at its absolute best, I recommend using either airtight containers or vacuum-sealed bags.
Airtight containers are ideal because they provide an excellent barrier against air and moisture while keeping out unwanted odors from permeating your precious snack. Opt for glass or BPA-free plastic containers with tight-fitting lids that will lock in the freshness.
If you’re going for a more portable option, consider using resealable plastic bags specially designed for food storage. These bags will also help keep your jerky safe from air and moisture, ensuring that each bite is as satisfying as the first one.
Remember, maintaining proper food safety practices is crucial when it comes to storing chicken jerky. Make sure your containers or bags are clean and dry before transferring the jerky into them.
Additionally, always store your chicken jerky in a cool, dry place away from direct sunlight or heat sources – this will help prolong its shelf life and maintain its optimal flavor. With the right storage method, you can relish the smoky flavor of your homemade chicken jerky for weeks to come!
Troubleshooting Common Issues
Addressing problems like uneven drying or overly dry jerky
Picture this: you’ve eagerly prepared your marinated chicken strips, loaded them onto the dehydrator trays, and set the temperature and time, only to find out later that some pieces are still wet while others resemble beef jerky. Don’t worry, you’re not alone in facing this dilemma.
Uneven drying can occur due to various factors but fear not, there are ways to tackle this problem. If your chicken jerky comes out unevenly dried, there’s a good chance that the thickness of your slices might be inconsistent.
When cutting the chicken breast into strips, make sure they have a similar thickness throughout. Using a very sharp knife, and maintaining a steady hand will help achieve uniformity.
Additionally, rearranging the trays during dehydration can help distribute heat evenly across all levels. A second culprit behind uneven drying could be improper spacing between the chicken thighs and strips on each tray.
Overcrowding can obstruct air circulation within the dehydrator, resulting in some areas staying moist while others dry out too quickly. Making sure each strip has enough breathing room will promote even airflow and prevent moisture accumulation.
Solutions for preventing bacterial growth during storage
Let’s face it: no one wants their homemade chicken jerky to become a breeding ground for bacteria. Proper storage is key to ensuring the longevity and safety of your tasty treat.
Once your chicken jerky is fully dried and cooled down to room temperature, it’s essential to store it in airtight containers or vacuum-sealed bags. This airtight container protects against moisture absorption from the surrounding environment which could lead to bacterial growth or mold formation.
To take it a step further and enhance shelf life even more, consider adding an extra layer of defense against bacteria by including a few drops of apple cider vinegar to your marinade. Apple cider vinegar is known for its antimicrobial properties, which can help inhibit the growth of harmful bacteria in your jerky.
Conclusion
As you delve into the world of homemade chicken jerky, it’s important to be prepared for potential hiccups along the way. Troubleshooting issues such as uneven drying and preventing bacterial growth will ensure that your dehydrated chicken strips remain delicious and safe to consume.
By paying attention to slice thickness and spacing while arranging the chicken strips on the dehydrator trays, you’ll achieve a more consistent texture. Moreover, storing your chicken jerky properly in airtight containers or vacuum-sealed bags will protect it from moisture and bacteria.
So go ahead and experiment with different marinades, adjust drying times, and overcome any obstacles that come your way. With these troubleshooting tips in mind, you’ll be well on your way to mastering the art of making mouthwatering chicken jerky in a food dehydrator.