I’m certain you are a real beef jerky lover. And probably, you’ve been looking for that real recipe for a fantastic jerky (might wanna try our Korean sweet and spicy jerky recipe).
Worry no more for you are in the right place. Whether you are a seasoned jerky lover looking for newer techniques or a starter who wants the know-how, this article shows you exactly how to make beef jerky with a dehydrator at home. This article is a detailed guide on everything about jerky. We’ll take you through the ingredients, the preparation procedures, and the safety precautions involved.

Jerky is a popular snack for campers, backpackers, and also outdoor sports enthusiasts. It is a lightweight meat product that is dried using various methods and requires no refrigeration.
You can always make real jerky from almost any lean meat. This includes beef, venison, pork, etc. However, raw poultry is discouraged due to the not–so–nice texture and flavor of its end product.
The word jerky is originally from the Quechua word ch’arki meaning “dried, salted meat.” This shows that it is a method of meat preservation that has been in existence for thousands of years. In those years, the sun was used to provide heat.
Microorganisms (harmful bacteria) contaminate raw meats and can cause deadly diseases. These microorganisms easily multiply in moist foods that have high proteins such as meat. To prevent this deadly onslaught, dehydration comes in handy especially if you have surplus meat in your kitchen.
In preparing jerky with a dehydrator, lean meat is trimmed of fat and cut into strips then dried at viable temperatures. Salt is added to inhibit the development of bacteria before enough moisture has been removed. Nonetheless, acids in citrus juice and vinegar in marinades can be used as substitutes for salt.
Take note that jerky made without salt would last less long than the one made without salt.
In this article:
How to Make Beef Jerky With a Dehydrator Step-by-Step Instructions
Unlike the olden jerky that was just sun-dried and salted, nowadays jerky is made differently. Different seasonings and flavors are applied, both salted and unsalted.
Apart from sliced meat, jerky can also be made from ground meat which is mixed with seasonings and pressed into flat shapes then dehydrated.
Safety Precautions
- Wash your hands thoroughly with running water and soap before and after you’ve handled raw meats.
- Refrigerate the meat at or below 40℉. For ground beef and poultry, use them within 2 days, for red meats, between 3 and 5 days.
- When thawing the frozen meat, use the refrigerator and not the chicken counter.
- When marinating too, use the refrigerator. Cease and desist from saving and re-using marinade.
Requirements
- Dehydrator
- Beef cuts. You can select:
- Top Round
- Eye of Round
- Sirlon Tip
- Grass Fed Filet
- Flank Steak
- Super lean Ground Beef. You will require a jerky gun. Read this article where you can find our recommendations for the best jerky guns.
- Marinade
- Refrigerator and freezer
- Freezer bag
- Air-tight container(s) for storage
Step-by-Step Instructions
1. Partially freeze your meat for about 1-2 hours.
It should come out a bit hard. This makes slicing much easier. It also aids in preparing uniform slices.
However, if you are lucky enough to own a jerky slicer, you can skip this stage. A jerky slicer ensures your strips all have similar widths. This is so pertinent as it allows even and uniform drying.
A slicer also comes in handy if you wish to prepare lots of jerky.
2. Slice the meat.
It shouldn’t be thicker than a quarter of an inch. If you desire a chewy jerky, slice it with the grain. Slice it across the grain if you desire a more tender and brittle jerky.
In doing this, you can use the ground meat and a jerky gun.
3. Trim all the fat from the meat and discard it. Fat makes the food turn rancid quickly.
4. Prepare the marinade.
5. Place the sliced beef in the gallon sized freezer bag.
6. Add the marinade.
Marinating your meat for jerky is the watershed moment of this whole procedure. It is here that you give your jerky the tenderness and flavor that you desire.
For this reason, ensure you marinate the strips with utmost precision required.
7. Drain the excess marinade from the jerky strips.
This aids in expediting the dehydration process.
8. Seal the freezer bag and place it in the refrigerator for about 24 hours.
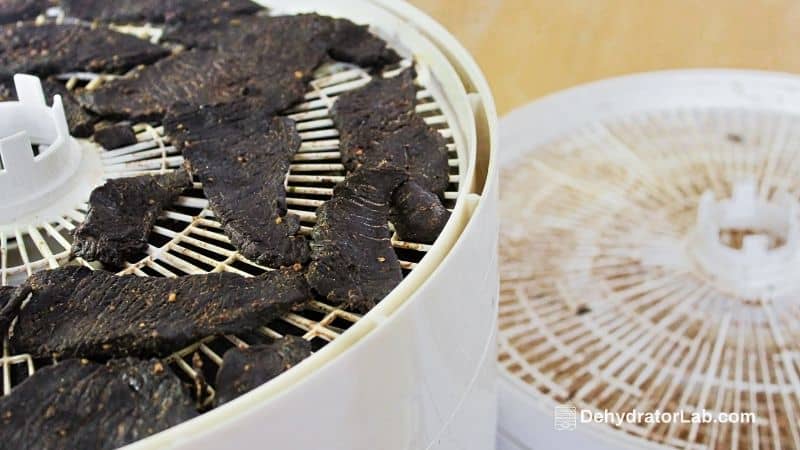
9. When ready, place the meat on the drying racks in a single layer.
Don’t overlap as this might affect the uniformity of the dehydration. Leave some space in between the strips to allow easy air circulation.
10. Set your dehydrator to 155℉ and allow it to run for about 4 hours.
If you are doing this for the first time, probably with a new machine, keep checking the progress till that time that you’ll get used to it. The jerky will be ready when it bends then cracks but shouldn’t break into two.
11. When done, open and remove the trays then allow your yummy jerky to cool.
12. Serve it warm.
13. For storage,use an air-tight container.
With this, the jerky can last for up to a month or longer if stored in the fridge or freezer. You can also use vacuum sealed bags – use a vacuum sealer for sous vide – (these are the best for longer storage), ziplock bags, glass jars.
How Dry Should The Jerky Be?
This is a common question that has been running through the minds of most jerky lovers. In making jerky, you must balance the heat such that it is high enough to remove the moisture but not too hot to cook the meat.
Jerky made with dehydrators is considered the most hygienic and the safest you can have. That means that with your dehydrator at home, you can always prepare a wonderful and yummy jerky without any worries. We have reviewed some of these food dehydrators for making jerky on another article.
Again, homemade jerkies are far much less costly than the ones you get from the shops. They are also exciting as you’ll have all the liberty to prepare as per your liking.
The ancient people used moderate heat from sunlight to dehydrate mainly their beef and other animal products, fish and poultry.
Though the dehydrator uses no sunlight, it applies the same concept, whereby, constant low heat is applied on the jerky and then moving air is introduced to dry out the seasoned meat. In doing this, a fine balance must be achieved to avoid over drying the meat.
When it is over dried, jerky loses the nutrients and becomes something else. If it is too dry, you can rehydrate it.
The coils supply the heat which is regulated by the thermostat then the fan creates the much-needed airflow for optimum dehydration. For those dehydrators that use no fan, the convection method aids in this.
How Long Does It Take To Dry Jerky In A Dehydrator?
Needless to say, time is a very precious commodity and using it wisely is the goal of all and sundry. It therefore follows suit that drying of your favorite jerky should always be an exercise that puts time into good use.
The length of time taken to dry jerky varies depending on:
- The thickness of the slices.The thinner the slices, the easier it would be to dry them hence minimum time taken. It is for this reason that we emphasized on thin, uniform slices.
- The jerky type.Jerky from the ground meat dries faster than the sliced – meat jerky. Ground meat jerky, which is ideal for foods such as buffalo meat, beef venison takes about 4 – 15 hours to dehydrate. The slice meats jerky, which are popular with lean meat, take about 5 – 10 hours.
- The load on the trays is also another important factor. An overloaded dehydrator will definitely require more time to deliver compared to a less loaded one.
- The wetness of the jerky.A jerky with a higher moisture content will require more time to dehydrate than jerky will less moisture content. This implies that the thawing should be done methodically.
- Adjustable temperature.Its common knowledge that the adjustable temperature feature in dehydrators allow you total control over the process. And when you have all that control, you can dictate many things, time included. So, a dehydrator that comes with fixed temperature option can take more time to dry your jerky as compared to one that is adjustable.
That said, let’s now look at the actual time it will take to prepare your beef jerky. This is based on the temperature setting.
Take a quick glance at our table:
| Drying Temperature Set | Minimum Time For Drying |
|---|---|
125℉ | 10 hours |
135℉ | 08 hours |
145℉ | 07 hours |
155℉ | 04 hours |
From the above table, you realize that temperature plays a key role in determining the speed of dehydration. As expected, the higher the drying temperature set, the faster the process.
The underlying factor here is that adequate preparation and having the right kind of machine will definitely save you lots of time.
If you don’t have a dehydrator, you build a diy dehydrator or can still make your homemade beef jerky with an oven.
Jerky From Wild Game
In this case, aptly treat the meat to kill the parasites before it can be sliced and marinated. Treatment can be done by rapidly freezing it.
Put in mind that the wound location and hunter’s skills greatly affect the meat safety.
For example, if the contents of the animal’s gut come into contact with the meat or the hunter’s hands, while dressing it, then such meat should be avoided for jerky because of fecal bacteria which can contaminate it.
Conclusion
Jerky is an enticing, healthy snack. From the guidelines above, you realize that preparing it is a simple task that only requires the right equipment coupled with the right skills.


