Dehydrating herbs is an age-old technique that has found new life in modern kitchens, especially with the advent of food dehydrators. Among the various herbs, dry dill often stands out for its unique flavor profile and versatility in culinary applications.
We will try to teach you how to dehydrate dill using a food dehydrator and explore the significance of dill in cooking, the advantages of dehydration over other preservation methods, and provide a detailed, step-by-step guide to effectively dehydrate this amazing herb.
Whether you’re a seasoned chef or a home cooking enthusiast, understanding how to dehydrate dill can elevate your culinary creations, offering you a way to preserve its freshness and flavor for an extended period.
In this article:
Understanding Dill and Its Uses
With its feathery green leaves and distinctive aroma, dill is more than just a herb; it’s a culinary staple in many kitchens, including mine. The first time I used fresh dill in a recipe, I was struck by its vibrant, slightly tangy flavor that instantly elevated the dish. Its unique taste, a blend of faint anise and grassy notes, makes it perfect for a range of dishes, from seafood to pickles.
In my kitchen, dill is a go-to for adding a fresh, zesty note to salads and soups. I’ve also discovered its health benefits, including its rich vitamin and mineral content, which can aid digestion and provide antioxidant properties.
However, the challenge with fresh dill, as I’ve found, is its limited shelf life. This is where dehydrating comes into play, allowing me to preserve the essence of dill and enjoy its flavor year-round.
From experimenting in my kitchen, I’ve learned that dehydrated dill retains much of its fresh flavor and can be rehydrated for use in recipes or used in its dried form for a more concentrated taste.
Why Dehydrate Dill?
Dehydrating dill is not just a method of preservation; it’s a transformation that unlocks new culinary possibilities. My personal experience with dehydrating dill seeds began as a solution to reduce waste.
Fresh dill can wilt and lose its potency quickly, but once dehydrated, its shelf life extends significantly, often lasting up to a year when stored properly.
The dehydration process intensifies the flavor of dried dill weed, making it more potent than its fresh counterpart. This concentrated flavor is ideal for dishes where a bold dill presence is desired.
Unlike drying herbs in an oven or air drying, which can unevenly dry the leaves and result in flavor loss, a food dehydrator provides consistent heat and airflow, ensuring even dehydration and optimal flavor retention.
Moreover, dehydrated dill is incredibly versatile. It can be used as is or rehydrated, offering flexibility in culinary applications. The process is straightforward and requires minimal effort, especially with a food dehydrator.
In my experience, dehydrating dill not only preserves this wonderful herb but also enhances its utility in the kitchen. It’s an efficient, economical, and flavorful way to enjoy dill throughout the year.
Choosing the Right Food Dehydrator
Selecting the right food dehydrator is crucial for achieving a perfectly dehydrated dill. Based on my experience, there are two primary types of dehydrators: stackable tray dehydrators and shelf tray dehydrators.
Stackable models are typically more compact and budget-friendly, ideal for small kitchens or occasional use. Shelf tray models, on the other hand, offer more uniform heat distribution and are better suited for frequent dehydrating or larger batches.
When choosing a dehydrator for dill, consider the following features:
Temperature Control
Herbs like dill require lower temperatures (around 95°F to 115°F) to preserve their essential oils and flavors. A dehydrator with adjustable temperature settings is ideal.
Air Flow
Consistent and even airflow ensures uniform drying. Models with horizontal airflow are generally more effective for herbs.
Capacity
Depending on your usage, choose a dehydrator with sufficient capacity. For larger quantities, shelf tray models are preferable.
In my experience, investing in a dehydrator with these features has made the process of dehydrating dill not only easier but also more efficient, yielding consistently excellent results.
Preparation of Dill for Dehydration
Proper preparation is key to dehydrating dill effectively. From my trials, I’ve refined a process that ensures the dried dill retains its flavor and dries evenly. Here are the steps I follow:
Harvesting
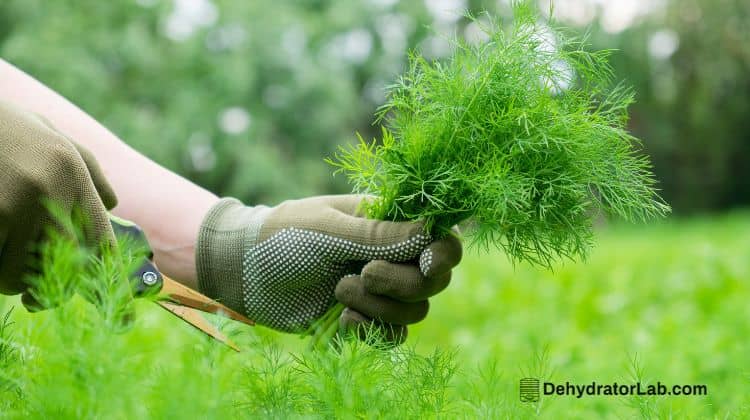
The best time to harvest dill for dehydration is just before it flowers, when the leaves are most flavorful. If you’re buying dill, look for fresh, vibrant, green fronds.
Cleaning
Gently rinse the dill under cold water to remove any dirt or insects. I avoid soaking dry dill weed in it, as this can diminish some of its natural oils.
Drying:
Pat the dill dry with a clean towel. Any excess moisture can prolong the dehydration time and potentially lead to uneven air drying dill.
Sorting and Trimming:
Remove any wilted or discolored fronds. I then trim the stems, leaving only the feathery leaves, as the stems can take longer to dry and can result in uneven dehydration.
Pre-dehydration Preparation:
If the leaves are large, I sometimes chop them into smaller pieces for uniform drying. However, keeping them whole also works well and can result in a more visually appealing product.
By following these steps, the dill is primed for effective dehydration, preserving its vibrant color and essential flavors.
Dehydrating Process Step-by-Step
Dehydrating dill in a food dehydrator is a straightforward process, but attention to detail can make a significant difference in the quality of the final product. Here’s a step-by-step guide based on my experiences:
1. Preheat the Dehydrator
Start by preheating your dehydrator to 95°F – 115°F. This temperature range is optimal for herbs, as it’s low enough to preserve their delicate oils and flavors without causing them to brown.
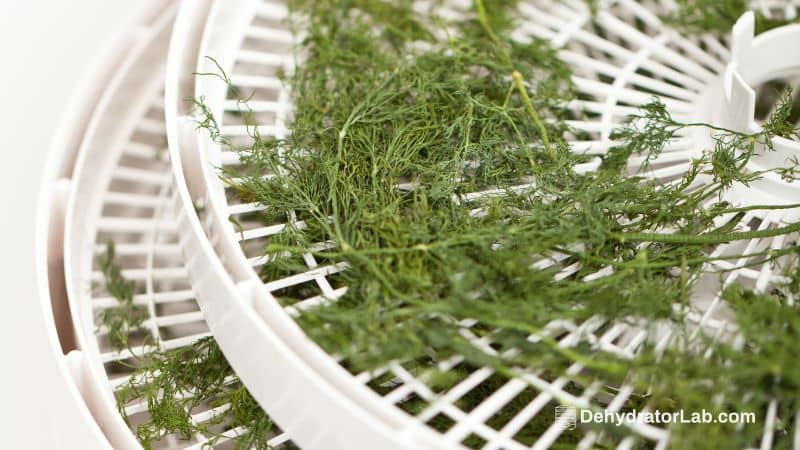
2. Arrange the Dill
Spread the prepared dill leaves in a single layer on the dehydrator trays. Ensure they’re not overlapping, as this can cause uneven drying. If your dehydrator has mesh inserts or herb screens, use them to prevent the small leaves from falling through.
3. Dehydration Time
The drying time can vary based on the dehydrator model and the moisture content of the dill. Typically, it takes between 4 to 8 hours. In my experience, it’s best to start checking around the 4-hour mark. The dill is properly dehydrated when the leaves are crumbly to the touch but not so dry that they disintegrate into powder.
4. Check for Consistency
Rotate the trays every few hours to ensure even drying, especially if your dehydrator does not have a fan for air circulation.
5. Testing for Doneness
To test if the first dill plant is completely dried, let it cool for a few minutes and then check for brittleness. The leaves should easily crumble between your fingers.
6. Cool Down
Once the dehydration drying dill is complete, turn off the dehydrator and allow the dill to cool in the trays. This helps to avoid any moisture build-up which can happen if you pack them while still warm.
7. Storing
Store the dehydrated dill in an airtight container, away from direct sunlight and heat. Glass jars are ideal for storing dried dill as they’re inert and won’t interact with the herbs.
Following these steps, you’ll have evenly dehydrated dill that retains much of its original flavor and aroma, perfect for various culinary uses.
Storing Dehydrated Dill
Proper storage of dehydrated dill is crucial for maintaining its flavor and extending its shelf life. Based on my experience, here are some effective dry fresh dill storage tips:
Airtight Containers: Store the dehydrated dill in airtight containers. Glass jars with tight-sealing lids are ideal as they prevent moisture and air from getting in.
Cool, Dark Place: Keep the containers in a cool, dark place like a pantry or cupboard. Exposure to light and heat can degrade the flavor of the dill over time.
Labeling: Label the containers with the date of dehydration. Although dehydrated dill can last up to a year or more, it’s best used within six months for optimum flavor.
Avoiding Moisture: Ensure the dill is completely cool before storing to prevent condensation inside the container, which can lead to mold growth.
Check Regularly: Periodically check the stored dill for any signs of moisture or spoilage.
By following these storage guidelines, you can enjoy the intense flavor of dehydrated dill in your dishes throughout the year.
Creative Uses of Dehydrated Dill Weed
Dehydrated dill, with its concentrated flavor, is a versatile ingredient that can add a unique twist to many dishes. Here are some creative ways to use it, inspired by my culinary experiments:
Seasoning Blends: Combine dehydrated dill with other fresh herbs and spices to create custom seasoning blends. It pairs well with garlic powder, onion powder, and sea salt for a savory mix.
Soups and Stews: Add a teaspoon of dehydrated dill to soups and stews. It imparts a warm, herby flavor that enhances the overall taste profile.
Salad Dressings: Mix dehydrated dill into vinaigrettes and creamy salad dressings for an extra zing. It’s particularly delightful in cucumber or potato salads.
Homemade Breads: Incorporate dehydrated dill into bread doughs for a fragrant twist on traditional recipes.
Marinades: Use it in marinades for fish or chicken to infuse them with a delicate dill flavor.
Yogurt Dips: Stir into Greek yogurt for a quick and flavorful dip, perfect for vegetables or pita bread.
Experimenting with dehydrated dill can open up a world of flavor possibilities, making it a staple in any spice cabinet.
Conclusion
Dehydrating dill is more than just a preservation technique; it’s a way to capture and intensify the essence of this aromatic herb. Whether you’re a seasoned cook or a beginner in the kitchen, dehydrating dill using a food dehydrator is a simple, rewarding process that can elevate your culinary creations.
The flexibility and extended shelf life it offers make it a valuable addition to any pantry. I encourage you to try dehydrating dill and explore the myriad of ways it can enhance your dishes. Happy dehydrating, and enjoy the burst of flavor that dehydrated dill brings to your table!