You want sweet, tart little ruby bites that taste like summer but sit quietly in your pantry for months. Perfect. Dehydrated cherries deliver big flavor in a tiny package, and the process stays simple once you nail a few habits.
I’ve run plenty of batches through my dehydrator (and yes, I eat too many warm off the trays – no regrets), so let’s walk through temps, timing, and storage for chewy, shelf-stable goodness.
FYI: this project rewards patience, not perfection. You’ve got this! 👊
In this article:
Why Dehydrate Cherries
You lock in cherry season and skip mystery additives in store-bought dried fruit. You control texture – go soft and chewy or a little drier for baking and trail mixes. You save freezer space and get grab-and-go snacks your future self will thank you for.
Choosing the Right Cherries
Pick fresh, ripe cherries without soft spots; both sweet and tart varieties work. Uniform size helps everything dry evenly. Wondering about frozen cherries? Use them if that’s what you’ve got, but thaw and drain well so extra water doesn’t drag out drying time.
Gear and Prep
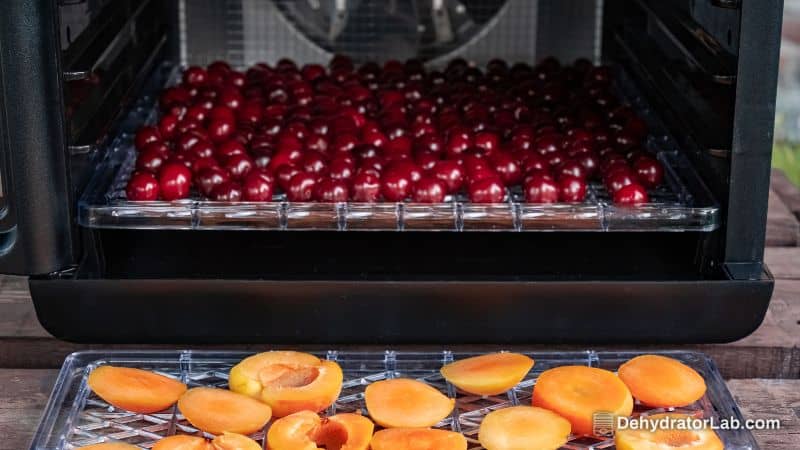
You need a food dehydrator with an adjustable thermostat, a cherry pitter, trays, parchment or mesh liners, and clean jars for storage. Set fruit to 135–140°F (57–60°C) since that range preserves flavor and texture while drying efficiently. Keep pieces in a single layer so air flows and moisture escapes properly.
Wash, Pit, Slice
Rinse cherries, stem them, and pat them dry so surface water doesn’t slow drying. Pit the cherries; a hand pitter keeps your sanity and your backsplash cleaner.
Quartering dries faster than halves, but halves stay juicier—choose your adventure based on how you plan to use them.
Optional Pretreatments
Do a quick blanch (about 30 seconds) if you want to help skins crack slightly to speed moisture release, especially for thick-skinned varieties. Consider an ascorbic or citric acid dip if browning bugs you, though cherries don’t usually need it.
Try a light syrup blanch only if you want a candy-like finish; it adds sweetness and time, so it’s not the everyday move IMO.
Temperature and Time
Set your dehydrator to 135–140°F (57–60°C). Plan on 12–36 hours depending on size, cut (halves vs. quarters), humidity, and airflow. Rotate trays every few hours for even results, but don’t crank the heat higher; you’ll case-harden the outside and trap moisture inside. Not cute.
How to Know They’re Done
Pull a few pieces, let them cool to room temp, then test. Properly dried cherries feel leathery and pliable with no visible wet pockets. They should bend without cracking and feel slightly tacky, not sticky-wet or juicy—think “big raisin energy.”
Conditioning (Don’t Skip It)
Conditioning evens out residual moisture so one wetter piece doesn’t ruin the batch. Fill clean jars halfway with fully cooled cherries. Close loosely and shake daily for 4–7 days while watching for condensation.
If you see condensation, return them to the dehydrator to dry longer, cool fully, and restart conditioning. If you see mold, toss the batch and start fresh—don’t argue with biology.
Storage That Lasts
After conditioning, store cherries in airtight jars or containers in a cool, dark spot. Label with the date because the future you deserves clarity. Check occasionally for any moisture or off smells, and enjoy them within several months for peak flavor and texture.
Sweet vs. Tart Cherries
Sweet cherries dry into richer, candy-like pieces that shine as snacks or in chocolate bark. Tart cherries bring a bright pop that rocks in granola, muffins, and salads. Drying time varies with sugar and size: sweeter, plumper fruit usually takes longer than smaller, more acidic fruit.
Troubleshooting
Sticky after cooling? They aren’t done – return to the dehydrator. Uneven drying? Rotate trays and keep slices uniform; avoid crowding. Odd texture or off taste? Check your dehydrator’s actual temperature with a thermometer and keep pieces in a single, airy layer.
Oven Method (No Dehydrator)
Line sheet pans with parchment and set cherries cut-side up. Set your oven to its lowest temp (ideally around 170°F) and crack the door slightly for airflow. Expect roughly 6–10 hours, rotating pans occasionally; test doneness the same way and condition afterward just like dehydrator batches.
Flavor Boosters and Variations
Sprinkle a pinch of cinnamon or cardamom before drying for a warm spice. Micro-grate lemon zest over sweet cherries to brighten them. Prefer a minimal ingredient list? Skip pretreatments—cherries bring their own personality.
Batch Size and Efficiency Tips
Load multiple trays but keep fruit from touching to avoid sticking and slowdowns. Start drying in the evening so you hit final tests the next day; long cycles feel easier overnight.
Rotate trays if your model runs hotter near the base or back—consistent airflow beats guesswork every time.
Creative Ways to Use Dried Cherries
Toss into granola, trail mix, and oatmeal for tart little bursts. Bake into muffins, scones, quick breads, and cookies; rehydrate in warm water or juice if you want softer pieces in batters. Fold into salads with goat cheese and toasted nuts, or blitz into energy bites – chef’s kiss.
My Take: Halves vs. Quarters
Quarters win for speed and uniform drying, perfect for trail mix and weekday snacking. Halves taste juicier and feel a bit luxe, especially in baked goods and chocolate bark, but they run longer—especially in humid weather. Start with halves to learn the target texture, then switch to quarters when you want faster batches, IMO.
Quick Step-by-Step
1) Wash, stem, and pit; optionally, blanch 30 seconds to nick skins, then chill quickly.
2) Slice into halves or quarters; place cut-side up on trays in a single, non-touching layer.
3) Set to 135–140°F (57–60°C) and dry 12–36 hours, rotating trays as needed.
4) Test for doneness after cooling: aim for leathery and pliable, not wet or squishy.
5) Cool completely; condition in half-filled jars for 4–7 days, shaking daily.
6) Store airtight in a cool, dark place; label and spot-check occasionally.
Safety Notes You Shouldn’t Skip
Always cool fruit completely before sealing to avoid condensation and mold. If you spot condensation during conditioning, dry longer and restart conditioning. Keep temps steady in the fruit range; resist the urge to speed things up with higher heat that causes case hardening.
Frequently Asked Questions
- Can I use sour cherries?
Absolutely, and they shine in baking; they often dry a bit faster than big sweet varieties. - Do I have to pretreat?
Not for cherries – acid dips help more with light fruits like apples; consider blanching only for thick skins or speed. - How long do they last?
Properly dried and conditioned cherries keep for months in airtight jars stored cool and dark; always inspect before use.
Final Thoughts
You own the cherry-drying playbook now: set 135–140°F, choose halves or quarters based on your goals, test for leathery doneness after cooling, and condition for a week to dodge mold drama. You’ll find your rhythm fast, and your snacks, baking, and breakfasts will thank you.
Save a warm handful at tray-pull because you earned it—and because warm dried cherries taste like candy, no branding required. 😉