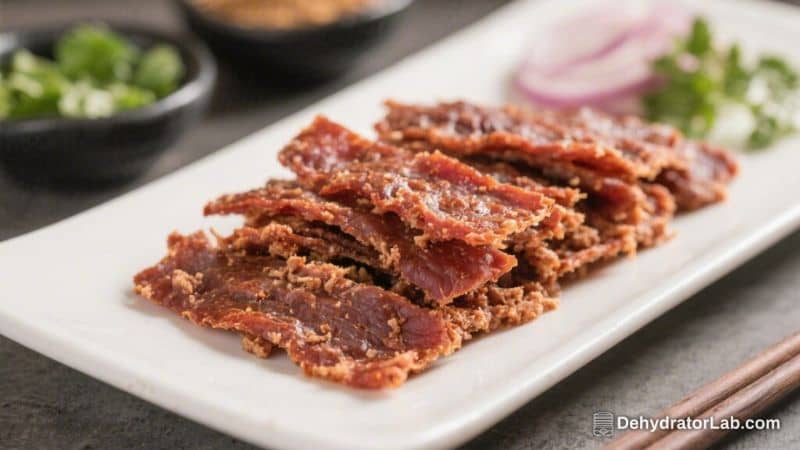
You don’t need fancy cuts of meat to make great jerky. Ground turkey jerky is lean, budget-friendly, and surprisingly simple to prepare at home. It delivers that classic savory chew with a lighter feel, and you can customize the flavor to fit your taste.
Whether you’re gearing up for hikes, road trips, or just want a clean, protein-rich snack, this recipe fits the bill. If you’ve been curious about homemade jerky but nervous about greasy results or tricky methods, this is a great place to start.
In this article:
Why This Recipe Works
- Lean but juicy: Turkey is naturally low in fat, but the ground texture lets seasonings absorb deeply, keeping it flavorful and tender.
- No special equipment needed: A dehydrator is great, but your oven can do the job just fine.
- Even texture: Using ground meat and a jerky gun (or a zip-top bag) creates uniform strips that dry consistently.
- Customizable flavor: Sweet, smoky, spicy, or garlicky—this base recipe lets you tweak without compromising texture.
- Meal-prep friendly: Make a big batch and stash it for quick snacks throughout the week.
Ingredients
- 2 pounds lean ground turkey (93% lean or leaner)
- 2 tablespoons low-sodium soy sauce
- 1 tablespoon Worcestershire sauce
- 1 tablespoon pure maple syrup or honey (optional for balance)
- 2 teaspoons kosher salt
- 1.5 teaspoons black pepper
- 1.5 teaspoons smoked paprika
- 1 teaspoon garlic powder
- 1 teaspoon onion powder
- 1/2 teaspoon crushed red pepper flakes (adjust to taste)
- 1/2 teaspoon ground coriander (optional, adds citrusy depth)
- 1 teaspoon liquid smoke (optional but recommended for classic jerky flavor)
- 1 tablespoon apple cider vinegar (helps with flavor and food safety)
Instructions
- Mix the marinade: In a large bowl, stir together the soy sauce, Worcestershire, maple syrup, salt, pepper, smoked paprika, garlic powder, onion powder, red pepper flakes, coriander, liquid smoke, and apple cider vinegar until well combined.
- Incorporate the turkey: Add the ground turkey and use your hands to gently mix until the seasonings are evenly distributed. Don’t overwork it.
You want it well mixed but not pasty.
- Chill to firm up: Cover the bowl and refrigerate for at least 2 hours, preferably overnight. This helps flavors penetrate and makes the mixture easier to shape.
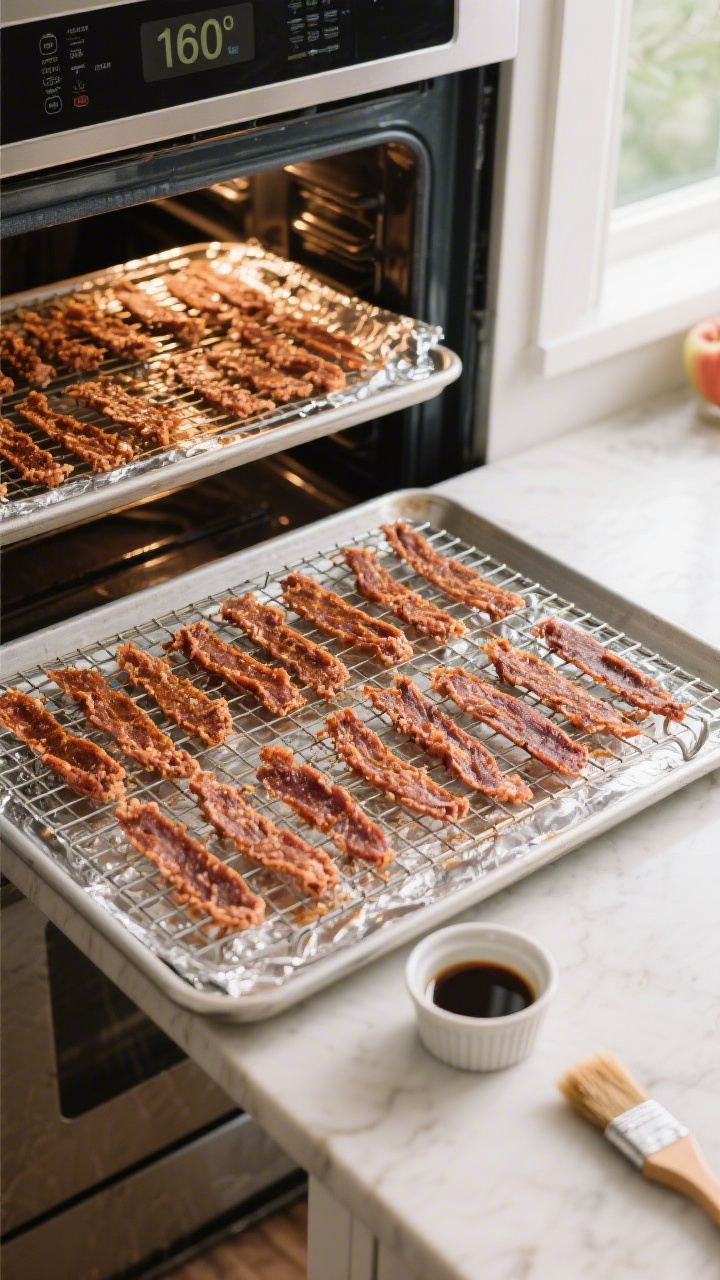
- Prep your tools: If using a dehydrator, set it to 160°F (71°C). If using an oven, preheat to the same temperature and line two baking sheets with foil.
Place wire racks on top for airflow. Lightly oil the racks to prevent sticking.
- Shape the strips: Load the turkey mixture into a jerky gun fitted with a flat or round nozzle. Pipe strips about 1/4 inch thick.
If you don’t have a jerky gun, press the mixture into a large zip-top bag, seal, and roll it flat to 1/4 inch. Cut the bag open and slice into strips with a knife or pizza wheel.
- Arrange evenly: Lay the strips on dehydrator trays or the wire racks, leaving small gaps for airflow. Smooth any rough edges so they don’t dry too quickly.
- Dry the jerky: Dehydrate at 160°F (71°C) for 3.5 to 6 hours, depending on thickness and humidity.
In the oven, it may take 4 to 6 hours. Rotate trays halfway through for even drying.
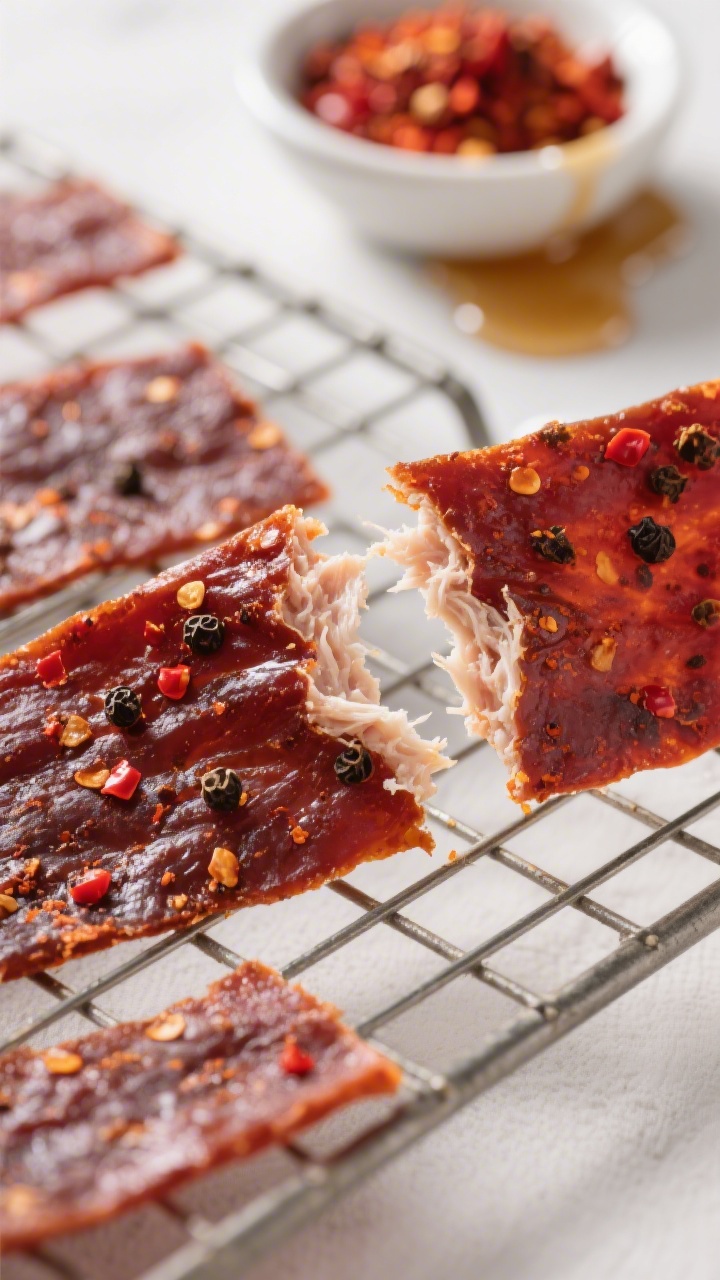
- Check for doneness: Jerky should be firm, dry to the touch, and bend without breaking, showing white fibers inside when torn. If moisture beads on the surface when bent, keep drying.
- Heat treat for safety (if needed): For extra assurance, you can finish the jerky in a 275°F (135°C) oven for 10 minutes to ensure it reaches safe temps.
This step is helpful if your dehydrator doesn’t reliably hold 160°F.
- Cool completely: Let jerky cool on the racks. This helps it firm up and prevents condensation once stored.
- Package properly: Pat off any surface oil with paper towels. Store in airtight containers or vacuum-sealed bags.
How to Store
- Room temperature: In an airtight bag or jar, it can last up to 3 to 5 days if fully dried and handled cleanly.
Keep it in a cool, dark place.
- Refrigerator: For best quality and safety, refrigerate for up to 2 weeks. Use a paper towel in the container to absorb any residual moisture.
- Freezer: Vacuum-sealed or tightly wrapped, jerky keeps for 2 to 3 months. Thaw in the fridge to avoid condensation.
- Label and rotate: Date your batches and use the oldest first.
Discard if you notice off smells, unusual softness, or visible mold.
Health Benefits
- Lean protein: Ground turkey offers high protein with less saturated fat than many red meats, supporting muscle recovery and satiety.
- Lower sugar option: You control sweeteners, so you can keep it low-carb and steady on the blood sugar front.
- Custom sodium: Using low-sodium soy sauce and measured salt helps keep sodium in check compared to store-bought jerky.
- No mystery additives: Homemade jerky skips artificial preservatives and unnecessary fillers.
What Not to Do
- Don’t skip the chill time: Warm, soft turkey is hard to shape and dries unevenly.
- Don’t go too thick: Anything thicker than 1/4 inch can dry on the outside and stay soft inside.
- Don’t ignore temperature: Dry at or finish to 160°F (71°C) to keep it safe. Inconsistent heat can risk under-drying.
- Don’t overload trays: Crowding blocks airflow and leads to rubbery spots.
- Don’t store while warm: Trapped steam causes condensation and early spoilage.
Alternatives
- Flavor swaps: Try teriyaki (soy, mirin, ginger), chipotle-lime (adobo, lime zest), or herb-garlic (Italian seasoning, extra garlic, lemon zest).
- Sugar-free: Skip the maple syrup and add a pinch more smoked paprika and black pepper for balance.
- Gluten-free: Use tamari or coconut aminos in place of soy sauce.
- Spice level: For mild, leave out red pepper flakes. For hot, add cayenne or a dash of hot sauce to the mix.
- Texture tweak: For a chewier bite, press the meat a touch thinner and dry slightly longer, watching closely near the end.
FAQ
Can I make this without a jerky gun?
Yes.
Roll the seasoned turkey in a zip-top bag to 1/4 inch thick, cut open the bag, and slice into strips. A bench scraper or pizza wheel makes clean cuts.
How do I know the jerky is safe to eat?
Make sure the drying temperature reaches 160°F (71°C) or finish in a 275°F (135°C) oven for 10 minutes. The jerky should be fully dry, not tacky, and bend without breaking.
Why is my jerky crumbly?
It may be too lean or over-dried.
Try using 93% lean turkey instead of ultra-lean, and watch the last hour of drying closely. Slightly thicker strips can also help.
Can I use ground chicken instead?
You can. The method is the same, but chicken can be a bit softer.
Keep strips at 1/4 inch and confirm temperatures for safety.
How long does homemade turkey jerky last?
When fully dried and stored well, it lasts 3 to 5 days at room temp, up to 2 weeks in the fridge, and 2 to 3 months in the freezer. Always check for off smells or moisture.
Do I need curing salt?
Not required for short-term storage if you dry at safe temps and refrigerate. Curing salt can extend shelf life and add that classic cured flavor, but use it carefully and according to package directions.
What if my oven’s lowest setting is higher than 160°F?
Prop the door open slightly with a wooden spoon to lower the internal temp and improve airflow.
Use an oven thermometer to monitor.
Can I skip the liquid smoke?
Yes. It adds a traditional smoky note, but the jerky will still taste great without it. Consider extra smoked paprika for a similar vibe.
Wrapping Up
Ground turkey jerky is a lean, flavorful snack you can make with basic tools and pantry spices.
It’s easy to customize, simple to store, and perfect for busy days. Once you master the thickness and timing, you’ll have a go-to protein snack that beats store-bought on taste and ingredients. Make a batch on the weekend, and you’re set for the week ahead.
Ground Turkey Jerky – Lean, Flavorful, and Easy to Make
Ingredients
- 2 pounds lean ground turkey (93% lean or leaner)
- 2 tablespoons low-sodium soy sauce
- 1 tablespoon Worcestershire sauce
- 1 tablespoon pure maple syrup or honey (optional for balance)
- 2 teaspoons kosher salt
- 1.5 teaspoons black pepper
- 1.5 teaspoons smoked paprika
- 1 teaspoon garlic powder
- 1 teaspoon onion powder
- 1/2 teaspoon crushed red pepper flakes (adjust to taste)
- 1/2 teaspoon ground coriander (optional, adds citrusy depth)
- 1 teaspoon liquid smoke (optional but recommended for classic jerky flavor)
- 1 tablespoon apple cider vinegar (helps with flavor and food safety)
Instructions
- Mix the marinade: In a large bowl, stir together the soy sauce, Worcestershire, maple syrup, salt, pepper, smoked paprika, garlic powder, onion powder, red pepper flakes, coriander, liquid smoke, and apple cider vinegar until well combined.
- Incorporate the turkey: Add the ground turkey and use your hands to gently mix until the seasonings are evenly distributed. Don’t overwork it.You want it well mixed but not pasty.
- Chill to firm up: Cover the bowl and refrigerate for at least 2 hours, preferably overnight. This helps flavors penetrate and makes the mixture easier to shape.
- Prep your tools: If using a dehydrator, set it to 160°F (71°C). If using an oven, preheat to the same temperature and line two baking sheets with foil.Place wire racks on top for airflow. Lightly oil the racks to prevent sticking.
- Shape the strips: Load the turkey mixture into a jerky gun fitted with a flat or round nozzle. Pipe strips about 1/4 inch thick.If you don’t have a jerky gun, press the mixture into a large zip-top bag, seal, and roll it flat to 1/4 inch. Cut the bag open and slice into strips with a knife or pizza wheel.
- Arrange evenly: Lay the strips on dehydrator trays or the wire racks, leaving small gaps for airflow. Smooth any rough edges so they don’t dry too quickly.
- Dry the jerky: Dehydrate at 160°F (71°C) for 3.5 to 6 hours, depending on thickness and humidity.In the oven, it may take 4 to 6 hours. Rotate trays halfway through for even drying.
- Check for doneness: Jerky should be firm, dry to the touch, and bend without breaking, showing white fibers inside when torn. If moisture beads on the surface when bent, keep drying.
- Heat treat for safety (if needed): For extra assurance, you can finish the jerky in a 275°F (135°C) oven for 10 minutes to ensure it reaches safe temps.This step is helpful if your dehydrator doesn’t reliably hold 160°F.
- Cool completely: Let jerky cool on the racks. This helps it firm up and prevents condensation once stored.
- Package properly: Pat off any surface oil with paper towels. Store in airtight containers or vacuum-sealed bags.
Printable Recipe Card
Want just the essential recipe details without scrolling through the article? Get our printable recipe card with just the ingredients and instructions.