If you’ve ever nurtured a bubbly sourdough starter, you know how personal it can feel—like a tiny kitchen pet. Dehydrating it is the easiest way to pause that relationship without losing it. It’s perfect for travel, gifting, or taking a break from baking.
You’ll get all the flavor and strength back later with just water and flour. Best of all, it’s low-effort and nearly foolproof with the right steps.
In this article:
What Makes This Special
Dehydrating a sourdough starter locks in your culture’s unique mix of wild yeast and bacteria in a stable form. That means you can store it for months or even years without feeding.
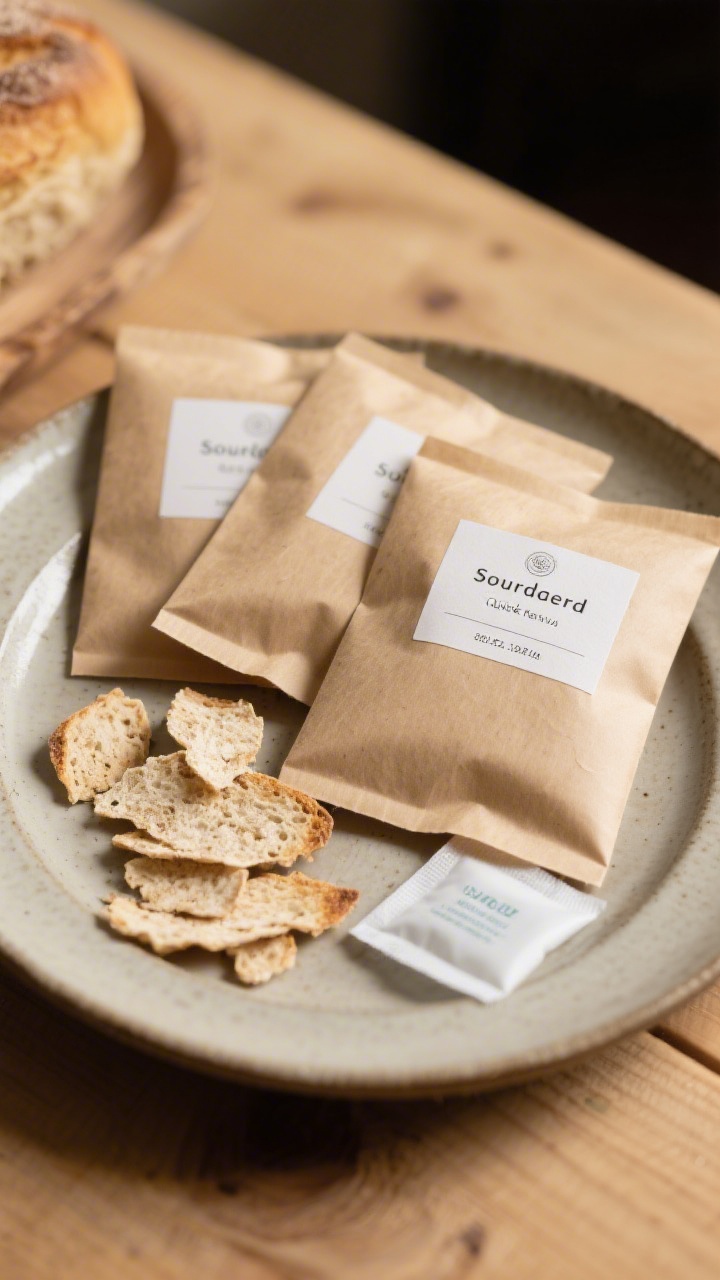
It also makes sharing simple: a small envelope of flakes can spark fresh loaves in another kitchen. – Reliable long-term storage: Less risk of mold or neglect compared to keeping a jar in the fridge. – Easy to mail or travel with: Lightweight and shelf-stable. – Preserves flavor: Keeps the unique character of your established starter. – Quick revival: Reactivates in a few days with basic feedings.
What You’ll Need
- Active sourdough starter: Recently fed and bubbly works best.
- All-purpose or bread flour: For feeding during revival. Whole wheat or rye can help jump-start activity if needed.
- Water: Room temperature; filtered or dechlorinated is ideal.
- Parchment paper or a silicone mat: For spreading the starter.
- Sheet tray: To hold the parchment while drying.
- Offset spatula or the back of a spoon: For spreading the starter thinly.
- Food dehydrator (optional): Speeds up drying at low temperatures.
- Airtight container or zip-top bag: For storage. Add a label and date.
- Silica gel packet (optional): Helps keep moisture out during storage.
Step-by-Step Instructions
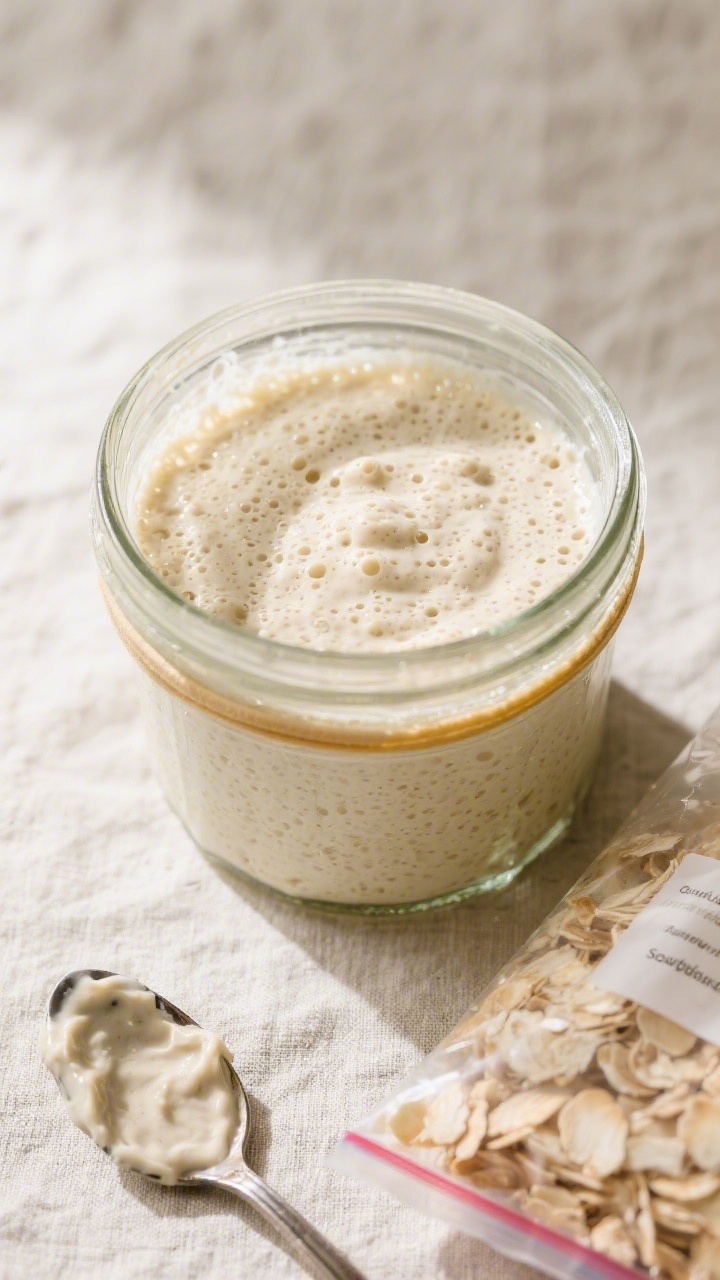
- Refresh your starter: Feed your starter 4–8 hours before drying so it’s at peak activity.
You want it bubbly, doubled, and smelling pleasantly tangy.
- Prepare your surface: Line a sheet tray with parchment or a silicone mat. This makes removal easy once it’s dry.
- Spread it thin: Scoop 1–2 cups of active starter onto the parchment. Use an offset spatula to spread it into a very thin, even layer—aim for about 1–2 millimeters thick.
Thin layers dry faster and more evenly.
- Dry at low temperature: Air-dry at room temperature in a dry, well-ventilated spot, away from direct sun. If using a dehydrator, set it to 95°F–105°F (35°C–40°C). Avoid higher heat to protect the microbes.
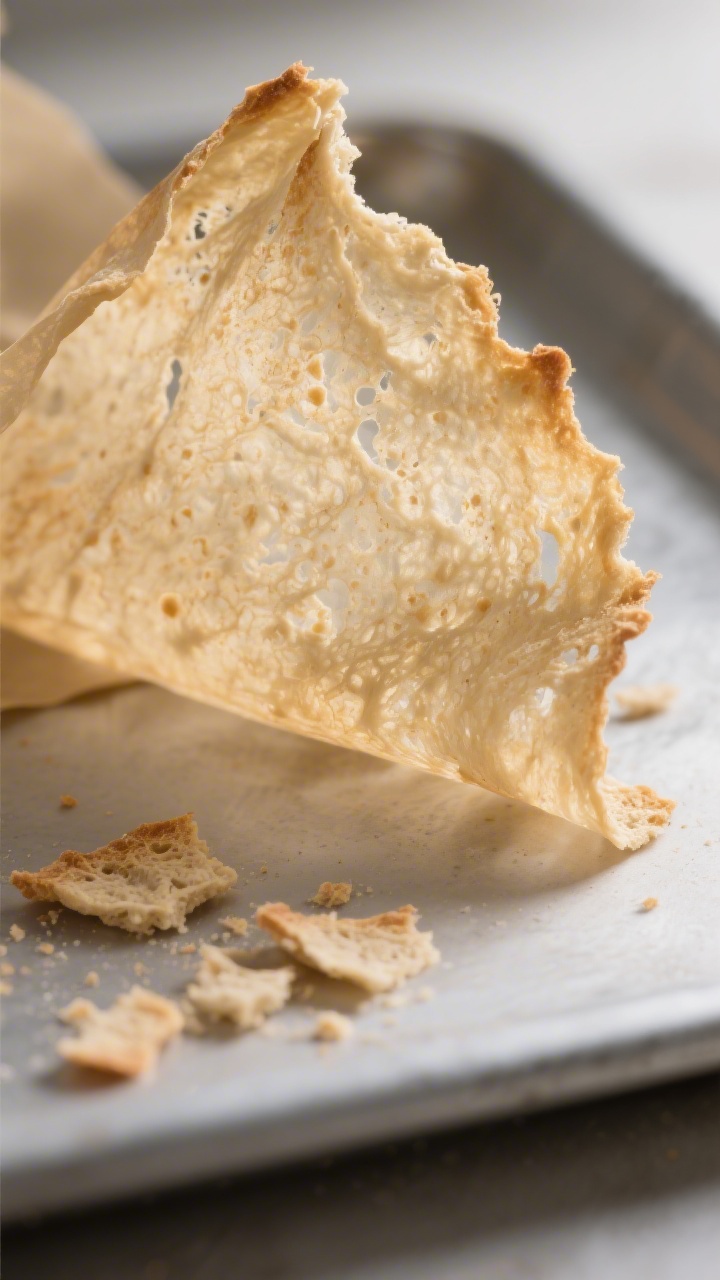
- Wait until completely brittle: Drying time varies—anywhere from 12–48 hours depending on humidity and thickness.
The starter is ready when it’s fully crisp and snaps cleanly with no soft spots.
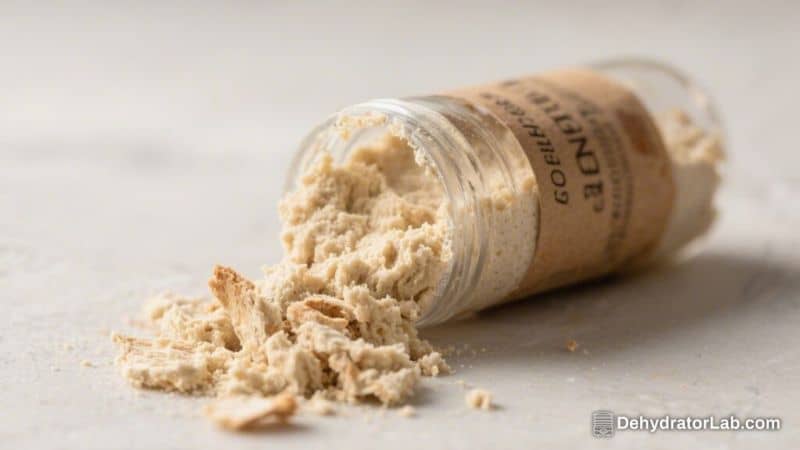
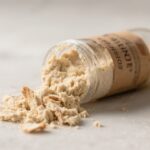
- Break into flakes: Peel the sheet off the parchment and crack it into small flakes. You can also pulse gently in a food processor to create coarse crumbs, but avoid turning it into powder.
- Package for storage: Transfer flakes to an airtight container or zip-top bag. Press out extra air.
Add a silica gel packet if you have one to keep moisture at bay.
- Label and date: Note the flour type and the date you dehydrated it. Most dehydrated starters keep well for 1–2 years when stored properly.
- Store smart: Keep in a cool, dark, dry place. A pantry works; the freezer is even better for very long storage.
Keeping It Fresh
Good storage is everything.
Moisture is the enemy here. Keep your dehydrated starter in an airtight container away from heat and light. If you live in a humid climate, double-bag it or store it with a moisture absorber.
For added insurance, freeze it—freezing won’t harm the dried culture and can significantly extend shelf life. If you plan to share, portion the flakes into small packets (10–15 grams per packet is plenty). Include simple revival instructions with each one so the recipient can bring it back to life easily.
Health Benefits
Sourdough fermentation does more than make bread taste great.
It helps break down some of the starches and gluten structures in dough, which can make bread easier to digest for many people. The acidity and long fermentation times can also help reduce the glycemic impact compared to some quick-rise breads. The natural lactic acid bacteria in sourdough may increase the availability of certain minerals by reducing phytic acid.
While dehydrating pauses the culture, it doesn’t remove these benefits. Once revived and fed, your starter will get back to producing the same fermentation byproducts that support flavor and digestibility.
Common Mistakes to Avoid
- Drying too hot: High heat can kill beneficial microbes. Stay below 105°F (40°C).
- Leaving it thick: Thick layers trap moisture and can dry unevenly.
Spread it thin.
- Packing before it’s fully dry: Any softness invites mold later. Make sure it’s brittle.
- Storing with air exposure: Air carries moisture. Use airtight containers and press out excess air.
- Rushing the revival: Expect a few days of feedings before peak strength returns.
Don’t bake too soon.
Alternatives
If dehydrating isn’t your style, you have options:
- Refrigeration: Store your wet starter in the fridge and feed weekly. Good for frequent bakers.
- Freezing wet starter: You can freeze starter in small portions. It works, but recovery may take longer than with flakes.
- Breadcrumb method: Mix your active starter with extra flour to form dry crumbs.
Air-dry and store like flakes.
- Backing up with a friend: Give a portion to a baking buddy as insurance.
How Do I Reactivate Dehydrated Starter?
Crumble 1 tablespoon (about 10–15 grams) of flakes into a jar. Add 2 tablespoons warm water and let it soften for 15–30 minutes. Stir in 2 tablespoons flour to make a paste.
Cover loosely and rest 12–24 hours. Feed with 1/4 cup flour and 2 tablespoons water every 12 hours, adjusting to keep a thick batter consistency. In 2–5 days, it should be bubbly and ready to use.
How Can I Tell If It’s Alive Again?
Look for consistent bubbles, a pleasant tangy smell, and a rise after feeding.
A reliable sign of readiness is that it doubles in volume within 4–6 hours at room temperature after two consecutive feedings. If it’s sluggish, keep feeding; it may just need more time.
What If My Flakes Get Soft or Clumpy?
That’s a sign of moisture exposure. If there’s no visible mold and it still smells clean and sour, you can try to use it immediately for revival.
If you see discoloration, fuzzy growth, or smell anything off (musty, cheesy in a bad way), discard and start with a fresh backup.
Can I Dehydrate a Whole Wheat or Rye Starter?
Yes. The process is the same. Starters fed with whole grains often revive quickly thanks to extra nutrients.
When reactivating, you can feed with the same flour or transition to your preferred flour over a few feedings.
How Long Does Dehydrated Starter Last?
Properly dried and stored in airtight packaging, it can last 1–2 years at room temperature, and often longer in the freezer. Fresher is generally better, but many bakers report excellent results after long storage.
Do I Need a Dehydrator?
No. Air-drying on parchment works well.
A dehydrator simply makes the process faster and more predictable, especially in humid environments, as long as you keep the temperature low.
Can I Bake Right After It Shows Bubbles?
It’s tempting, but hold off. Early bubbles mean life, not strength. Give it a couple of days of consistent feedings until it reliably doubles within a few hours.
That’s when it can leaven bread well.
Final Thoughts
Dehydrated sourdough starter is a smart backup and a generous gift. It gives you flexibility—pause your baking when life gets busy, then pick up right where you left off. With a low-temperature dry, an airtight container, and a little patience during revival, your culture will spring back strong.
Keep a small packet in your pantry or freezer, and you’ll always have the heart of your sourdough ready to go.
Dehydrated Sourdough Starter – A Simple Way to Save and Share Your Culture
Ingredients
- Active sourdough starter: Recently fed and bubbly works best.
- All-purpose or bread flour: For feeding during revival. Whole wheat or rye can help jump-start activity if needed.
- Water: Room temperature; filtered or dechlorinated is ideal.
- Parchment paper or a silicone mat: For spreading the starter.
- Sheet tray: To hold the parchment while drying.
- Offset spatula or the back of a spoon: For spreading the starter thinly.
- Food dehydrator (optional): Speeds up drying at low temperatures.
- Airtight container or zip-top bag: For storage. Add a label and date.
- Silica gel packet (optional): Helps keep moisture out during storage.
Instructions
- Refresh your starter: Feed your starter 4–8 hours before drying so it’s at peak activity.You want it bubbly, doubled, and smelling pleasantly tangy.
- Prepare your surface: Line a sheet tray with parchment or a silicone mat. This makes removal easy once it’s dry.
- Spread it thin: Scoop 1–2 cups of active starter onto the parchment. Use an offset spatula to spread it into a very thin, even layer—aim for about 1–2 millimeters thick.Thin layers dry faster and more evenly.
- Dry at low temperature: Air-dry at room temperature in a dry, well-ventilated spot, away from direct sun. If using a dehydrator, set it to 95°F–105°F (35°C–40°C). Avoid higher heat to protect the microbes.
- Wait until completely brittle: Drying time varies—anywhere from 12–48 hours depending on humidity and thickness.The starter is ready when it’s fully crisp and snaps cleanly with no soft spots.
- Break into flakes: Peel the sheet off the parchment and crack it into small flakes. You can also pulse gently in a food processor to create coarse crumbs, but avoid turning it into powder.
- Package for storage: Transfer flakes to an airtight container or zip-top bag. Press out extra air.Add a silica gel packet if you have one to keep moisture at bay.
- Label and date: Note the flour type and the date you dehydrated it. Most dehydrated starters keep well for 1–2 years when stored properly.
- Store smart: Keep in a cool, dark, dry place. A pantry works; the freezer is even better for very long storage.
Printable Recipe Card
Want just the essential recipe details without scrolling through the article? Get our printable recipe card with just the ingredients and instructions.