Fresh lemon zest is fantastic, but it doesn’t last long. Dehydrated lemon zest gives you the same bold citrus flavor anytime you need it, without a trip to the store. It’s easy to make, stores well, and adds a sunny note to everything from baked goods to roasted veggies.
If you like pantry staples that punch above their weight, this one earns a permanent spot. Once you try it, you’ll start sprinkling it on just about everything.
In this article:
Why This Recipe Works
Dehydrating lemon zest pulls out moisture while locking in bright citrus oils. Those oils hold most of the flavor, so the zest stays aromatic for months.
It’s also more convenient than zesting a lemon every time you cook. A small pinch of dehydrated zest can replace fresh zest in most recipes and even works in dry rubs, spice blends, and dressings.
Another plus: you’re using the whole fruit more efficiently. Zest the lemons now, dehydrate the zest, and save the juice for other recipes. Zero waste, maximum flavor. You can make a big batch when lemons are cheap and keep it on hand year-round.
Shopping List
- Lemons (organic if possible, since you’re using the peel)
- Optional: Granulated sugar (for sweet applications or zest-sugar blends)
- Optional: Kosher salt (for citrus salt)
- Optional: Neutral oil spray (to lightly coat dehydrator trays if sticking is a concern)
Step-by-Step Instructions
- Wash and dry the lemons. Rinse under warm water and scrub to remove wax or residue.
Pat completely dry with a clean towel.
- Zest the lemons. Use a microplane, zester, or vegetable peeler. If using a peeler, avoid the white pith—stick to the bright yellow peel for the best flavor and no bitterness.
- Break up larger pieces. If you used a peeler, slice the strips into thin slivers. The thinner the pieces, the faster and more evenly they dry.
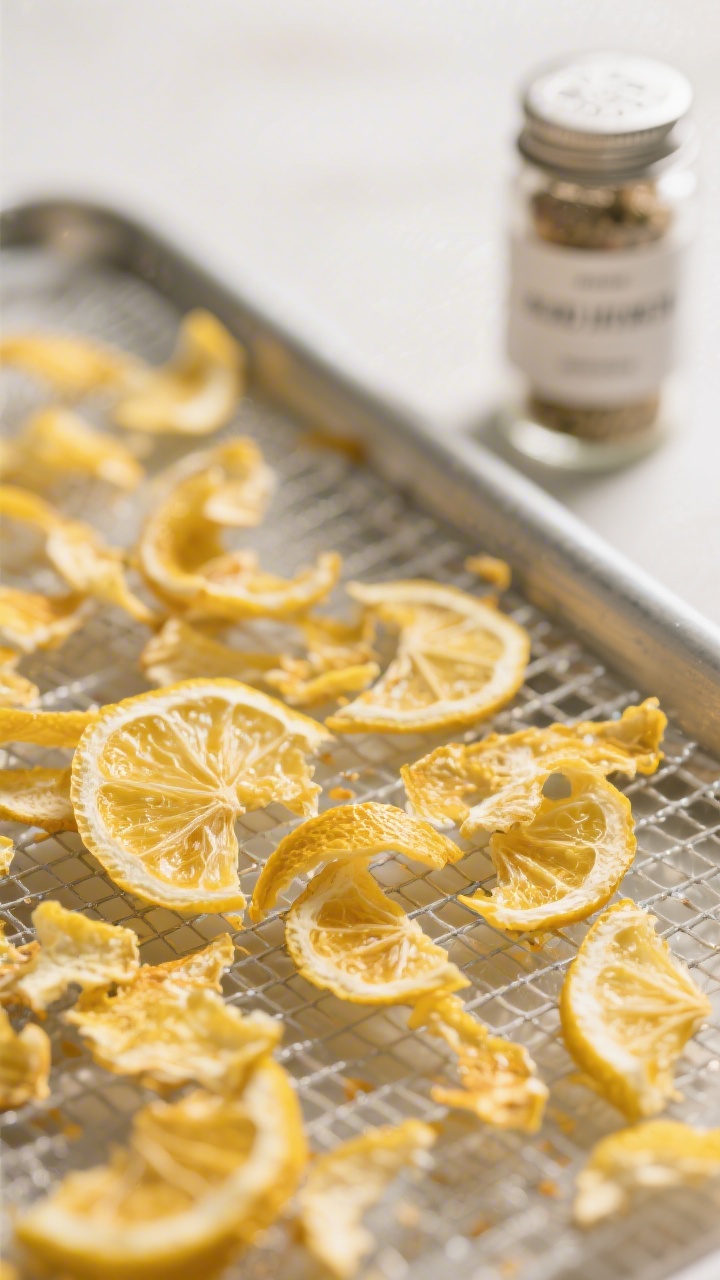
- Choose your drying method. You can use a dehydrator, an oven, or air-dry in very low humidity. Dehydrator is the most reliable and gives the best texture.
- Dehydrator method: Spread zest in a thin, even layer on mesh trays.
Dry at 95–105°F (35–40°C) for 2–4 hours, or until the zest is fully dry and crisp to the touch.
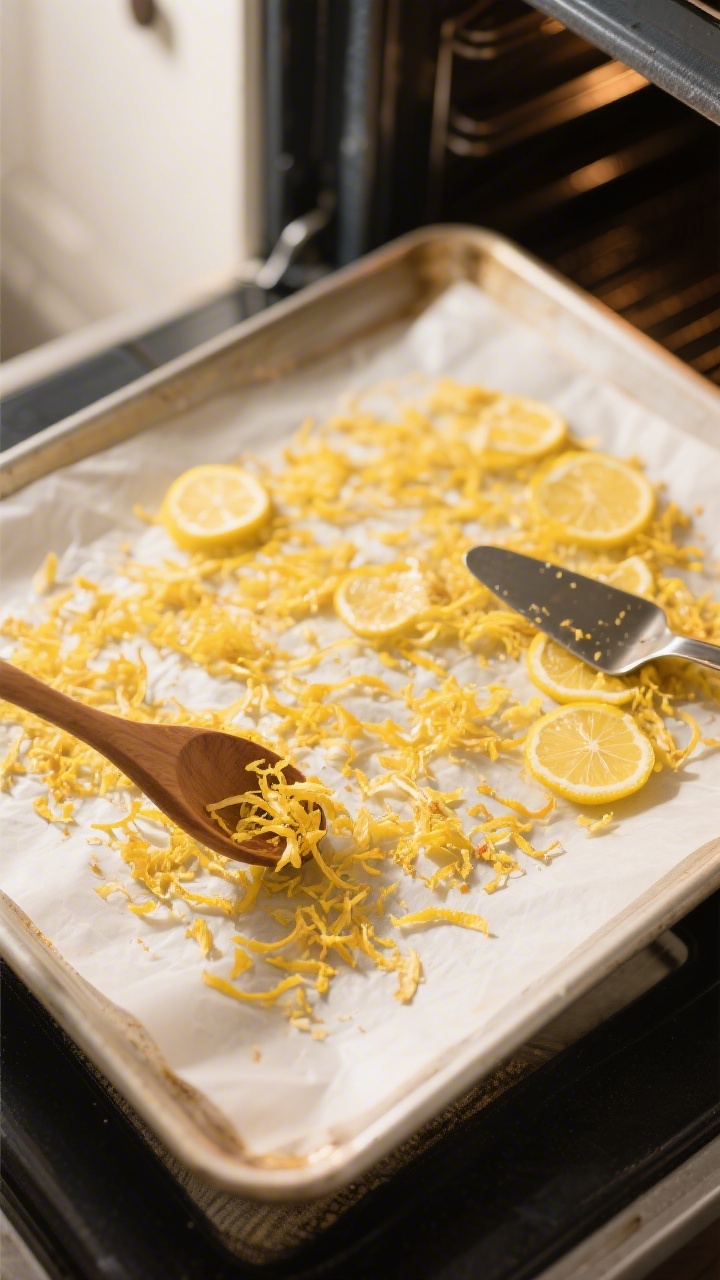
- Oven method: Line a baking sheet with parchment. Spread zest in a thin layer. Set the oven to its lowest temperature (ideally 170–200°F / 75–95°C).
Prop the door open slightly with a wooden spoon to allow moisture to escape. Dry for 30–90 minutes, stirring every 15 minutes, until fully dried.
- Air-dry method (least reliable): Spread zest on a plate in a single layer in a very dry, warm room with good airflow. Stir a few times a day.
This can take 24–72 hours and depends on humidity.
- Test for doneness. The zest should feel brittle and snap when rubbed. If it bends, it’s not done yet. Any remaining moisture will cause clumping or mold later.
- Cool completely. Let the zest cool to room temperature on the tray. Warm zest can create condensation in the container.
- Use as is or grind. For a fine powder, pulse in a spice grinder.
For a flakier texture, crumble it with your fingers. Powder is great for baking and rubs; flakes are perfect for finishing dishes.
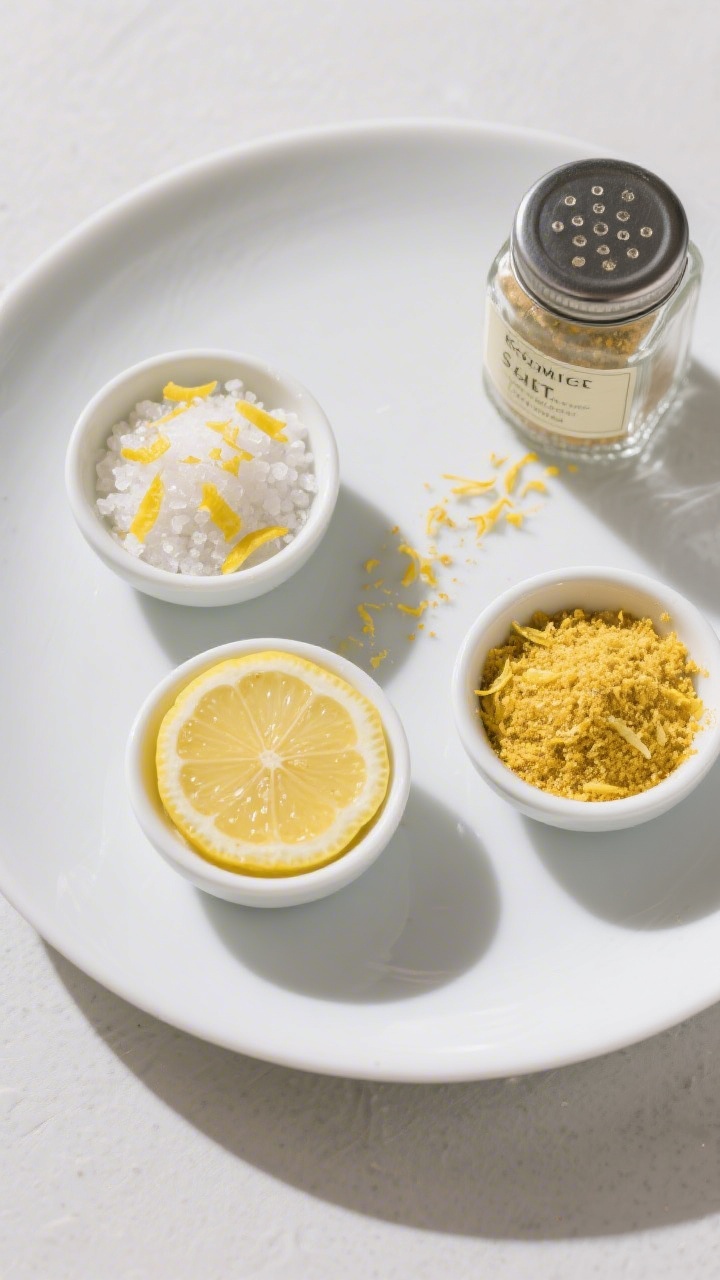
- Optional blends: Mix equal parts dehydrated lemon zest and kosher salt for a citrus salt. Or combine zest and sugar (1:2 ratio) for a bright lemon sugar.
- Label and store. See storage tips below for best results.
How to Store
- Airtight container: Use a spice jar, small mason jar, or vacuum-sealed bag to keep out moisture.
- Cool, dark place: Store away from heat and light. A pantry or cupboard is ideal.
- Add a desiccant: A small food-safe silica gel packet helps prevent clumping in humid climates.
- Shelf life: 6–12 months for peak flavor.
It won’t spoil if kept dry, but aroma slowly fades over time.
- Label clearly: Note the date and whether it’s flakes or powder so you can use it efficiently.
Why This is Good for You
Lemon zest contains natural oils rich in limonene and other compounds that add aroma without extra sodium or sugar. It’s an easy way to boost flavor while keeping recipes lighter. Zest also holds small amounts of vitamins and antioxidants, though the main benefit here is flavor, not nutrition.
Because it’s shelf-stable, you’ll reach for it more often. That means more brightness in everyday meals—think roasted veggies, grilled chicken, yogurt, vinaigrettes, and even popcorn. A little goes a long way, so you get big payoff with a tiny pinch.
What Not to Do
- Don’t include the white pith. It’s bitter and will dull the clean lemon flavor.
- Don’t rush drying at high heat. High temperatures can scorch the oils and turn the zest brown and bitter.
- Don’t store while warm. Trapped steam leads to clumping and mold.
- Don’t skip testing for dryness. If it’s bendy, it’s not ready.
Keep drying until brittle.
- Don’t forget to label. Powder and flakes look similar to other spices—avoid mix-ups.
Recipe Variations
- Lemon Pepper: Combine equal parts dehydrated lemon zest and cracked black pepper. Add a pinch of garlic powder and flaky salt. Great on chicken, fish, and roasted potatoes.
- Citrus Salt: Mix 1 tablespoon lemon zest with 2 tablespoons kosher salt.
Use on grilled vegetables, avocado toast, or margarita rims.
- Lemon Sugar: Blend 1 tablespoon lemon zest with 2–3 tablespoons granulated sugar. Sprinkle on muffins before baking or stir into tea.
- Herbed Lemon Blend: Combine zest with dried thyme, oregano, and a touch of chili flakes. Perfect for sheet-pan dinners.
- Mixed Citrus Zest: Add dehydrated zest from limes, oranges, or grapefruits for a more complex flavor.
Keep ratios even for balance.
FAQ
How much dehydrated zest replaces fresh zest?
Use about half the amount by volume. For 1 teaspoon of fresh zest, start with 1/2 teaspoon of dehydrated zest. Taste and adjust since intensity can vary by batch.
Can I zest lemons after juicing?
Yes, but it’s easier to zest whole lemons first.
If you’ve already juiced them, let the halves dry a bit so the peel is less slippery, then carefully zest, avoiding the pith.
Why did my zest turn brown?
It likely dried at too high a temperature or too long. Keep temps low and spread the zest thinly. Stir occasionally for even drying, especially in the oven.
Do I need to wash organic lemons?
Absolutely.
Even organic lemons can carry dirt or natural wax. Scrub gently under warm water and dry well before zesting.
Can I dehydrate in the microwave?
It’s not recommended. Microwaves heat unevenly and can scorch delicate zest.
A dehydrator or low oven gives far better texture and flavor.
How do I use lemon zest powder?
Use it in baking, marinades, spice rubs, and vinaigrettes. It dissolves more easily than flakes and blends seamlessly into batters, sauces, and dressings.
Is there a difference between grated zest and peel strips?
Flavor is similar, but grated zest dries faster and is ready to use right away. Peel strips may need grinding or crumbling after drying for best texture.
Can I freeze dehydrated lemon zest?
You can, but it’s not necessary if it’s fully dry and stored airtight.
Freezing can help preserve aroma longer, though moisture during thawing can cause clumping. Keep packets sealed until they reach room temperature.
What can I do with the leftover lemons after zesting?
Juice them and freeze the juice in ice cube trays, make lemonade, whisk into vinaigrettes, or use in marinades. You’ll get two valuable products from one lemon.
Will this work with limes or oranges?
Yes.
The same method applies. Adjust drying time slightly based on zest thickness and oil content. Lime and orange zests are excellent for desserts and spice blends.
Final Thoughts
Dehydrated lemon zest is one of those small kitchen upgrades that pays off every day.
It’s simple to make, budget-friendly, and endlessly useful. Keep a jar in your pantry and you’ll always have a bright, citrusy boost ready to go—no lemons required. Once you get in the habit, you might wonder how you ever cooked without it.

Dehydrated Lemon Zest – Bright, Fragrant, and Incredibly Useful
Ingredients
- Lemons (organic if possible, since you’re using the peel)
- Optional: Granulated sugar (for sweet applications or zest-sugar blends)
- Optional: Kosher salt (for citrus salt)
- Optional: Neutral oil spray (to lightly coat dehydrator trays if sticking is a concern)
Instructions
- Wash and dry the lemons. Rinse under warm water and scrub to remove wax or residue.Pat completely dry with a clean towel.
- Zest the lemons. Use a microplane, zester, or vegetable peeler. If using a peeler, avoid the white pith—stick to the bright yellow peel for the best flavor and no bitterness.
- Break up larger pieces. If you used a peeler, slice the strips into thin slivers. The thinner the pieces, the faster and more evenly they dry.
- Choose your drying method. You can use a dehydrator, an oven, or air-dry in very low humidity. Dehydrator is the most reliable and gives the best texture.
- Dehydrator method: Spread zest in a thin, even layer on mesh trays.Dry at 95–105°F (35–40°C) for 2–4 hours, or until the zest is fully dry and crisp to the touch.
- Oven method: Line a baking sheet with parchment. Spread zest in a thin layer. Set the oven to its lowest temperature (ideally 170–200°F / 75–95°C).Prop the door open slightly with a wooden spoon to allow moisture to escape. Dry for 30–90 minutes, stirring every 15 minutes, until fully dried.
- Air-dry method (least reliable): Spread zest on a plate in a single layer in a very dry, warm room with good airflow. Stir a few times a day.This can take 24–72 hours and depends on humidity.
- Test for doneness. The zest should feel brittle and snap when rubbed. If it bends, it’s not done yet. Any remaining moisture will cause clumping or mold later.
- Cool completely. Let the zest cool to room temperature on the tray. Warm zest can create condensation in the container.
- Use as is or grind. For a fine powder, pulse in a spice grinder.For a flakier texture, crumble it with your fingers. Powder is great for baking and rubs; flakes are perfect for finishing dishes.
- Optional blends: Mix equal parts dehydrated lemon zest and kosher salt for a citrus salt. Or combine zest and sugar (1:2 ratio) for a bright lemon sugar.
- Label and store. See storage tips below for best results.
Printable Recipe Card
Want just the essential recipe details without scrolling through the article? Get our printable recipe card with just the ingredients and instructions.