Craving crunchy, bright carrot bits that last for months and jump into soups, stews, and trail meals without turning sad and soggy? You’re in the right place. Dehydrating carrots feels simple, saves money, and rewards you with lightweight flavor bombs you can toss into almost anything.
Ever wondered why some jars turn chewy or foggy after a week? Let’s fix that with a clear, step-by-step plan that actually works.
In this article:
Why Dehydrate Carrots?
You extend shelf life, cut weight and bulk, and keep a stash ready for soups, stews, ramen, omelets, and backpacking meals. You control slice size, texture, and seasoning, which store-bought dehydrated veggies rarely match.
You also rescue those “almost limp” carrots before they slide into the compost – been there, not fun. Ever toss a handful into chicken soup and watch them bounce back to life? That little moment feels like kitchen magic.
What You Need
- Fresh carrots, peeled and trimmed
- Knife or mandoline for even slices (or a box grater for shreds)
- Large pot and steamer basket or boiling pot for blanching
- Food dehydrator with adjustable temperature
- Airtight jars or mylar bags for storage
Best Temperature and Target Dryness
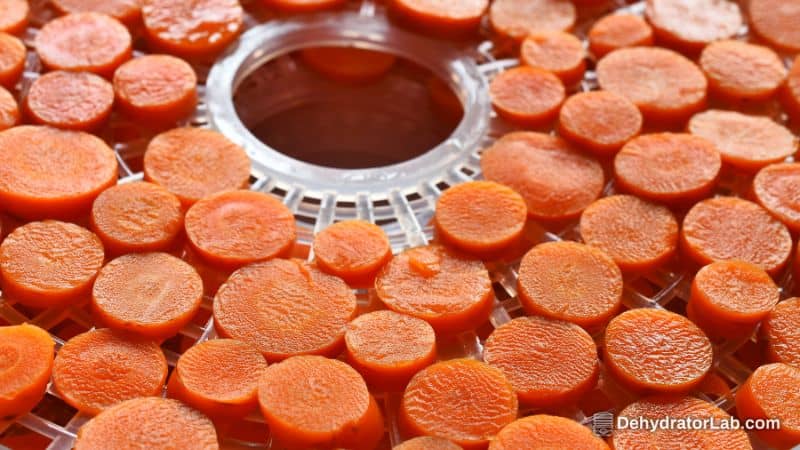
Set your dehydrator to 125–135°F (52–57°C) and dry until pieces feel hard and completely dry, with no tackiness. Properly dried pieces “click” when dropped onto a plate and snap cleanly when broken.
Thin shreds finish faster and rehydrate quicker, while thicker cuts take longer but keep more bite. Ever push the temp to “speed things up”? You risk case-hardening, where the outside dries too fast and traps moisture inside—hello, storage problems.
How to Prep Carrots
You win or lose the batch during prep. Aim for consistent size, clean surfaces, and enzyme control with blanching. Want brighter color and better texture months later? Blanch.
- Wash, peel, and trim carrots; keep sizes consistent so pieces dry evenly.
- Choose your cut: 3–5 mm coins or half-moons, small dice, or grated shreds.
- Blanch: steam or boil briefly to inactivate enzymes that cause off flavors and discoloration over time. Cool quickly in ice water and drain well.
- Optional pretreat: if you use acid or sulfite dips, keep it brief and know your sensitivities. For most home batches, blanching alone hits the sweet spot.
Why Blanching Matters
Blanching preserves color, improves flavor, and boosts long-term quality. Skip it and you risk dull color and grassy notes later. Ask yourself: do you want those jars to still look cheerful in three months? Then blanch.
Dehydrator Setup and Loading
- Preheat to 125–135°F.
- Spread carrots in a single layer with space around each piece for airflow.
- Rotate trays if your dehydrator heats unevenly.
- Keep different cut sizes on separate trays so they finish at similar times.
How Long Does It Take?
Drying time depends on cut size, humidity, and your dehydrator’s airflow. Use these ballparks, then trust the dryness tests.
- Coins/half-moons: 6–12 hours
- Shredded carrot: 6–10 hours
- Small dice/thicker cuts: plan for the longer end; check often near the finish
Doneness Tests That Work
- Texture: hard and brittle, no flex, no soft spots
- Sound: a few pieces “click” on a plate
- Break test: pieces snap cleanly rather than bend
Conditioning: The Step Most People Skip
Conditioning equalizes moisture in the jar and dramatically reduces mold risk. Yes, it adds a week. No, it’s not optional if you want reliable results.
- Cool dried carrots to room temperature.
- Pack loosely in clean jars about two-thirds full and close the lids.
- Shake daily for 7–10 days. If you see condensation or clumping, return the batch to the dehydrator, dry longer, cool, and restart conditioning.
- Spot mold? Toss the whole jar. Brutal, but necessary.
Storage That Keeps Carrots Crisp
Store fully dried, conditioned carrots in airtight containers in a cool, dark place. Label with contents and date, and rotate oldest first. Desiccant packets help in humid climates. Stash jars away from ovens and sun-warmed cabinets to protect quality.
- Glass jars or Mylar with oxygen absorbers for longer-term storage
- Cool, dark pantry zones for best color and flavor
- FIFO rotation for consistent quality
Slicing Styles: What Works Best?
Match the cut to how you cook.
- Thin coins or half-moons: versatile and familiar in soups
- Small dice: perfect for pilaf, fried rice, or mixed grains
- Shreds: ultra-fast rehydration for eggs, ramen cups, and quick stir-fries
Blanching Options: Steam vs. Boil
- Steam blanch: gentler on flavor and nutrients, less water-logging
- Water blanch: quick and consistent; keep batches small and time tight
- Microwave blanching: skip it for preservation; it heats unevenly
Optional Pretreats: Do You Need Them?
Most home dehydrators skip sulfites for vegetables because blanching already preserves color and texture well. If you experiment with an acid or sulfite dip, follow tested amounts, keep times short, and consider sensitivities. IMO, for carrots, blanching gives the best effort-to-payoff ratio.
How to Rehydrate Carrots
Use a 1:1 volume of dried carrots to hot water as a baseline and adjust to taste.
- Soups and stews: toss carrots in dry and simmer 10–20 minutes
- Rice or quinoa: soak carrots in hot water for 10 minutes, then cook with grains
- Eggs or omelets: soak shreds 5–10 minutes, squeeze, and fold into eggs
Smart Troubleshooting
- Leathery after storage: you under-dried or skipped proper conditioning; redry and recondition
- Dull color: you skipped blanching or dried too hot; aim for 125–135°F next time
- Jar fogging on day two: moisture remained; re-dry and restart conditioning
- Uneven textures: your cuts varied in thickness; switch to a mandoline or steady knife technique
Backpacking and Meal-Prep Tips
Dehydrated carrots shine in trail meals and weeknight shortcuts. Ever load a jar with instant ramen, powdered stock, dried carrots, and green onions, then just add boiling water? That’s a five-minute lunch that tastes like you planned it. 🙂
- Pair dried carrots with dried peas, onions, and celery for a ready soup base
- Add shreds to instant couscous cups with bouillon and spices
- Keep a jar by the stove and toss a pinch into sauces for subtle sweetness and color
Exact Step-by-Step
- Prep: wash, peel, and cut evenly.
- Blanch: steam or boil a few minutes until tender-crisp; chill quickly and drain well.
- Load: preheat to 125–135°F; spread pieces in a single, spaced layer.
- Dry: check at 6 hours; finish when pieces are hard, dry, and snap cleanly.
- Cool & condition: jar loosely, shake daily for 7–10 days, and watch for moisture.
- Store: keep airtight in a cool, dark place; label and rotate.
- Use: rehydrate as needed or add directly to wet dishes.
Comparing Cuts and Methods
- Coin slices: balanced drying time and texture; great for soups and sides
- Shreds: fastest to dry and rehydrate; ideal for eggs and ramen
- Dice: best for grains and mixed dishes where shape matters
- Steam blanch: gentler, great color retention
- Water blanch: simple and reliable; keep times tight
Common Mistakes to Avoid
- Overloading trays: you block airflow and create wet pockets that refuse to finish
- Skipping blanching: you risk faded color, off flavors, and poor shelf life
- Storing warm: you trap condensation and invite mold; always cool before sealing
- Skipping conditioning: you miss your safety net for hidden moisture
My Favorite Uses
I throw dried coins into chicken soup and watch them pop with color, then use shreds for quick fried rice on busy nights because they hydrate in minutes.
I stash a jar in my camping bin because light, shelf-stable veg makes trail meals feel like real food. Ever notice how carrots add gentle sweetness that balances salty broths? That’s why they stay in my pantry lineup.
Safety and Quality Notes
- Maintain moderate temps to avoid scorching or case-hardening
- Keep tools and surfaces clean to prevent spoilage
- Consider sensitivities: sulfite dips preserve color but can bother some people; blanching usually does enough
Time and Temperature Quick Reference
- Temperature: 125–135°F (52–57°C)
- Slices: 6–12 hours to harden and dry
- Shreds: 6–10 hours
- Conditioning: 7–10 days in sealed jars, shake daily
- Storage: airtight, cool, dark; label and rotate
Dehydrating Carrots FAQ
Preparation
- What temperature range should I plan for later?
Aim for 125–135°F (52–57°C). This range supports even drying without scorching or case-hardening. - Do I really need to blanch carrots first?
Yes. Blanching preserves color, improves flavor, and boosts long-term quality. Skip it and you risk dull color and grassy notes. - How do I blanch correctly?
Steam or boil briefly until tender-crisp, then chill in ice water and drain well. Keep batches small and timing tight; add about 1 extra minute at higher altitudes. - What cuts work best?
- Thin coins or half-moons: versatile for soups and sides.
- Small dice: great for pilaf, fried rice, and mixed grains.
- Shreds: fastest to dry/rehydrate; perfect for eggs, ramen, and quick bowls.
- Any gear tips before starting?
Use a mandoline or sharp knife for consistent thickness, and prep a large colander or towel to dry blanched pieces thoroughly before loading trays. - Should I use acid or sulfite pretreats?
Optional. Most home dehydrators skip them for carrots because blanching usually protects color and texture well. If you use them, keep dips brief and consider sensitivities. - How do I avoid uneven results from the start?
Keep pieces uniform, drain blanched carrots well, and separate different cut sizes onto their own trays so they finish together.
Drying
- What dehydrator temperature should I set?
Set to 125–135°F (52–57°C). Staying in this window reduces the risk of case-hardening and keeps the color brighter. - How long does it take?
- Coins/half-moons: 6–12 hours.
- Shreds: 6–10 hours.
- Small dice/thicker cuts: plan for the longer end; start checking near hour 6 and then periodically.
- How should I arrange the trays?
Preheat first. Spread in a single layer with space around each piece; no piles or overlap. Rotate trays if your dehydrator heats unevenly. - How do I know they’re done?
- Texture: hard and brittle—no flex or soft spots.
- Sound: “click” when dropped on a plate.
- Break test: pieces snap cleanly rather than bend.
- What’s case-hardening, and how do I avoid it?
It’s when the exterior dries too fast and seals in internal moisture. Avoid by keeping temps moderate, slicing uniformly, and maintaining airflow. - Can I mix different cuts in one batch?
Yes, but keep each cut type on separate trays. Pull finished trays as they’re done and let thicker cuts continue.
Storage
- What is conditioning, and why should I do it?
Conditioning equalizes moisture across the batch and reduces mold risk. It’s the #1 step that turns “pretty good” into “consistently great.” - How do I condition properly?
Cool dried carrots to room temperature. Loosely fill clean jars about two-thirds, close, and shake daily for 7–10 days. If you see condensation or clumping, redry and restart conditioning. - How should I store dehydrated carrots?
Use airtight containers (jars or mylar). Keep them in a cool, dark place. Label with contents and date, and rotate oldest first. Desiccants help in humid climates. - How long will they last?
With proper drying, conditioning, and cool, dark storage, expect several months up to about a year of best quality. Heat shortens shelf life; cooler storage preserves color and flavor. - Can I store near the oven or dishwasher?
Avoid warm or steamy zones. Heat and humidity degrade quality and encourage moisture reabsorption. - Is vacuum sealing worth it?
It helps, especially in humid environments or for long-term storage. Still, condition first, then seal.
Troubleshooting
- My carrots turned leathery in storage. What went wrong?
They weren’t fully dried or weren’t conditioned long enough. Redry until truly brittle, cool, then recondition for 7–10 days. - I see fogging or droplets in the jar—now what?
That’s hidden moisture. Return the batch to the dehydrator, dry longer, cool completely, and restart conditioning. - The color looks dull. How do I fix future batches?
Blanch next time and stick to 125–135°F. Avoid high heat and over-drying. - Some pieces finished early while others lagged. How do I prevent this?
Cut more consistently, separate cut sizes onto different trays, and rotate trays. Pull finished trays and continue the rest. - I’m worried about mold. What are the red flags?
Visible fuzz, off odors, or sticky/tacky pieces after storage. Discard any suspect jar entirely—don’t try to salvage. - My dried carrots are tough after rehydration. Any tips?
Use a 1:1 volume of dried carrots to hot water as a starting point and allow more time. For grains, pre-soak for 10 minutes before cooking together. For eggs, soak shreds 5–10 minutes and squeeze gently. - Can I dehydrate canned carrots?
Yes. Drain well, cut uniformly, dry around 135°F until hard and wrinkly, cool, then condition 7–10 days. Watch salt levels in final dishes. - Do shredded carrots still need blanching?
For the best color and flavor over time, yes. Blanching helps even with shreds, especially for longer storage. - How do I keep insects and moisture out?
Use airtight containers, consider vacuum sealing or mylar with oxygen absorbers, and store in a cool, dark place. Open only what you need; frequent opening invites humid air. - Any quick use ideas to test texture and flavor?
Toss a spoonful into simmering soup for 10–20 minutes, or soak shreds 5–10 minutes for omelets or fried rice. If they hydrate evenly and taste sweet and clean, your process worked.
Conclusion
You now have a reliable, repeatable method to dehydrate carrots that stay crisp and flavorful on the shelf. Keep the temp steady, blanch for quality, and condition every batch, and you’ll sidestep the usual pitfalls.
Ready to turn that fridge stash into bright pantry power-ups, or do we still want to pretend those limp bag-ends will “get used tomorrow”? FYI, fire up the dehydrator and give those carrots a second life – your soups and weeknights will thank you. 🙂