So you’ve got a pile of cherries sitting on your counter, and you’re wondering what the heck to do with them before they turn into a science experiment, right?
Making cherry fruit leather is honestly one of the smartest moves you can make. It’s like turning fruit into candy, but without the guilt trip.
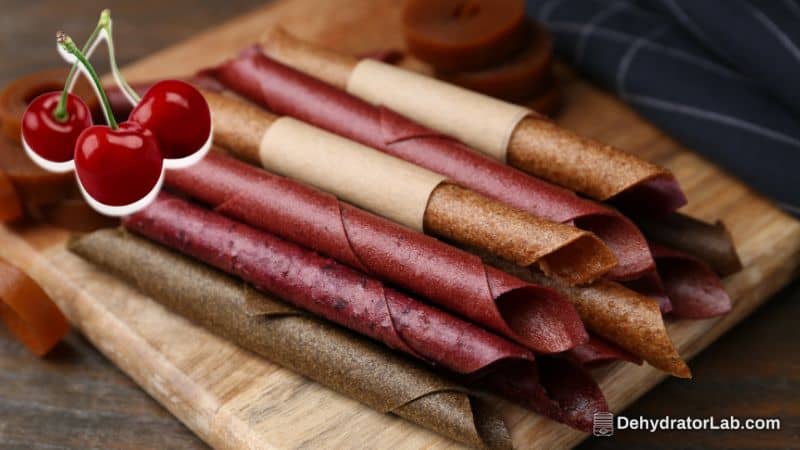
Cherry fruit leather is basically pureed cherries that have been dried into a chewy, leathery snack that tastes way better than it sounds. And the best part? Your food dehydrator does most of the heavy lifting while you binge-watch your favorite show.
In this article:
Why Cherry Fruit Leather Is Worth Your Time
Let me be real with you—this isn’t some complicated culinary project that requires a culinary degree. Cherry fruit leather is ridiculously simple, and you’re probably already kicking yourself for not trying it sooner.
First off, you’re preserving fresh cherries at their peak sweetness, which means you get to enjoy that summer flavor all year long. Plus, it’s a healthier alternative to those store-bought fruit snacks loaded with who-knows-what.
And let’s talk about versatility for a second. You can customize the sweetness, add spices, or even mix in other fruits if you’re feeling adventurous. IMO, that’s a win-win situation. 🙂
What You’ll Need to Get Started
Before you jump in, let’s make sure you’ve got everything lined up. Nothing’s more annoying than getting halfway through a recipe and realizing you’re missing something crucial.
Ingredients
- 4 cups of pitted fresh cherries (Bing cherries work beautifully here)
- 2 tablespoons of lemon juice (this keeps the color bright and adds a little tang)
- 1½ teaspoons of cornstarch (helps thicken the puree)
- Optional sweetener like honey or sugar if your cherries aren’t sweet enough
Equipment
- Cherry pitter (trust me, this saves your sanity)
- Blender or food processor
- Stainless steel pot for simmering
- Food dehydrator with fruit leather trays or liners
- Parchment paper or silicone sheets to line trays
- Offset spatula (optional, but makes spreading easier)
- Kitchen scissors for cutting
Step-by-step Guide
Step 1: Prep Those Cherries
Alright, let’s get those cherries ready. Wash them thoroughly because nobody wants gritty fruit leather. Remove the stems and grab your cherry pitter—this little gadget is an absolute game-changer.
Pit enough cherries to get about 4 cups. Here’s a pro tip: save those pits if you’re feeling fancy because you can actually use them to make cherry pit syrup or jelly later. But if that sounds like too much work, just toss them. No judgment here.
Step 2: Blend It Up
Toss your pitted cherries, lemon juice, and cornstarch into a blender or food processor. Blend everything until it’s completely smooth—no chunks allowed.
The lemon juice does double duty here: it brightens the flavor and helps preserve that gorgeous cherry color. The cornstarch helps thicken things up so your fruit leather isn’t too runny.
Step 3: Simmer the Puree
Pour your cherry puree into a stainless steel pot and bring it to a boil. Once it’s bubbling, reduce the heat and let it simmer for about 2 minutes, stirring frequently.
This step is crucial because it activates the cornstarch and helps reduce some of the liquid, which speeds up the drying process later. Nobody wants to wait forever for their snack to be ready, right?
Let the mixture cool slightly before moving to the next step. You don’t want to pour scorching hot puree onto your dehydrator trays. :/
Step 4: Prepare Your Dehydrator Trays
Now here’s where people get creative (or stressed out, depending on how you look at it). You need to line your dehydrator trays with something to prevent sticking.
You’ve got a few options here:
- Parchment paper (the classic choice)
- Silicone sheets or Paraflexx sheets (reusable and super convenient)
- Cut plastic freezer bags (budget-friendly hack)
- Lightly oil the trays with a tiny amount of oil
Whatever you do, never use wax paper. It’ll stick to your fruit leather and ruin everything. Learn from other people’s mistakes on this one.
Step 5: Spread the Puree Evenly
This is where your inner artist comes out. Use about ½ cup of puree per tray for a mini dehydrator, or around 1 cup for full-size trays.
Spread the puree evenly across the lined tray—aim for about ⅛ to ¼ inch thickness. You can tilt and tap the tray to help it spread, or use an offset spatula to smooth it out.
Here’s the thing: don’t spread it too thin, or it’ll be a nightmare to peel off later. But don’t make it too thick either, or it’ll take forever to dry. Finding that sweet spot takes a little practice, but you’ll get the hang of it.
FYI, forming your puree into a nice square or rectangle shape makes cutting it into strips way easier later on.
Step 6: Dehydrate That Beauty
Set your dehydrator to 135°F (some sources say 140°F, but 135°F works great). Now comes the hardest part—waiting.
Dehydrate for about 6-8 hours, but start checking around the 4.5-hour mark. The exact time depends on how thick you spread the puree, the humidity in your kitchen, and your specific dehydrator.
How do you know when it’s done? Press the leather gently with your fingers. If it leaves an indentation or feels squishy, it needs more time. It should feel dry and leathery (hence the name), but still flexible.
Cherries are naturally sticky because of their high sugar content, so don’t freak out if it’s slightly tacky—that’s normal.
Step 7: The Flip Trick (Optional)
Some people swear by this step: once your fruit leather is mostly dry, carefully peel it off the tray, flip it over onto a mesh dehydrator sheet (bottom side up), and dry for another 1-1.5 hours.
This helps ensure both sides are completely dry and prevents any moisture from being trapped. It’s not necessary, but if you’re planning to store your fruit leather for a while, it’s worth doing.
Step 8: Cool and Cut
Once your cherry fruit leather is fully dried, remove it from the dehydrator and let it cool completely.
Grab your kitchen scissors or a sharp knife and cut the leather into strips. You can make them as wide or narrow as you like—there’s no official fruit leather police enforcing strip dimensions here.
Roll each strip up in wax paper or parchment paper for that classic fruit roll-up look. It makes them easier to grab as a snack, and honestly, it just looks cooler.
Storage Tips That Actually Work
You didn’t go through all this effort just to have your fruit leather go bad in a week, right? Here’s how to keep it fresh.
Short-term storage: Keep your rolled fruit leather strips in an airtight container at room temperature. They’ll last for a few months this way, though let’s be honest—they probably won’t stick around that long.
Long-term storage: For extended storage, pop them in the refrigerator or even the freezer. Adding an oxygen absorber to your storage container helps minimize moisture and keeps things extra fresh.
Store them flat with wax paper between layers, or roll them up individually in parchment paper. Either way works great.
Common Mistakes to Avoid
Let’s talk about the pitfalls so you don’t have to learn the hard way.
Spreading too thin: I mentioned this before, but it bears repeating. Too-thin fruit leather is impossible to peel off without tearing. Aim for that ⅛ to ¼ inch sweet spot.
Not checking early enough: Different dehydrators and humidity levels affect drying time. Start checking your leather around the 4-6 hour mark so you don’t over-dry it.
Using wax paper: Seriously, don’t do it. It will fuse to your fruit leather and create a sticky mess that’s impossible to fix.
Skipping the simmer step: That quick 2-minute simmer activates the cornstarch and reduces liquid. Don’t skip it or your leather will take forever to dry.
Ways to Level Up Your Cherry Fruit Leather
Once you’ve mastered the basic recipe, it’s time to get creative.
Mix in other fruits: Try blending cherries with strawberries, raspberries, or even apples for a different flavor profile. Using a variety of fruits keeps things interesting.
Add spices: A pinch of cinnamon or nutmeg can add warmth and depth. Just don’t go overboard—a little goes a long way.
Drizzle with chocolate: Once your fruit leather is done, drizzle melted chocolate on top and sprinkle with shredded coconut or chopped nuts. It’s like turning a healthy snack into a dessert without the guilt.
Experiment with sweetness: If your cherries are super tart, add a tablespoon or two of honey or agave to the puree. Taste as you go to find your perfect balance.
Why Dehydrators Beat Ovens for This Job
Look, you can technically make fruit leather in an oven, but your dehydrator is honestly the MVP here. With a dehydrator, you set the temperature to 135°F, walk away, and let it do its thing.
Ovens require way more babysitting – you’ve got to rotate trays every hour or so to avoid hot spots and uneven drying. Plus, oven temperatures can be inconsistent, especially if you’re trying to maintain a low temp for hours.
Dehydrators are specifically designed for this kind of work, with consistent airflow and even heat distribution. It’s the difference between a tool that’s built for the job and one that’s just making do.
Final Thoughts
Making cherry fruit leather in a food dehydrator is one of those simple pleasures that pays off big time. You get a delicious, healthy snack that stores well and tastes incredible – all from a few cups of fresh cherries and minimal effort.
Once you nail down the basics, you’ll find yourself making batch after batch, experimenting with different fruits and flavors. And when your friends ask where you got those amazing fruit roll-ups, you can casually mention you made them yourself. 🙂
So grab those cherries, fire up your dehydrator, and get ready to enjoy one of the best homemade snacks you’ll ever make. You won’t regret it.