In this article:
How to Dehydrate Limes in a Food Dehydrator
So, you’ve found yourself with a bag of limes and a sudden, undeniable urge to preserve them for the apocalypse. Or maybe you just want a delicious, tangy garnish for your drinks that doesn’t involve a last-minute grocery run. I get it. I’ve been there.
My own dehydrating journey started after I bought a giant crate of limes for a party that was, frankly, far too ambitious. Faced with a countertop of green orbs threatening to turn into sad, squishy balls, I fired up my trusty dehydrator. What followed changed how I stock my pantry for good.
Now, I’m obsessed, and I’m here to walk you through it. It’s surprisingly simple, and the results are fantastic. Let’s turn those juicy limes into shelf-stable sunshine, shall we?
TL;DR: Key Takeaways
- 🍋 Slice 1/8 to ¼ inch thick — thicker takes forever, thinner turns brittle.
- 🌡️ Dry at 135°F for 6-12 hours, checking from hour 6 onward.
- 🖐️ Look for leathery and pliable, not brittle — no beads of moisture when torn.
- 🧂 Grind into lime powder for tacos, seafood, or a custom citrus salt.
- 📦 Cool fully before sealing — stored right, they last up to a year.
Why Bother Dehydrating Limes Anyway?
Before we start slicing and dicing, you might be wondering why you shouldn’t just let those limes live out their short, fresh lives in your fruit bowl. The reasons are pretty compelling.
Dehydrated limes are little powerhouses of flavor. By removing the water, you concentrate that bright, tart, citrusy punch into a solid form. You can use them in so many ways:
- Homemade Spices: Grind them into a powder for an incredible lime seasoning for fish, chicken, or popcorn.
- Next-Level Garnishes: Toss a slice into your tea, cocktail, or even a glass of water. It rehydrates slightly and looks gorgeous.
- Long-Term Storage: Properly dehydrated limes can last for months, even up to a year, in your pantry. No more wasted citrus!
- Craft Projects: Seriously! I’ve used them in homemade potpourri and even as decorations. They smell amazing.
Think of it as unlocking a secret level in your cooking game. It’s a small effort for a big, flavorful payoff.
What You’ll Need
You don’t need a ton of fancy equipment for this. In fact, you probably have most of it already. Here’s your shopping list, both mandatory and nice-to-have.
The Non-Negotiables:
- Limes: Obviously. Any variety works, but look for ones that are firm and feel heavy for their size (that means they’re juicy).
- A Food Dehydrator: This is the star of the show. I use a basic circular model with stackable trays, and it’s never let me down.
- A Sharp Knife: A chef’s knife or a serrated knife works best. Dull knives are a safety hazard and will crush your limes instead of slicing them. No one wants lime pulp everywhere.
- A Cutting Board: Protect those countertops.
The “Your-Life-Will-Be-Easier” Extras:
- A Mandoline Slicer: If you want perfectly uniform, paper-thin slices, this is your best friend. It makes a real difference for consistency and drying time. Just watch your fingertips — I speak from experience.
- A Bowl or Baking Sheet: For holding your sliced limes before they hit the trays.
Prepping Your Limes for Their Spa Day
This is the most hands-on part of the whole process. Do it right, and you’re setting yourself up for success.
Step 1: The Citrus Bath
First things first, give your limes a good wash. You’d be surprised what’s on that peel. We’re making a food product, not preserving wax and supermarket germs. I like to scrub them gently under warm water with a bit of vinegar or a dedicated fruit and veggie wash.
Why is this so important? Because you’re dehydrating the entire slice, peel and all. You want that outer layer to be as clean as possible.
Step 2: The Great Slice-Off
Now, for the slicing. Consistency is key here. Why? Because uniformly thin slices will dry at the same rate. If you have a chunky slice next to a thin one, one will be bone-dry while the other is still a chewy mess.
- Target Thickness: Aim for slices between 1/8-inch and 1/4-inch thick. Any thicker, and the drying time skyrockets. Any thinner, and they can become too brittle and lose their shape.
- Manual Method: If you’re using a knife, just take your time. Try to make each slice as even as the last. It’s a great mindfulness exercise, or a great test of your patience—your call.
- Mandoline Method: This is where you cheat (smartly). Set your mandoline to the desired thickness and glide those limes through. Always use the safety guard! I cannot stress this enough. My mandolin has claimed a bit of my thumbnail, and it was not a fun lesson.
Pro Tip: Remove any seeds you see as you go. They don’t dehydrate nicely and can add a bitter flavor.
Let’s Get Dehydrating – Time, Temperature, and Texture
The prep is done. Now we let the machine do its magic. This is the easy part.
Tray Layout and Temperature Setting
Lay your lime slices in a single layer on the dehydrator trays. Make sure they aren’t touching or overlapping. They need good air circulation on all sides to dry properly. It’s like giving each slice its own personal space bubble.
Now, for the heat. What’s the perfect temperature for dehydrating limes?
Set your dehydrator to 135°F (57°C).
This temperature is high enough to efficiently remove moisture and prevent microbial growth, but low enough to preserve the lime’s vibrant color and delicate oils. Some guides will tell you to go lower, like 125°F, but I’ve found 135°F gives me a perfect result without taking forever.
The Waiting Game… I Mean, Drying Time
So, how long does it actually take? Ever wondered why recipes can be so vague on this?
The truth is, it depends. It depends on the humidity in your house, the thickness of your slices, and how juicy your limes were to begin with. But as a solid guideline:
Expect the process to take anywhere from 6 to 12 hours.
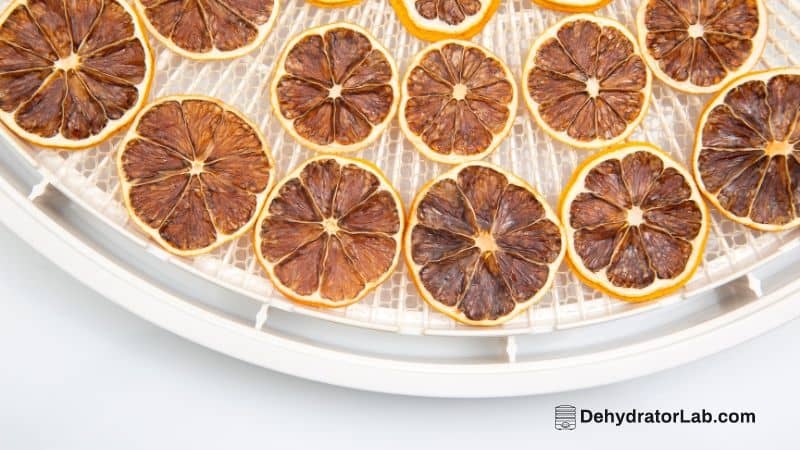
I know, that’s a big window. Start checking them at the 6-hour mark. You’re looking for a leathery, dry-to-the-touch texture with no sticky or moist spots. They should be pliable but not brittle. If you try to bend one, it shouldn’t crack, but it also shouldn’t feel soft or flexible.
How to Tell When Your Limes Are Perfectly Dehydrated
Don’t just trust the clock. Your eyes and fingers are the best tools here. A perfectly dehydrated lime slice has a specific feel.
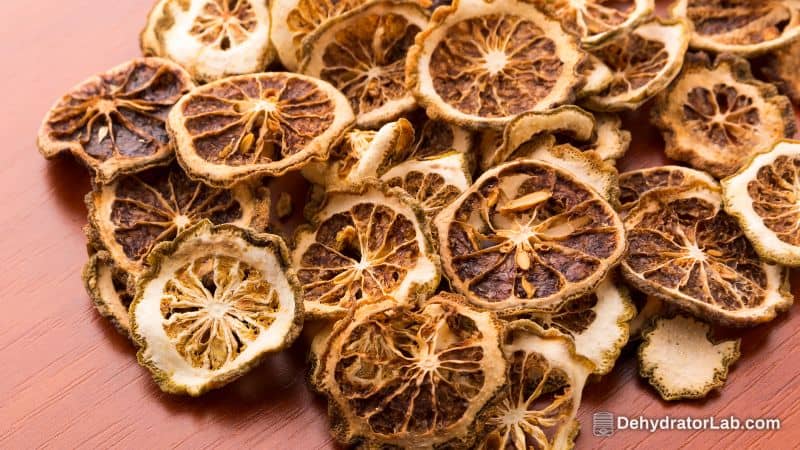
- The Look: The color will have faded to a pale, creamy green or yellowish-tan. The white pith will be more opaque.
- The Touch: The slices should feel dry and leathery, not crispy like a potato chip. There should be zero moisture when you tear a piece.
- The Snap Test (Kind Of): Unlike herbs, you don’t want a clean snap. If you try to bend a slice, it should offer resistance and might tear, but it shouldn’t feel plasticky or soft in the center.
If you see any condensation inside the dehydrator lid or on the trays, let them keep going. Patience, my friend!
Storing Your Culinary Gold
You didn’t go through all this effort just to let your dehydrated limes get soggy, right? Proper storage is the final, critical step.
Once your limes are done, take them out and let them cool completely on the trays. This is important! If you seal them up while they’re still warm, you’ll trap evaporating moisture and ruin all your hard work.
Once they’re at room temperature, store them in an airtight container. My favorites are:
- Glass mason jars with a tight-sealing lid.
- Heavy-duty zip-top bags with the air squeezed out.
Keep your containers in a cool, dark, and dry place. A pantry or cupboard is perfect. Avoid storing them near the stove or a sunny window, as heat and light are the enemies of long-term storage.
How to Use Dehydrated Limes
Now for the fun part! What can you actually do with these things?
- Lime Powder: Toss a handful of slices into a spice grinder or high-powered blender and pulse until you get a fine powder. It’s incredible on tacos, grilled seafood, or mixed into salt for a custom citrus salt.
- Garnish Everything: Drop a slice into your gin and tonic, iced tea, or even a pot of rice while it cooks for a subtle, fragrant flavor.
- Baking Secret: Grind the powder and add it to cookie, cake, or frosting recipes for a zesty twist.
- Just Snack on Them: Okay, maybe not a whole slice, but a little nibble is a seriously intense citrus hit. You’ve been warned!
Ready to Become a Dehydrating Pro?
And that’s it! You’ve officially transformed fresh, perishable limes into a versatile, long-lasting pantry staple. It feels a little like magic, doesn’t it?
The process is simple: wash, slice uniformly, dehydrate at 135°F until leathery, and store properly. The hardest part is, honestly, just waiting for the dehydrator to finish its job.
So, go on, give it a try. Embrace your inner food-preservation nerd. Your future cocktails, weeknight dinners, and homemade spice blends will thank you for it.
Now, if you’ll excuse me, all this talk of lime powder has given me a serious craving for fish tacos. Happy dehydrating!
P.S. — Pull out the seeds as you slice. Skip that step and you’ll taste the bitterness in every batch you grind.