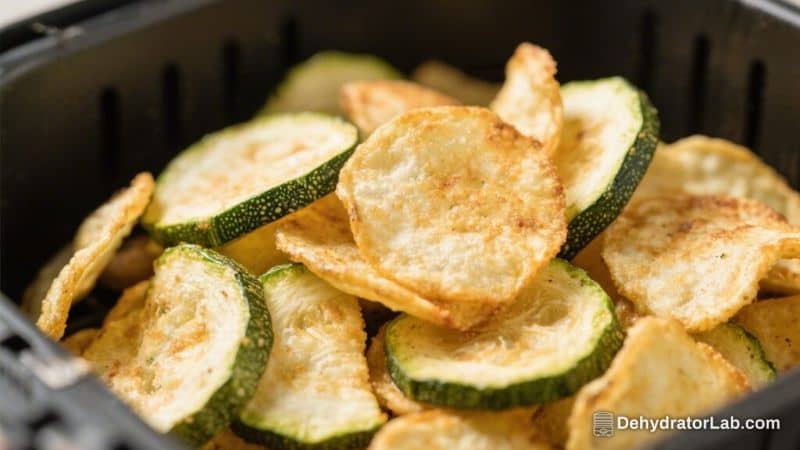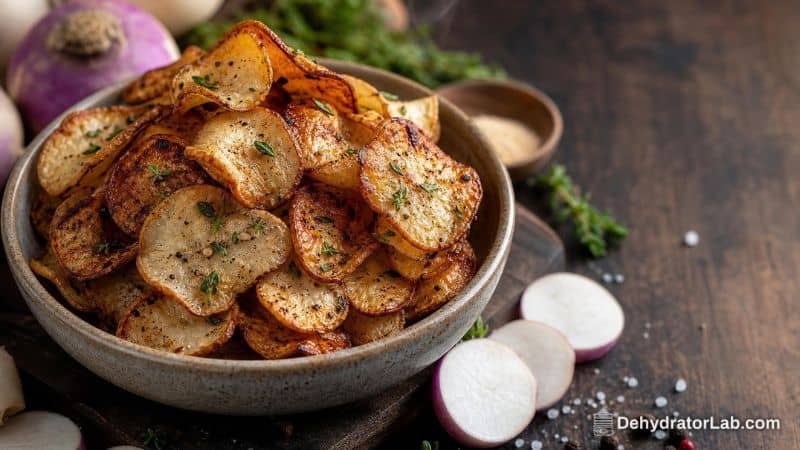
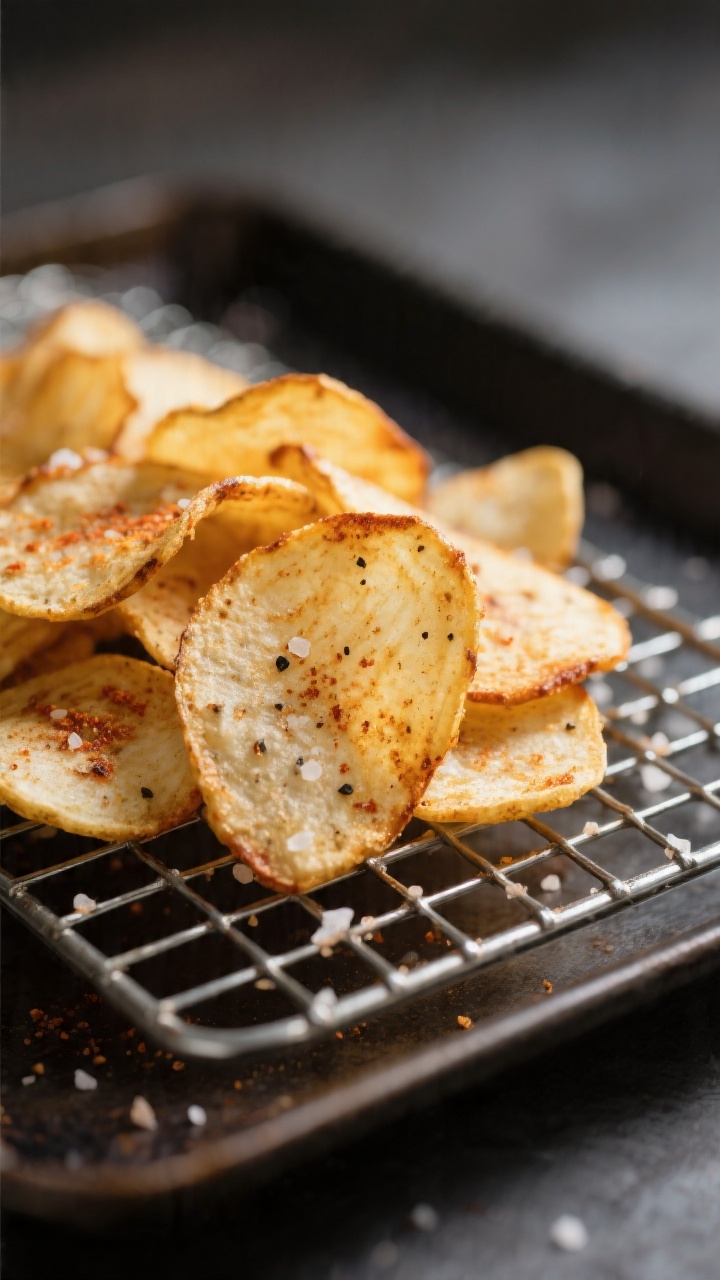
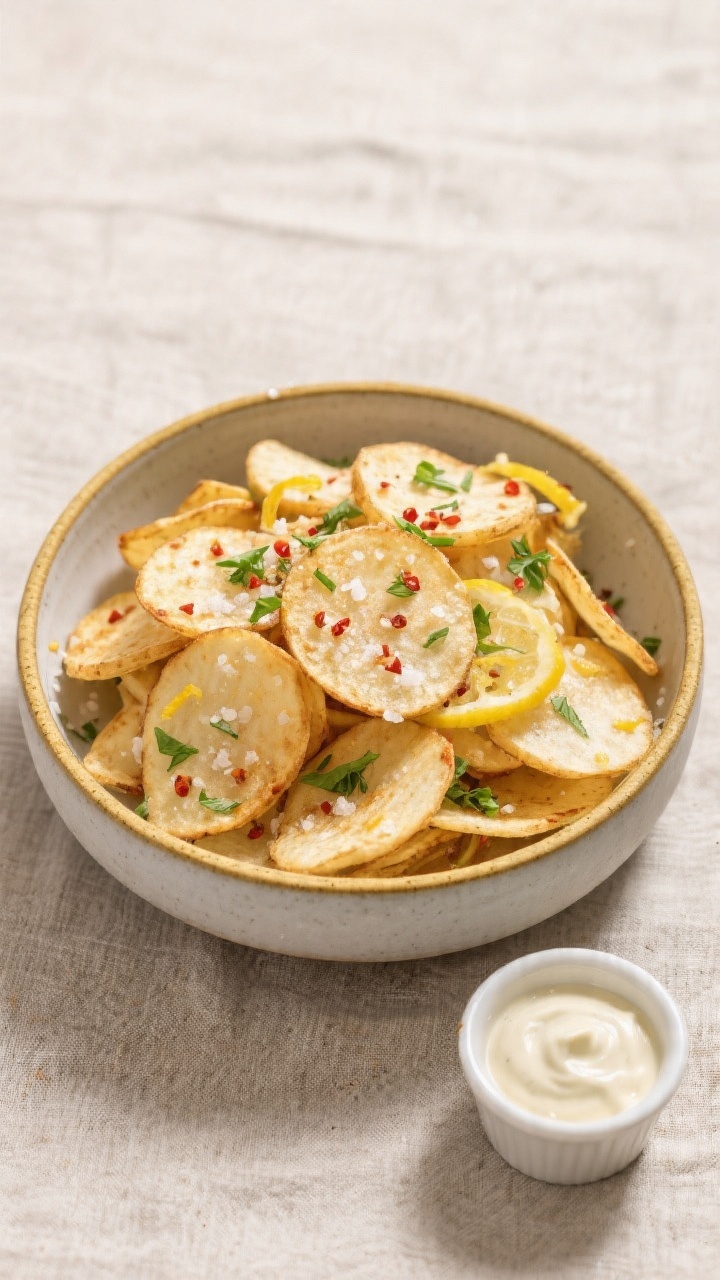
Turnips don’t always get the spotlight, but they make seriously good chips—especially in the air fryer. These turnip chips are thin, crisp around the edges, and lightly seasoned so the natural sweetness comes through. They feel like a snack, but they’re veggie-forward and simple to make.
If you’re looking for a lighter alternative to potato chips or want a new way to use turnips, this is it. You’ll get big flavor with minimal oil and just a handful of pantry spices.
In this article:
What Makes This Recipe So Good
- Fast and easy: From slicing to snacking in about 20 minutes. No deep-frying, no fuss.
- Light but satisfying: Crispy edges with a tender bite, plus a clean, slightly sweet flavor.
- Budget-friendly: Turnips are inexpensive and widely available, especially in cooler months.
- Customizable: Keep it simple with salt and pepper or play with spices and herbs.
- Great for meal prep: They reheat nicely and make a handy, better-for-you snack.
Shopping List
- 2 medium turnips (about 1 to 1.25 pounds total)
- 1 to 1.5 tablespoons olive oil or avocado oil
- 1/2 teaspoon fine sea salt (plus more to taste)
- 1/2 teaspoon black pepper
- 1/2 teaspoon garlic powder
- 1/2 teaspoon onion powder
- 1/4 teaspoon smoked paprika (optional, for a subtle smoky note)
- Pinch of red pepper flakes (optional, for heat)
- Fresh parsley or chives, finely chopped (optional, for garnish)
Instructions
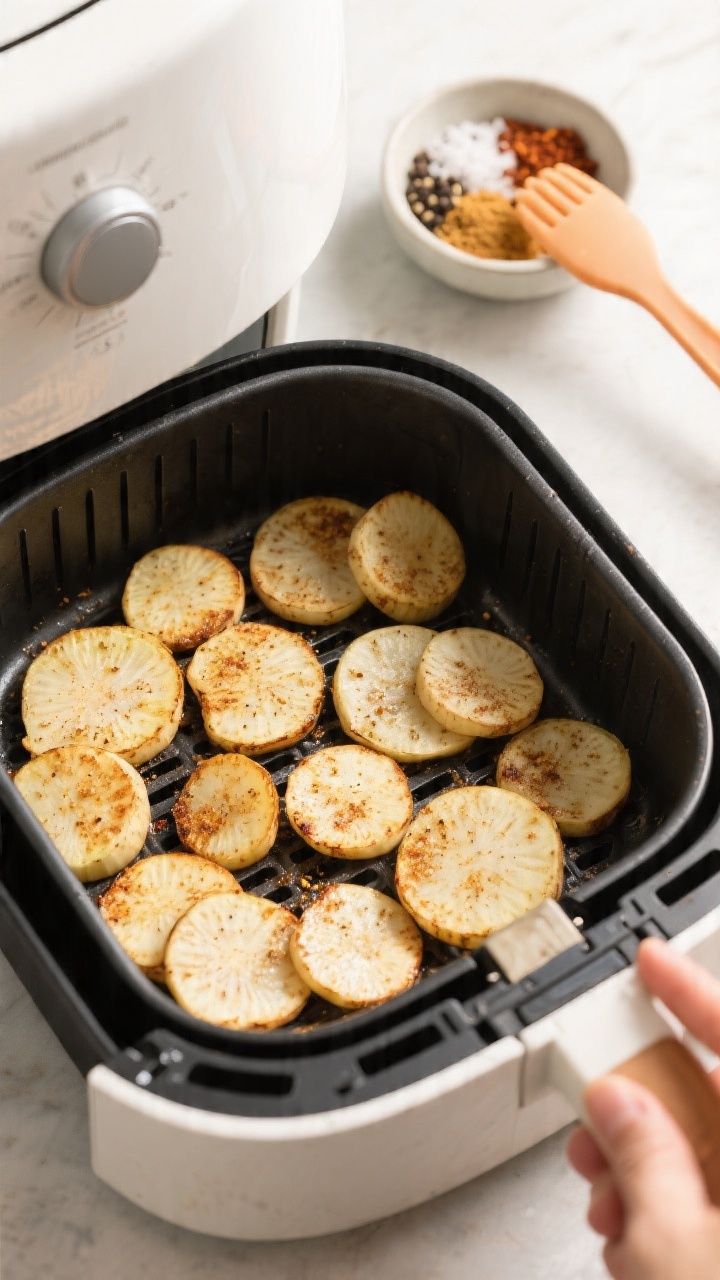
- Preheat the air fryer: Set to 350°F (175°C).
Preheating helps the chips crisp more evenly.
- Prep the turnips: Wash and peel the turnips. Trim off the root and stem ends so you have flat surfaces.
- Slice thinly: Using a mandoline or a sharp knife, slice into thin rounds, about 1/16 to 1/8 inch thick. Thinner slices = crisper chips, but avoid paper-thin slices if you want a bit of tenderness in the center.
- Dry the slices: Pat the rounds dry with paper towels to remove excess moisture. This step is key for crispness.
- Season: In a large bowl, toss the slices with oil until lightly coated—no pooling oil.
Sprinkle in salt, pepper, garlic powder, onion powder, and smoked paprika if using. Toss to evenly coat.
- Arrange in a single layer: Place slices in the air fryer basket without overlapping. Work in batches if needed. Don’t crowd the basket or they’ll steam instead of crisp.
- Cook: Air fry for 8 to 11 minutes, flipping or shaking halfway.
Start checking at 7 minutes. They’re done when edges are golden and centers look set, not wet.
- Season and cool: Transfer to a wire rack and sprinkle with a pinch more salt if desired. Let them cool a couple of minutes to crisp further.
- Repeat: Continue with remaining slices.
Garnish with chopped herbs before serving if you like.
How to Store
- Room temperature (best for same-day): Keep cooled chips in an uncovered bowl for a few hours. They stay crisp and ready to grab.
- Short-term storage: Once fully cool, store in a paper bag or a loosely covered container at room temp for up to 2 days. Avoid airtight containers—they trap moisture and soften the chips.
- To re-crisp: Air fry at 300°F (150°C) for 2 to 3 minutes, then cool on a rack.
- Avoid the fridge: Refrigeration makes them limp.
If they soften, use the re-crisp method above.
Health Benefits
- Lower in carbs than potatoes: Turnips are a smart swap if you’re watching carbs or looking for lighter snacks.
- High in fiber: Helps support digestion and keeps you fuller longer.
- Rich in vitamin C: Supports immune health and acts as an antioxidant.
- Air-fried, not deep-fried: You’ll use far less oil, keeping calories and saturated fat in check.
- Phytonutrients from cruciferous veggies: Turnips belong to the same family as broccoli and kale, offering plant compounds linked to overall wellness.
Common Mistakes to Avoid
- Slicing too thick or uneven: Thick pieces won’t crisp properly. Aim for consistent thin slices.
- Skipping the drying step: Water on the surface leads to soggy chips. Pat them dry well.
- Crowding the basket: Overlapping slices trap steam.
Cook in batches for best texture.
- Too much oil: A light coat goes a long way. Excess oil weighs chips down and can cause uneven browning.
- Walking away: Turnips can go from perfect to overdone quickly. Start checking early and often toward the end.
Variations You Can Try
- Salt and Vinegar: Toss cooked chips with a sprinkle of malt vinegar powder and fine salt.
Or lightly mist raw slices with diluted vinegar before cooking, then season after.
- Ranch-Style: Mix dried dill, parsley, garlic powder, onion powder, salt, and pepper. Toss with oil and air fry.
- Smoky BBQ: Combine smoked paprika, brown sugar or coconut sugar, chili powder, garlic powder, and salt.
- Parmesan and Herb: After cooking, toss warm chips with finely grated Parmesan, lemon zest, and chopped parsley.
- Spicy Cajun: Use a Cajun seasoning blend and a pinch of cayenne for heat.
- Everything Bagel: Season with an everything bagel mix right after tossing in oil.
FAQ
Do I have to peel the turnips?
You don’t have to, but peeling gives a cleaner look and more even texture. Smaller, young turnips have tender skins and can be left unpeeled.
If the skin looks thick or waxy, peel it.
Why are my chips soggy?
Too much moisture or crowding is usually the cause. Make sure slices are dried well, use a light coat of oil, and cook in a single layer. Let chips cool briefly on a rack so steam can escape.
Can I bake these instead of air frying?
Yes.
Spread slices on parchment-lined sheets and bake at 375°F (190°C) for 12 to 20 minutes, flipping halfway. Watch closely near the end, as ovens vary and thin slices can brown fast.
What thickness works best?
About 1/16 to 1/8 inch. Thinner slices get extra crisp, while slightly thicker ones keep a bit of chew in the center.
Keep the thickness consistent for even cooking.
Which oil should I use?
Olive oil and avocado oil both work well. You need just enough to coat. If using extra-virgin olive oil, keep the temp moderate and check often to avoid scorching.
Can I use a different root vegetable?
Absolutely.
Rutabaga, kohlrabi, or parsnip slices work with the same method. Cooking times may shift by a minute or two depending on moisture and sugar content.
How do I keep them crisp after storing?
Store at room temp in a breathable container and re-crisp in the air fryer at 300°F for a few minutes. Cool on a rack to set the crunch.
Are turnip chips bitter?
Fresh, firm turnips are mild with a hint of sweetness.
Older or very large turnips can taste sharper. Peeling and seasoning help balance any slight bitterness.
Final Thoughts
Air Fryer Turnip Chips are a simple way to turn a humble vegetable into a snack you’ll actually crave. They’re quick, customizable, and much lighter than traditional chips.
With a few easy tips—thin slices, dry surfaces, and no crowding—you’ll get reliable crunch every time. Keep a batch on hand for snacking, serve alongside sandwiches, or top salads for texture. Once you try them, turnips might become a regular on your grocery list. For more easy root vegetable chips, try our Air Fryer Beet Chips or Air Fryer Radish Chips, and our Air Fryer Parsnip Chips are a naturally sweet follow-up.

Air Fryer Turnip Chips – Crispy, Light, and Surprisingly Addictive
Ingredients
- 2 medium turnips (about 1 to 1.25 pounds total)
- 1 to 1.5 tablespoons olive oil or avocado oil
- 1/2 teaspoon fine sea salt (plus more to taste)
- 1/2 teaspoon black pepper
- 1/2 teaspoon garlic powder
- 1/2 teaspoon onion powder
- 1/4 teaspoon smoked paprika (optional, for a subtle smoky note)
- Pinch of red pepper flakes (optional, for heat)
- Fresh parsley or chives, finely chopped (optional, for garnish)
Instructions
- Preheat the air fryer: Set to 350°F (175°C).Preheating helps the chips crisp more evenly.
- Prep the turnips: Wash and peel the turnips. Trim off the root and stem ends so you have flat surfaces.
- Slice thinly: Using a mandoline or a sharp knife, slice into thin rounds, about 1/16 to 1/8 inch thick. Thinner slices = crisper chips, but avoid paper-thin slices if you want a bit of tenderness in the center.
- Dry the slices: Pat the rounds dry with paper towels to remove excess moisture. This step is key for crispness.
- Season: In a large bowl, toss the slices with oil until lightly coated—no pooling oil.Sprinkle in salt, pepper, garlic powder, onion powder, and smoked paprika if using. Toss to evenly coat.
- Arrange in a single layer: Place slices in the air fryer basket without overlapping. Work in batches if needed. Don’t crowd the basket or they’ll steam instead of crisp.
- Cook: Air fry for 8 to 11 minutes, flipping or shaking halfway.Start checking at 7 minutes. They’re done when edges are golden and centers look set, not wet.
- Season and cool: Transfer to a wire rack and sprinkle with a pinch more salt if desired. Let them cool a couple of minutes to crisp further.
- Repeat: Continue with remaining slices.Garnish with chopped herbs before serving if you like.
Printable Recipe Card
Want just the essential recipe details without scrolling through the article? Get our printable recipe card with just the ingredients and instructions.