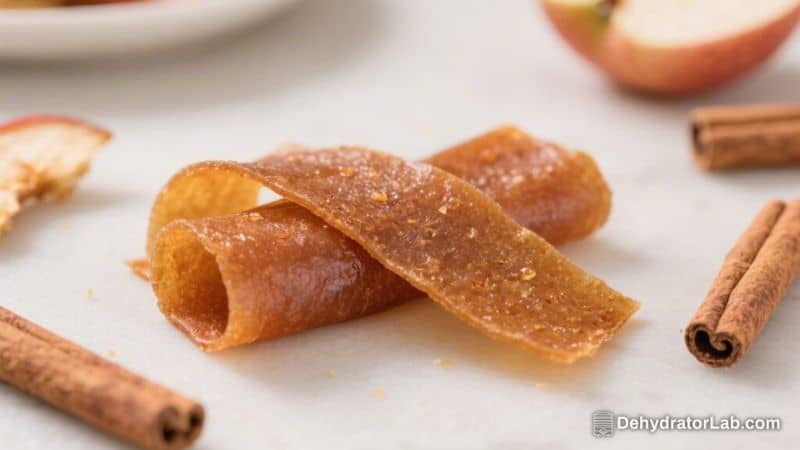
If you love tropical flavors and simple homemade snacks, this pineapple coconut fruit leather is a winner. It tastes like a sunny vacation, with juicy pineapple and creamy coconut blended into a bright, chewy treat. It’s perfect for lunchboxes, hiking snacks, or a sweet bite after dinner.
No refined sugar is needed unless your pineapple is extra tart. You don’t need special equipment either—an oven works just fine.
In this article:
What Makes This Special
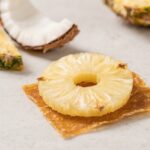
This fruit leather brings together two ingredients that naturally shine: ripe pineapple and coconut. The pineapple gives a tangy-sweet punch while coconut adds mellow creaminess and a soft texture.
The result is a vibrant, rollable snack that feels both fun and wholesome.
It’s also very forgiving. Whether you have fresh or frozen pineapple, a blender or food processor, or a dehydrator or oven, you can make this work. Plus, it’s a great way to use fruit that’s a little overripe.
Ingredients
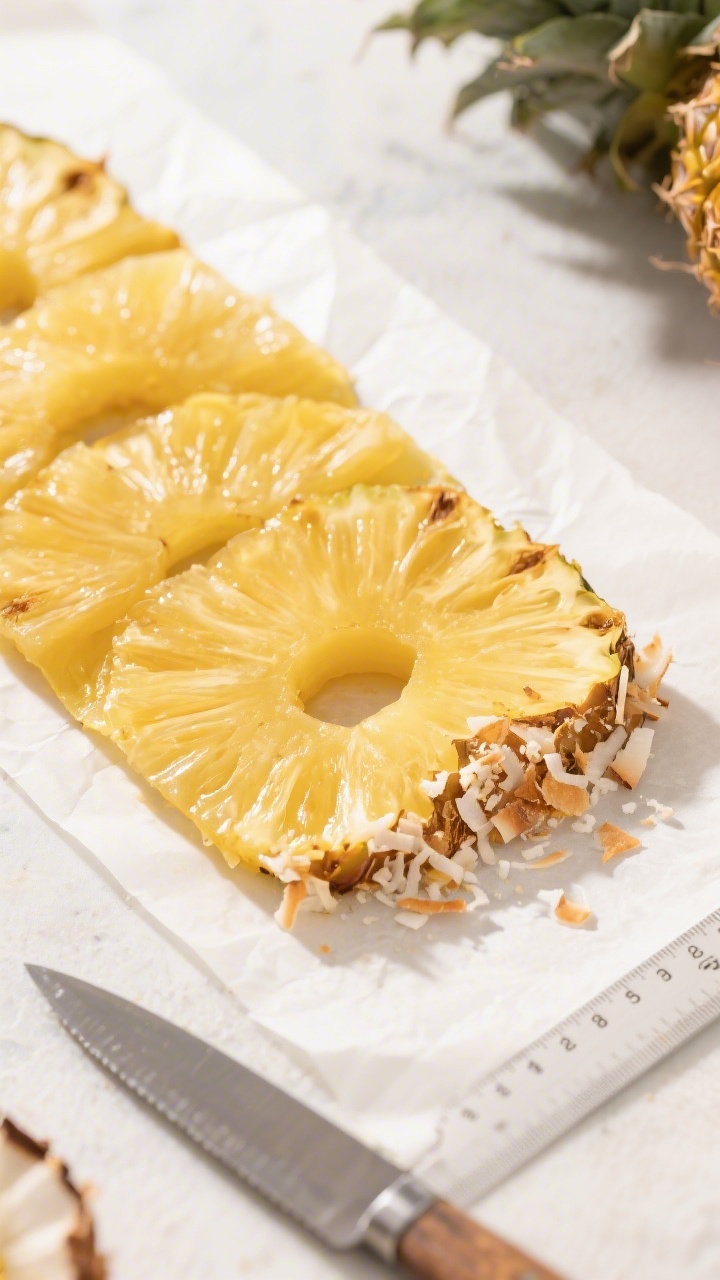
- 3 cups chopped ripe pineapple (fresh or thawed from frozen, drained)
- 1/2 cup canned coconut milk (full-fat for creamier texture)
- 2–3 tablespoons unsweetened shredded coconut (optional, for texture)
- 1–2 tablespoons lime juice (to brighten and help preserve color)
- 1–3 tablespoons honey or maple syrup, to taste (optional, based on sweetness of pineapple)
- Pinch of fine sea salt (about 1/8 teaspoon)
- Neutral oil or nonstick spray (for lining, if needed)
Instructions
- Prepare your pan. Line a rimmed baking sheet with a silicone baking mat or high-quality parchment paper.
Lightly grease parchment with a thin film of oil to prevent sticking. If using a dehydrator, set up nonstick dehydrator sheets.
- Preheat. For oven: set to 170–200°F (75–95°C). If your oven doesn’t go that low, use the lowest setting and prop the door slightly open with a wooden spoon for airflow.
For dehydrator: set to 135°F (57°C).
- Blend the base. In a blender, add pineapple, coconut milk, lime juice, sweetener if using, and salt. Blend until very smooth. You’re aiming for a thick smoothie consistency—pourable, but not watery.
- Adjust texture. If the puree seems thin, blend in 2 tablespoons shredded coconut or simmer the puree on the stove for 5–8 minutes to reduce slightly.
This helps it dry evenly without cracking.
- Taste and tweak. This is your moment to balance flavors. Add a touch more lime for brightness or a bit more sweetener if your pineapple is tart. The flavor will concentrate as it dries, so keep it slightly less sweet than you want the final result.
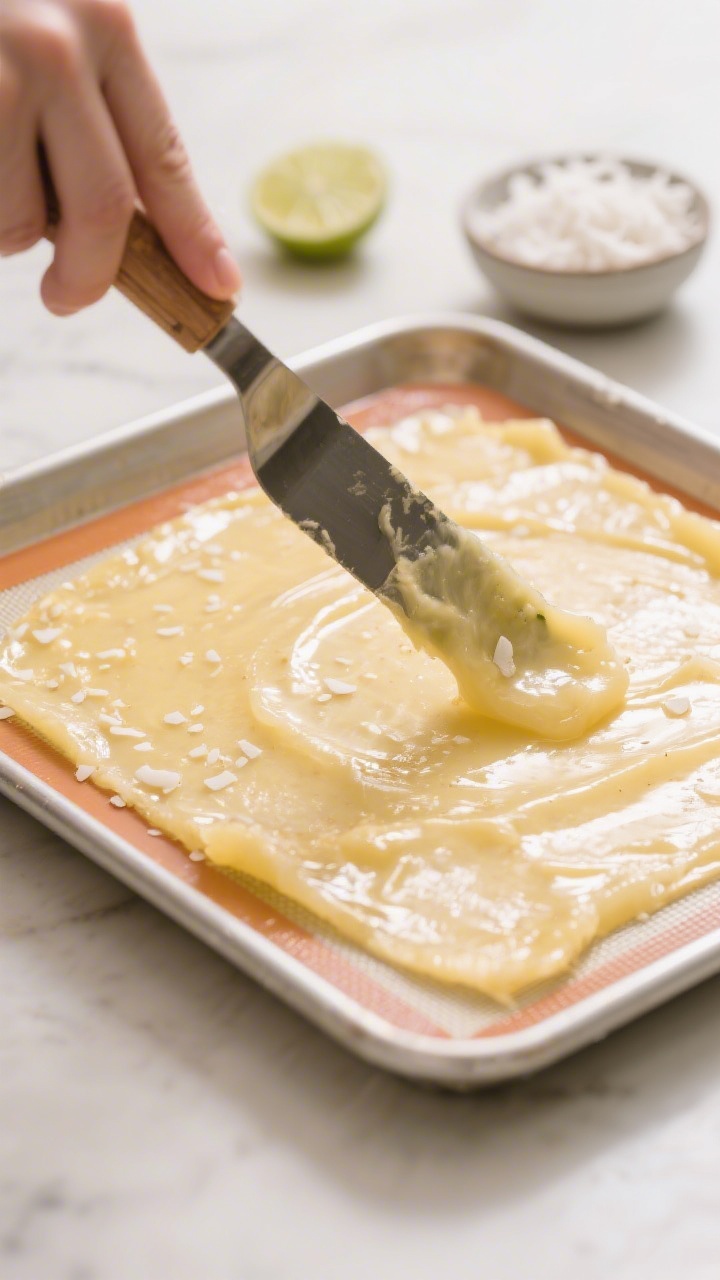
- Spread the puree. Pour onto the lined sheet and spread with an offset spatula to about 1/8 inch (3 mm) thick. Keep the layer even, slightly thicker at the edges to prevent over-drying and cracking there.
- Dry it out.
- Oven: Bake 3–5 hours, rotating the pan halfway.
Start checking at 3 hours. The surface should be tacky but not wet, and it should peel from the liner in one piece.
- Dehydrator: Dry 4–8 hours at 135°F. Time varies by humidity and thickness.
- Oven: Bake 3–5 hours, rotating the pan halfway.
- Test for doneness. The fruit leather should be flexible and not sticky to the touch.
If the center is still very soft or shiny-wet, keep drying. Do not rush this step—underdried leather spoils faster.
- Cool completely. Let it cool on the sheet for 20–30 minutes. This helps set the texture and makes peeling easier.
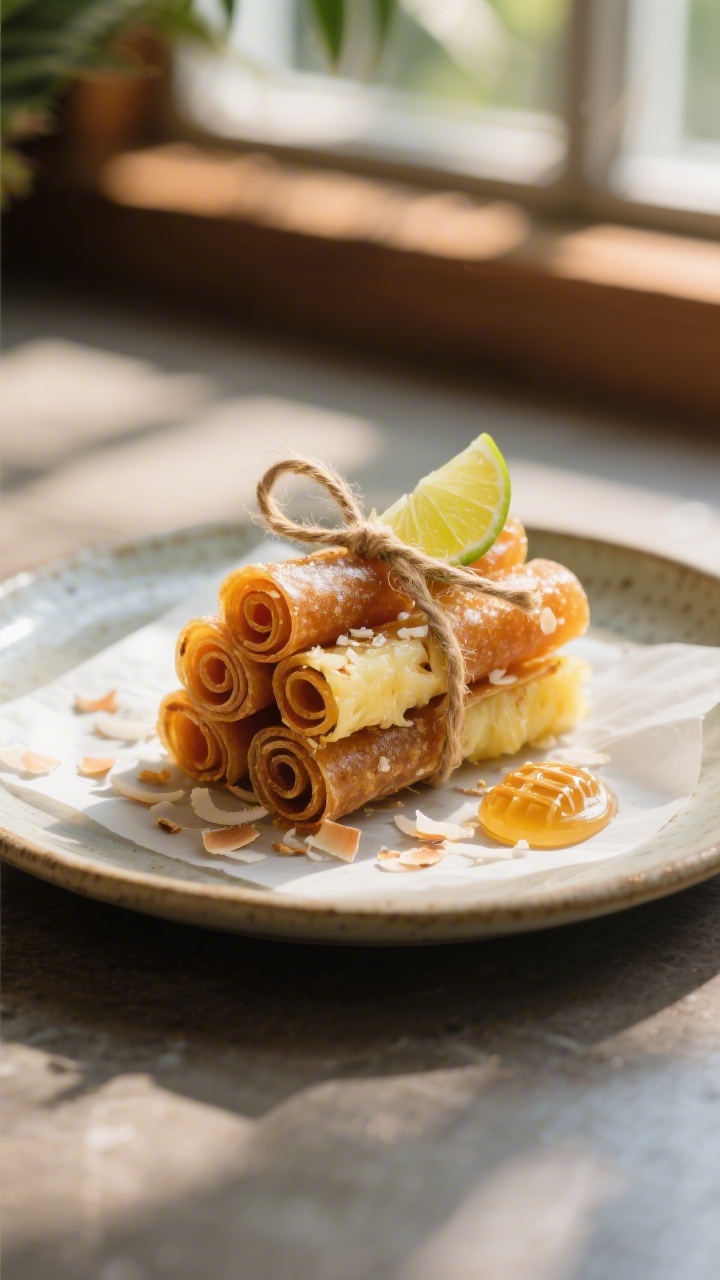
- Peel and cut. Carefully peel the leather from the liner. Place it on a sheet of parchment and cut into strips or rectangles.
Roll with the parchment to keep pieces from sticking together.
- Optional finishing. Sprinkle a little toasted shredded coconut on top before rolling for extra texture. Press gently so it adheres.
Storage Instructions
- Room temperature: Store rolls in an airtight container with parchment between layers for up to 1 week in a cool, dry place.
- Refrigerator: Keeps well for 2–3 weeks. Make sure the container is truly airtight to avoid moisture.
- Freezer: For long-term storage, freeze up to 3 months.
Thaw at room temperature in the sealed container to prevent condensation.
- Humidity tip: If pieces soften in humid weather, return them to the oven/dehydrator for 30–60 minutes to re-dry.
Health Benefits
- Whole-fruit goodness: You’re using the entire pineapple, which brings fiber, vitamin C, and bromelain—a digestive enzyme that may help with protein breakdown.
- Healthy fats: Coconut milk adds satisfying fats that make the snack more filling and help slow the rush of natural sugars.
- No refined junk: You control the sweetness. If your pineapple is ripe, you may not need added sugar at all.
- Kid-friendly: Chewy texture and bright flavor make it a smart alternative to store-bought snacks with preservatives or colorings.
What Not to Do
- Don’t pour too thick. If the layer is thicker than 1/8 inch, the outside may harden while the center stays gummy.
- Don’t skip the liner. Fruit puree sticks like glue. Use a silicone mat or well-oiled parchment.
- Don’t crank the heat. High heat cooks instead of dehydrates, leading to browning, cracking, and uneven texture.
- Don’t store while warm. Trapped steam leads to condensation and mold.
Cool fully before packing.
- Don’t forget acidity. A splash of lime brightens flavor and helps preserve color. Without it, the leather can taste flat.
Variations You Can Try
- Mango Twist: Swap 1 cup pineapple for mango for a sweeter, silkier finish.
- Ginger Kick: Add 1/2–1 teaspoon fresh grated ginger for warmth and zing.
- Chili-Lime: Stir in a pinch of chili powder or Tajín and extra lime juice for a sweet-heat combo.
- Banana Cream: Blend in half a ripe banana for extra body and mellow sweetness.
- Passionfruit Punch: Add 2–3 tablespoons passionfruit pulp for tart intensity.
- Coconut Crunch: Fold in toasted coconut flakes after blending for texture (spread gently to keep the layer even).
FAQ
Can I use canned pineapple?
Yes. Choose pineapple canned in juice, not syrup.
Drain it well before blending so the mixture isn’t too watery.
What if I don’t have coconut milk?
You can skip it and blend only pineapple with lime. The leather will be thinner and more tangy. For a creamy vibe, substitute a few tablespoons of Greek yogurt, but dry at a lower temperature and keep it well-refrigerated after drying.
Why is my fruit leather cracking?
It’s either too dry or spread too thin, especially around the edges.
Next time, spread a touch thicker at the perimeter and check earlier. You can also brush a teaspoon of coconut milk over the surface halfway through drying to help prevent brittleness.
How do I keep it from sticking to the pan?
Use a silicone baking mat for the most reliable release. If using parchment, lightly oil it first and avoid very thin spots when spreading.
How sweet should the puree be before drying?
Make it slightly less sweet than you want the final product.
Drying concentrates sweetness, so a balanced puree becomes more intense after several hours.
Can I double the recipe?
Yes, but use two pans rather than layering it thicker on one pan. Rotate pans halfway through and expect a bit more drying time.
Is this safe for toddlers?
Generally, yes, but cut into small, manageable pieces and watch for chewing. Avoid added sweeteners for very young children, and check for coconut sensitivities.
What if the surface gets glossy and sticky again after storage?
Humidity can rehydrate the leather.
Lay pieces on a lined sheet and dry in a low oven for 20–30 minutes until tacky-dry again.
Can I add protein powder?
You can, but add no more than 1 scoop per batch and blend thoroughly. Too much powder can make the leather chalky and slow down drying.
How long does it take in a very humid climate?
Plan on the higher end of the range—5–7 hours in the oven or 6–10 in a dehydrator. Keep the layer even and allow airflow.
If your oven has convection, use it on the lowest heat setting.
Wrapping Up
Pineapple coconut fruit leather is simple, bright, and genuinely satisfying. With a blender, a lined pan, and a few hours of gentle drying, you get a snack that tastes like sunshine and keeps well all week. Keep the layer even, be patient with the drying, and don’t skip that squeeze of lime.
Once you nail your preferred thickness and sweetness, you’ll have a go-to treat that beats store-bought every time.
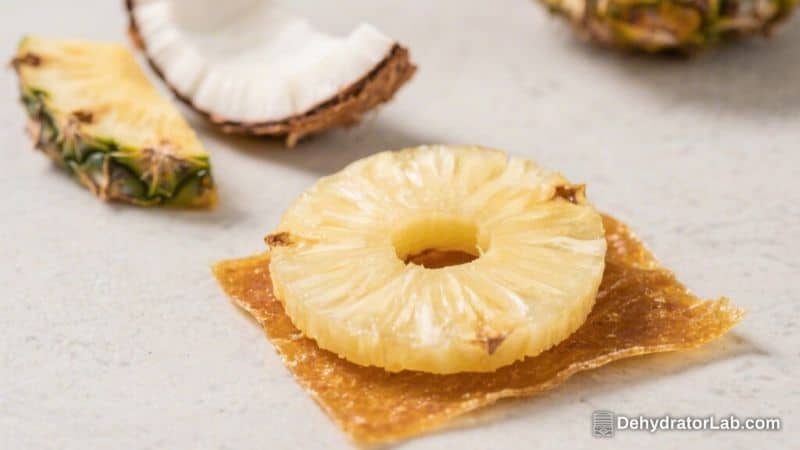
Pineapple Coconut Fruit Leather – Tropical, Chewy, and Naturally Sweet
Ingredients
- 3 cups chopped ripe pineapple (fresh or thawed from frozen, drained)
- 1/2 cup canned coconut milk (full-fat for creamier texture)
- 2–3 tablespoons unsweetened shredded coconut (optional, for texture)
- 1–2 tablespoons lime juice (to brighten and help preserve color)
- 1–3 tablespoons honey or maple syrup, to taste (optional, based on sweetness of pineapple)
- Pinch of fine sea salt (about 1/8 teaspoon)
- Neutral oil or nonstick spray (for lining, if needed)
Instructions
- Prepare your pan. Line a rimmed baking sheet with a silicone baking mat or high-quality parchment paper.Lightly grease parchment with a thin film of oil to prevent sticking. If using a dehydrator, set up nonstick dehydrator sheets.
- Preheat. For oven: set to 170–200°F (75–95°C). If your oven doesn’t go that low, use the lowest setting and prop the door slightly open with a wooden spoon for airflow.For dehydrator: set to 135°F (57°C).
- Blend the base. In a blender, add pineapple, coconut milk, lime juice, sweetener if using, and salt. Blend until very smooth. You’re aiming for a thick smoothie consistency—pourable, but not watery.
- Adjust texture. If the puree seems thin, blend in 2 tablespoons shredded coconut or simmer the puree on the stove for 5–8 minutes to reduce slightly.This helps it dry evenly without cracking.
- Taste and tweak. This is your moment to balance flavors. Add a touch more lime for brightness or a bit more sweetener if your pineapple is tart. The flavor will concentrate as it dries, so keep it slightly less sweet than you want the final result.
- Spread the puree. Pour onto the lined sheet and spread with an offset spatula to about 1/8 inch (3 mm) thick. Keep the layer even, slightly thicker at the edges to prevent over-drying and cracking there.
- Dry it out. Oven: Bake 3–5 hours, rotating the pan halfway.Start checking at 3 hours. The surface should be tacky but not wet, and it should peel from the liner in one piece.
- Dehydrator: Dry 4–8 hours at 135°F. Time varies by humidity and thickness.
- Test for doneness. The fruit leather should be flexible and not sticky to the touch.If the center is still very soft or shiny-wet, keep drying. Do not rush this step—underdried leather spoils faster.
- Cool completely. Let it cool on the sheet for 20–30 minutes. This helps set the texture and makes peeling easier.
- Peel and cut. Carefully peel the leather from the liner. Place it on a sheet of parchment and cut into strips or rectangles.Roll with the parchment to keep pieces from sticking together.
- Optional finishing. Sprinkle a little toasted shredded coconut on top before rolling for extra texture. Press gently so it adheres.
Printable Recipe Card
Want just the essential recipe details without scrolling through the article? Get our printable recipe card with just the ingredients and instructions.