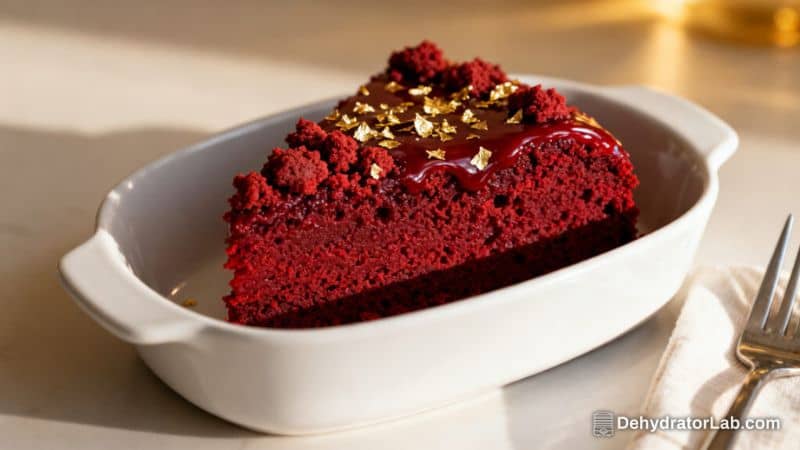
Red velvet cake feels special no matter the occasion, and making it in the air fryer keeps it simple and stress-free. You still get the tender crumb, the subtle cocoa flavor, and that creamy tang of cream cheese frosting—just in a smaller, weeknight-friendly format. No heating up the whole kitchen, no long preheating times.
If you’ve ever wanted a “just enough” cake that still tastes as it came from a bakery, this is it. Let’s make a moist, beautifully red cake with a plush crumb right in your air fryer.
In this article:
What Makes This Recipe So Good
- Moist and tender crumb: Buttermilk and a touch of vinegar keep the cake soft and plush.
- Classic red velvet flavor: Light cocoa notes, a hint of tang, and the signature red color.
- Small-batch friendly: Bakes in a 6-inch pan, perfect for date night, small gatherings, or treating yourself.
- Quick and convenient: Air fryers heat fast, so cake is ready sooner than oven-baked versions.
- Reliable results: This batter is forgiving, and the air fryer cooks it evenly when you follow the timing and pan size guidelines.
What You’ll Need
- All-purpose flour – 1 cup, spooned and leveled
- Granulated sugar – 3/4 cup
- Unsweetened cocoa powder – 1 tablespoon (natural, not Dutch-processed)
- Baking soda – 1/2 teaspoon
- Fine salt – 1/4 teaspoon
- Buttermilk – 1/2 cup, at room temperature
- Neutral oil (canola or vegetable) – 1/3 cup
- Large egg – 1, at room temperature
- Vanilla extract – 1 teaspoon
- White vinegar – 1 teaspoon
- Red gel food coloring – about 1–2 teaspoons (gel gives vibrant color without thinning the batter)
- Nonstick spray or butter – for the pan
Cream Cheese Frosting (Optional but Recommended):
- Cream cheese – 4 ounces, softened
- Unsalted butter – 2 tablespoons, softened
- Powdered sugar – 1 cup, sifted
- Vanilla extract – 1/2 teaspoon
- Pinch of salt
Equipment: 6-inch round cake pan (2 inches tall), parchment paper for lining, mixing bowls, whisk, spatula, and an air fryer with a basket or oven-style drawer that fits the pan.
How to Make It
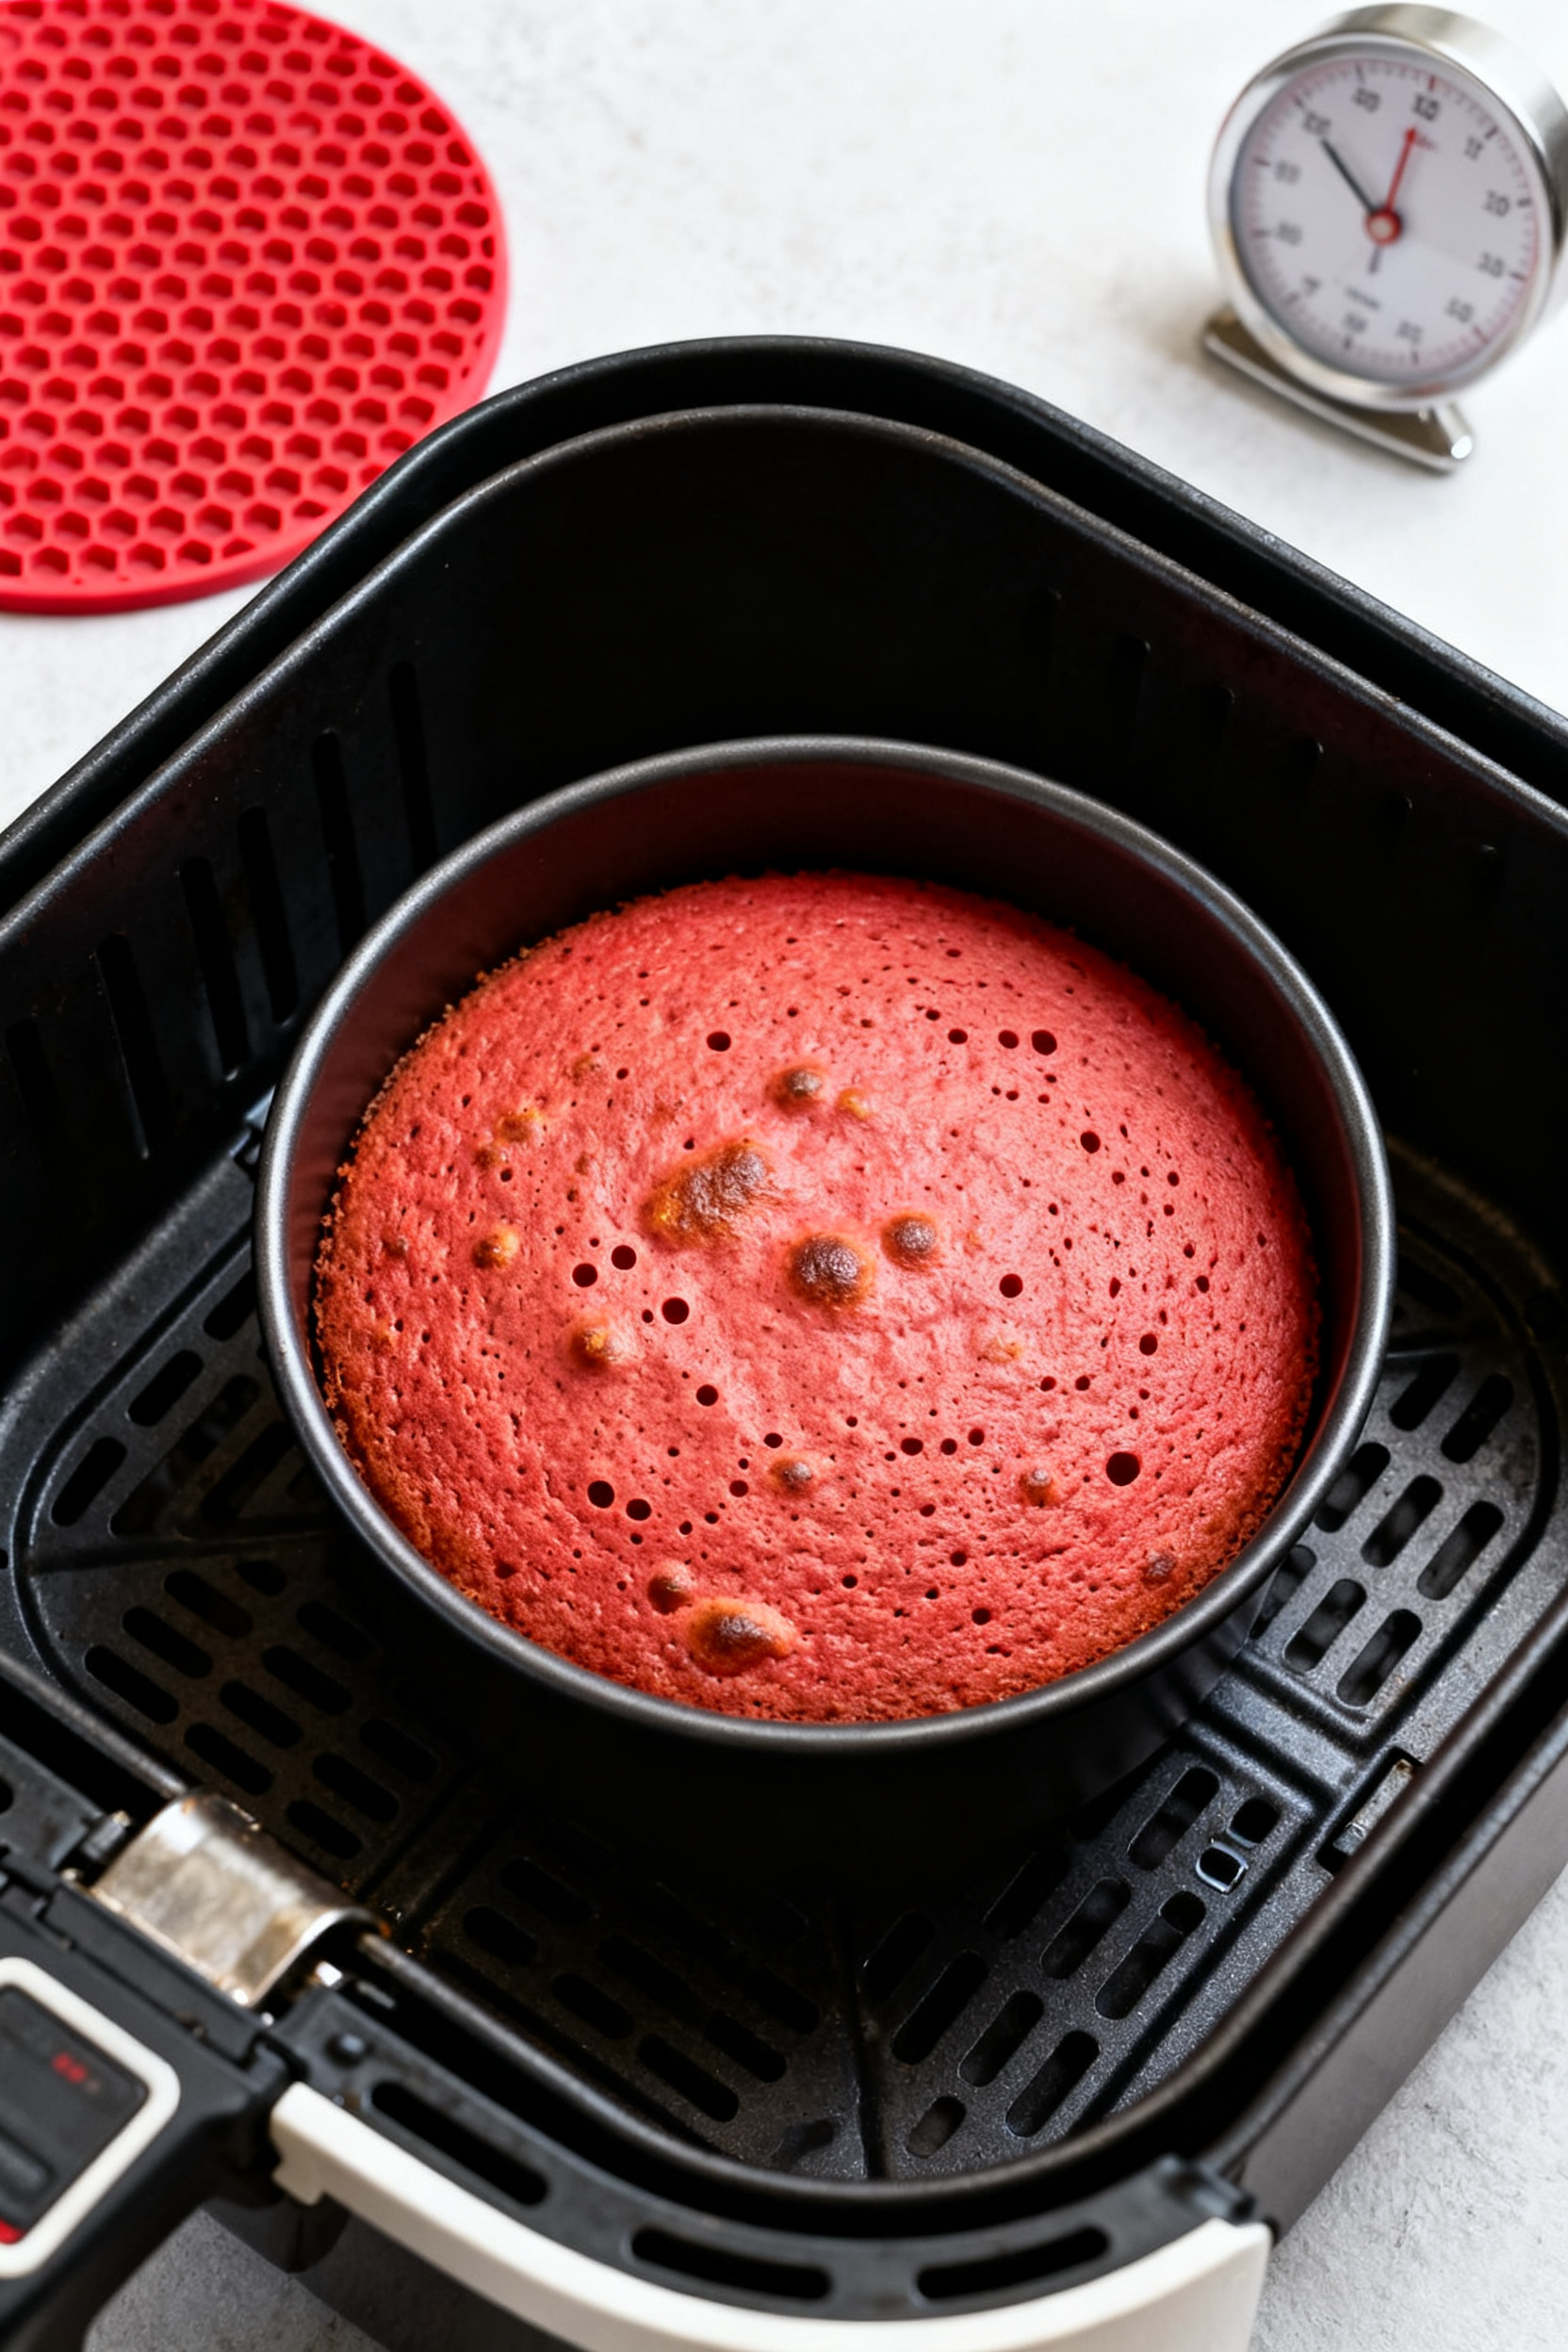
- Prep the pan and air fryer: Lightly grease a 6-inch cake pan and line the bottom with parchment. Spray again.
Preheat your air fryer to 320°F (160°C) for 3–5 minutes if your unit requires preheating.
- Combine dry ingredients: In a medium bowl, whisk flour, sugar, cocoa powder, baking soda, and salt until no cocoa clumps remain.
- Mix wet ingredients: In a separate bowl, whisk buttermilk, oil, egg, vanilla, vinegar, and red gel food coloring. Start with 1 teaspoon coloring, then add more to reach a deep red hue.
- Make the batter: Pour the wet mixture into the dry. Whisk just until combined and smooth.
Do not overmix—stop when you no longer see dry streaks.
- Fill the pan: Scrape batter into the prepared pan and smooth the top. Tap the pan on the counter twice to release air bubbles.
- Air fry: Place the pan in the air fryer basket. Cook at 320°F (160°C) for 22–28 minutes, rotating the pan halfway if your air fryer has hot spots.
It’s done when a toothpick comes out with a few moist crumbs, not wet batter.
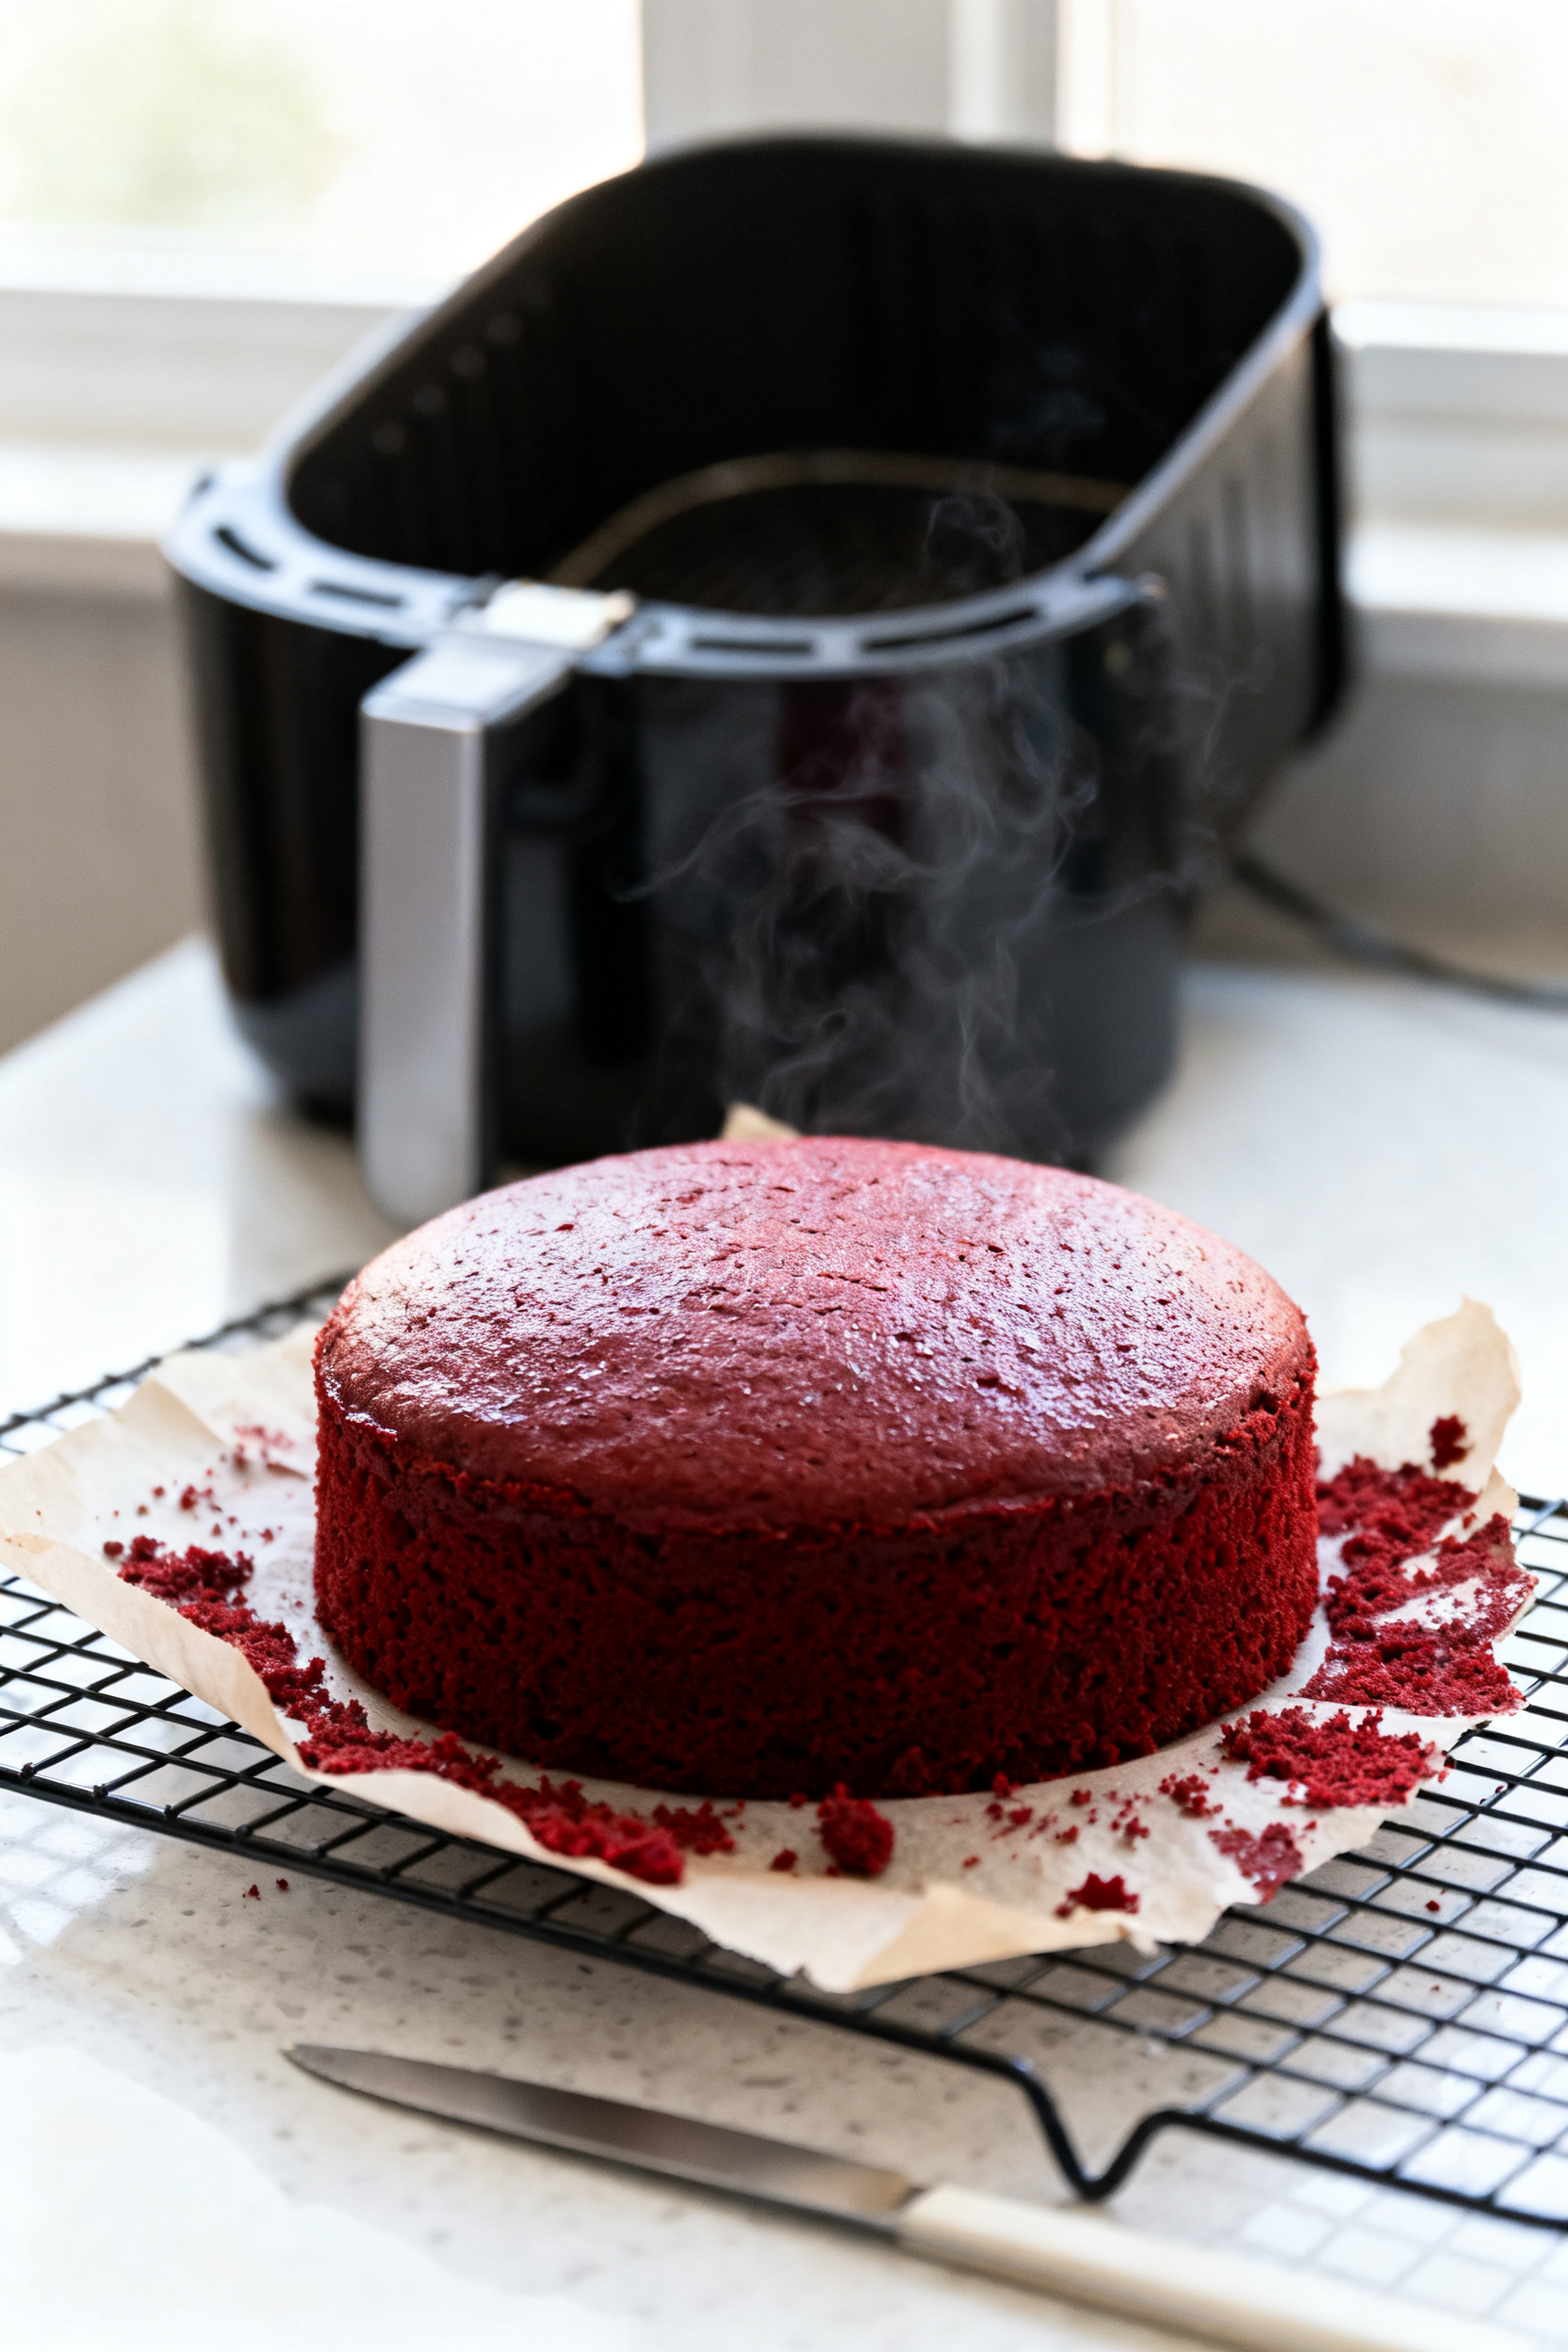
- Cool: Let the cake cool in the pan for 10 minutes. Run a thin knife around the edge, then turn onto a rack. Peel off parchment and cool completely, about 45–60 minutes.
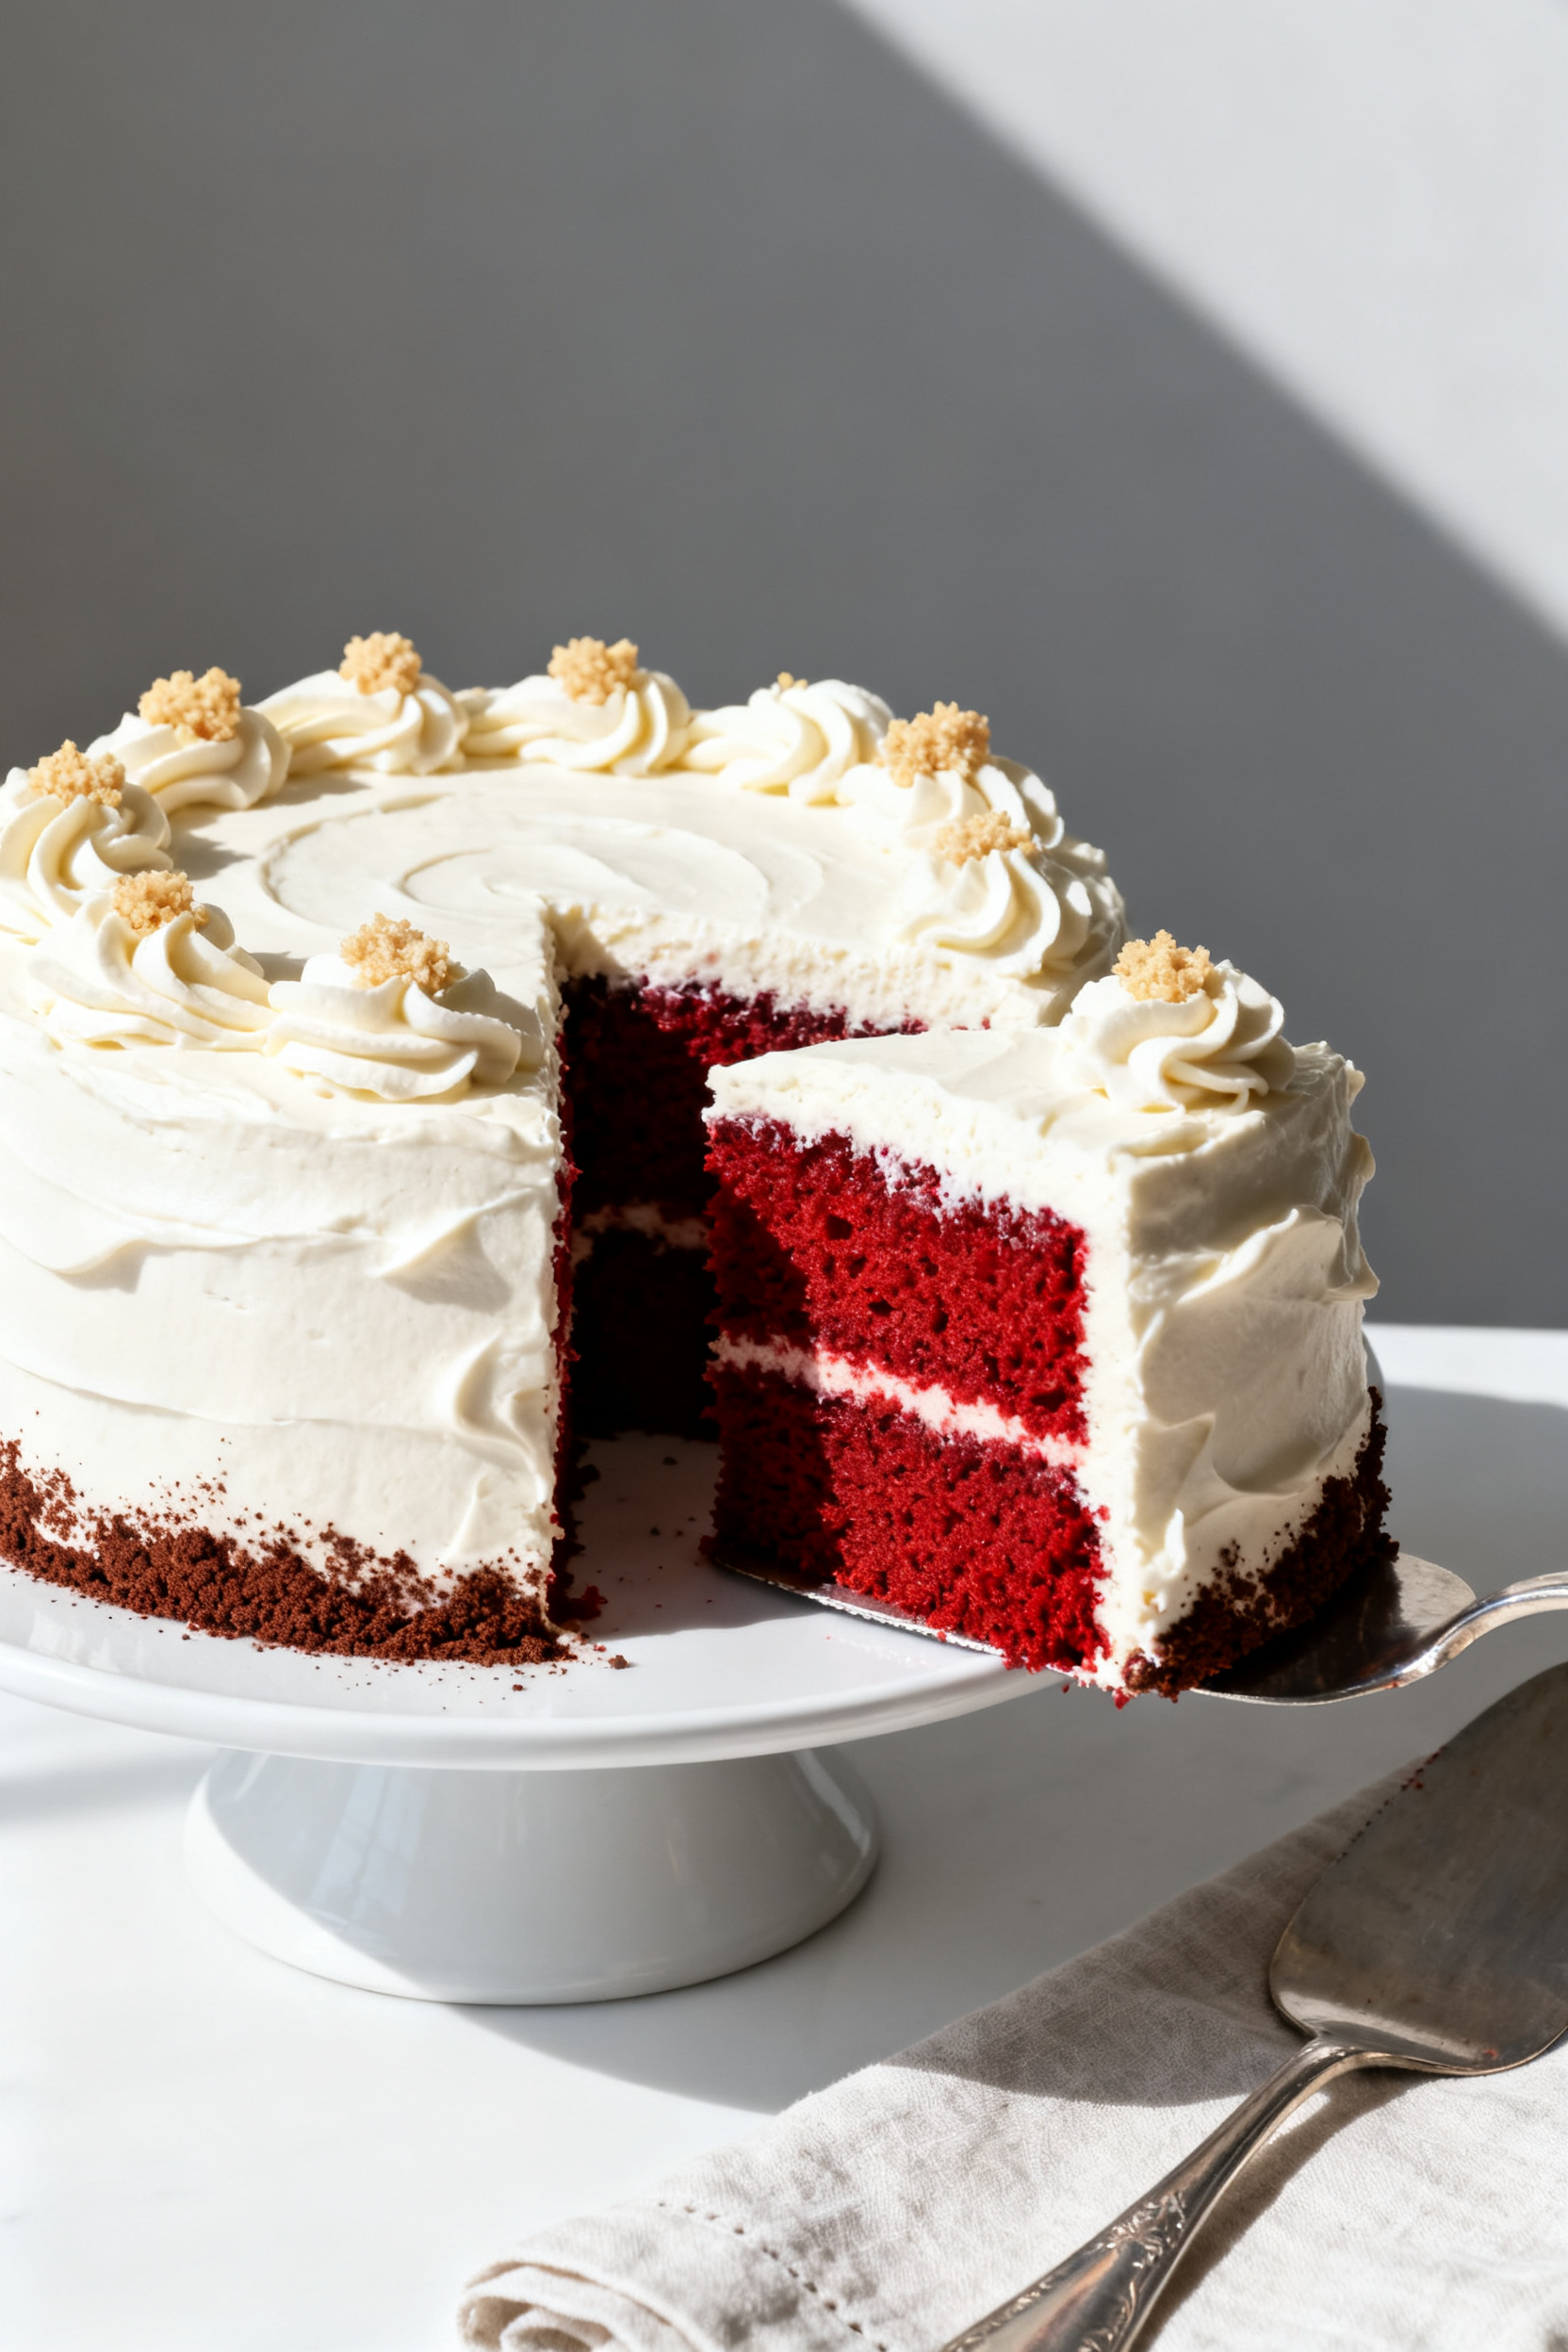
- Make the frosting: Beat cream cheese and butter until smooth.
Add powdered sugar, vanilla, and a pinch of salt. Beat until fluffy, 1–2 minutes. Adjust thickness with a teaspoon of milk if needed, or add more powdered sugar for a stiffer frosting.
- Frost and serve: Once the cake is fully cool, spread frosting on top and down the sides.
For a simple finish, keep it as a single layer. Slice and enjoy.
How to Store
- Unfrosted cake: Wrap tightly in plastic and keep at room temperature for up to 2 days, or refrigerate for up to 5 days.
- Frosted cake: Because of the cream cheese, store covered in the refrigerator for up to 4 days. Let slices stand at room temp 20–30 minutes before serving for best texture.
- Freezing: Wrap unfrosted cake in plastic and foil, then freeze up to 2 months.
Thaw overnight in the fridge. Frost after thawing.
Benefits of This Recipe
- Faster bake time: Air fryers preheat in minutes, so cake is on the table sooner.
- Energy efficient: You’re heating a compact space, not the whole oven.
- Consistent results in small batches: Great for portion control and quick celebrations.
- Beginner-friendly: Simple batter method with familiar pantry ingredients.
- Customizable: Easy to adapt to cupcakes or minis with the same batter.
What Not to Do
- Don’t skip parchment: Air fryer baskets and pans can run hot—parchment prevents sticking and tearing.
- Don’t overmix: Overworking the batter tightens gluten and leads to a tough cake.
- Don’t use liquid food coloring excessively: Too much liquid thins the batter. Use gel for vibrant color without altering texture.
- Don’t crank the heat: Higher temps brown the top fast and leave the center underbaked.
Stick to 320°F.
- Don’t frost a warm cake: Warm cake melts cream cheese frosting and turns it soupy.
Alternatives
- Pan size: No 6-inch pan? Use two 4-inch pans and start checking at 14–16 minutes.
- Cupcakes: Line silicone muffin cups and fill 2/3 full. Air fry at 320°F for 12–15 minutes.
- Dairy-free: Swap buttermilk with plant milk + acid (1/2 cup almond or soy milk + 1 teaspoon vinegar).
Use dairy-free cream cheese and butter.
- Gluten-free: Use a 1:1 gluten-free flour blend that includes xanthan gum. Let the batter rest 10 minutes before baking.
- Less food coloring: Reduce gel to 1/2 teaspoon or skip it. Flavor stays the same; the cake will be a light cocoa color.
- Oil alternatives: Use melted neutral coconut oil or light olive oil.
Avoid strongly flavored oils.
FAQ
Can I bake this in a regular oven?
Yes. Use the same pan and bake at 350°F (175°C) for 22–28 minutes. Start checking at 20 minutes.
A toothpick should come out with a few moist crumbs.
Why is there vinegar in red velvet cake?
Vinegar reacts with baking soda to create lift and helps keep the crumb tender. It also enhances the tang that makes red velvet taste distinct.
Do I have to use buttermilk?
Buttermilk adds flavor and moisture. If you don’t have it, make a quick version: 1/2 cup milk plus 1 1/2 teaspoons vinegar or lemon juice.
Let it sit 5 minutes before using.
My cake browned too fast on top. What should I do?
Tent the pan loosely with foil and continue baking. You can also drop the temperature to 300°F and add a few extra minutes until the center is set.
Can I double the recipe?
You can, but bake in batches.
Overcrowding the air fryer prevents even airflow. Alternatively, use a larger air fryer-safe pan and increase time slightly, checking doneness with a toothpick.
What kind of cocoa should I use?
Use natural unsweetened cocoa. Dutch-processed cocoa can affect color and the acid-base balance, which may change texture and lift.
How do I know it’s done?
Look for edges pulling slightly from the pan, a springy top, and a toothpick with a few moist crumbs.
If it’s wet, add 2–3 more minutes and check again.
Can I make it ahead?
Yes. Bake the cake a day ahead, wrap and refrigerate, then frost the day you serve. The flavor actually improves slightly after resting.
Wrapping Up
Air Fryer Red Velvet Cake gives you all the nostalgic flavor in a fast, manageable format.
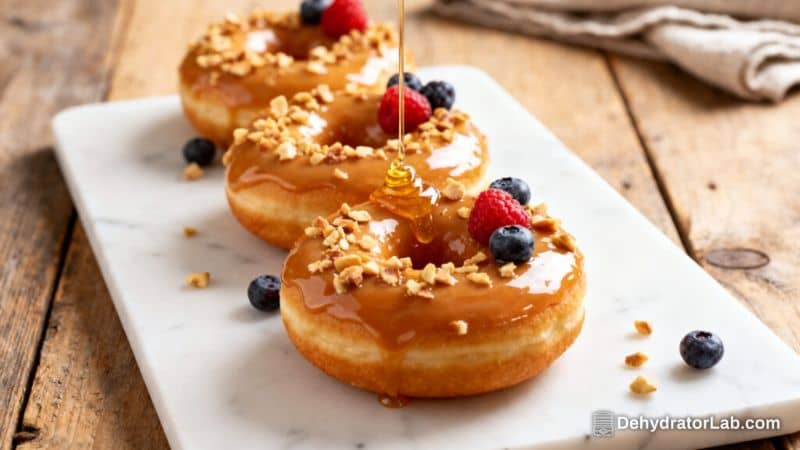
It’s tender, beautifully colored, and pairs perfectly with tangy cream cheese frosting. Whether you want a small celebration cake or a quick weekend treat, this method delivers bakery-quality results without fuss. Keep the temperature moderate, don’t overmix, and let it cool before frosting—you’ll be set for a perfect slice every time. If you enjoy this kind of small celebration cake, our Air Fryer Carrot Cake With Cream Cheese Frosting and Air Fryer Cheesecake Bites are great next bakes, and for a chocolate fix, try our Air Fryer Fudgy Brownies.
Enjoy!
Air Fryer Red Velvet Cake – Classic Flavor, Faster Bake
Ingredients
- All-purpose flour – 1 cup, spooned and leveled
- Granulated sugar – 3/4 cup
- Unsweetened cocoa powder – 1 tablespoon (natural, not Dutch-processed)
- Baking soda – 1/2 teaspoon
- Fine salt – 1/4 teaspoon
- Buttermilk – 1/2 cup, at room temperature
- Neutral oil (canola or vegetable) – 1/3 cup
- Large egg – 1, at room temperature
- Vanilla extract – 1 teaspoon
- White vinegar – 1 teaspoon
- Red gel food coloring – about 1–2 teaspoons (gel gives vibrant color without thinning the batter)
- Nonstick spray or butter – for the pan
- Cream cheese – 4 ounces, softened
- Unsalted butter – 2 tablespoons, softened
- Powdered sugar – 1 cup, sifted
- Vanilla extract – 1/2 teaspoon
- Pinch of salt
Instructions
- Prep the pan and air fryer: Lightly grease a 6-inch cake pan and line the bottom with parchment. Spray again.Preheat your air fryer to 320°F (160°C) for 3–5 minutes if your unit requires preheating.
- Combine dry ingredients: In a medium bowl, whisk flour, sugar, cocoa powder, baking soda, and salt until no cocoa clumps remain.
- Mix wet ingredients: In a separate bowl, whisk buttermilk, oil, egg, vanilla, vinegar, and red gel food coloring. Start with 1 teaspoon coloring, then add more to reach a deep red hue.
- Make the batter: Pour the wet mixture into the dry. Whisk just until combined and smooth.Do not overmix—stop when you no longer see dry streaks.
- Fill the pan: Scrape batter into the prepared pan and smooth the top. Tap the pan on the counter twice to release air bubbles.
- Air fry: Place the pan in the air fryer basket. Cook at 320°F (160°C) for 22–28 minutes, rotating the pan halfway if your air fryer has hot spots.It’s done when a toothpick comes out with a few moist crumbs, not wet batter.
- Cool: Let the cake cool in the pan for 10 minutes. Run a thin knife around the edge, then turn onto a rack. Peel off parchment and cool completely, about 45–60 minutes.
- Make the frosting: Beat cream cheese and butter until smooth.Add powdered sugar, vanilla, and a pinch of salt. Beat until fluffy, 1–2 minutes. Adjust thickness with a teaspoon of milk if needed, or add more powdered sugar for a stiffer frosting.
- Frost and serve: Once the cake is fully cool, spread frosting on top and down the sides.For a simple finish, keep it as a single layer. Slice and enjoy.
Printable Recipe Card
Want just the essential recipe details without scrolling through the article? Get our printable recipe card with just the ingredients and instructions.