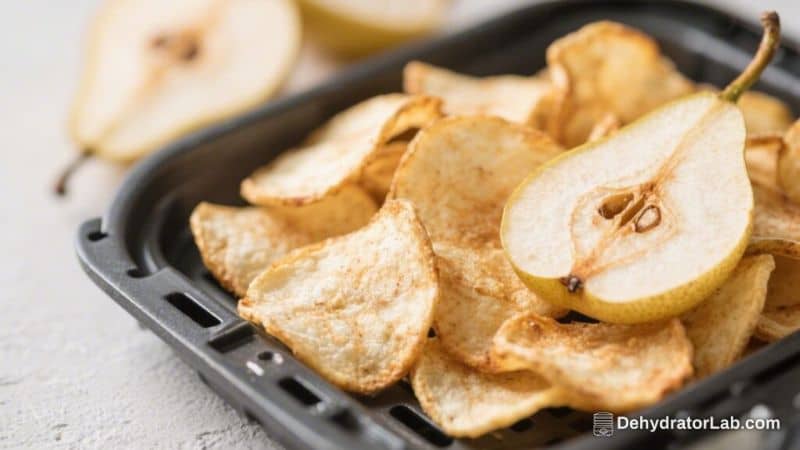
Pear chips are a simple, crisp snack that tastes like candy but comes from whole fruit. With an air fryer, you can make them fast—no oven marathon, no complicated steps. They’re lightly sweet, warmly spiced if you like, and surprisingly crunchy.
Eat them on their own, sprinkle them over yogurt, or pack them in lunch boxes. Once you try them, you’ll wonder why you ever bought store-bought chips in the first place.
In this article:
Why This Recipe Works
This recipe leans on the air fryer’s quick, even heat to pull moisture from thin pear slices, giving you a crisp finish without deep frying or long bake times. Pears naturally have plenty of sugar, so they caramelize just enough at the edges, creating a gentle sweetness without added sugar.
A touch of lemon keeps the slices from browning and brightens the flavor. Thin, even slices ensure consistent texture, while a brief preheat and a flip halfway through help the chips dry out evenly. You get that delicate snap with minimal effort.
What You’ll Need
- 2–3 ripe but firm pears (Bosc or Anjou are ideal; they hold shape well)
- 1 tablespoon lemon juice (to prevent browning)
- 1–2 teaspoons water (to dilute the lemon if needed)
- Optional sweetener: 1–2 teaspoons maple syrup, honey, or coconut sugar
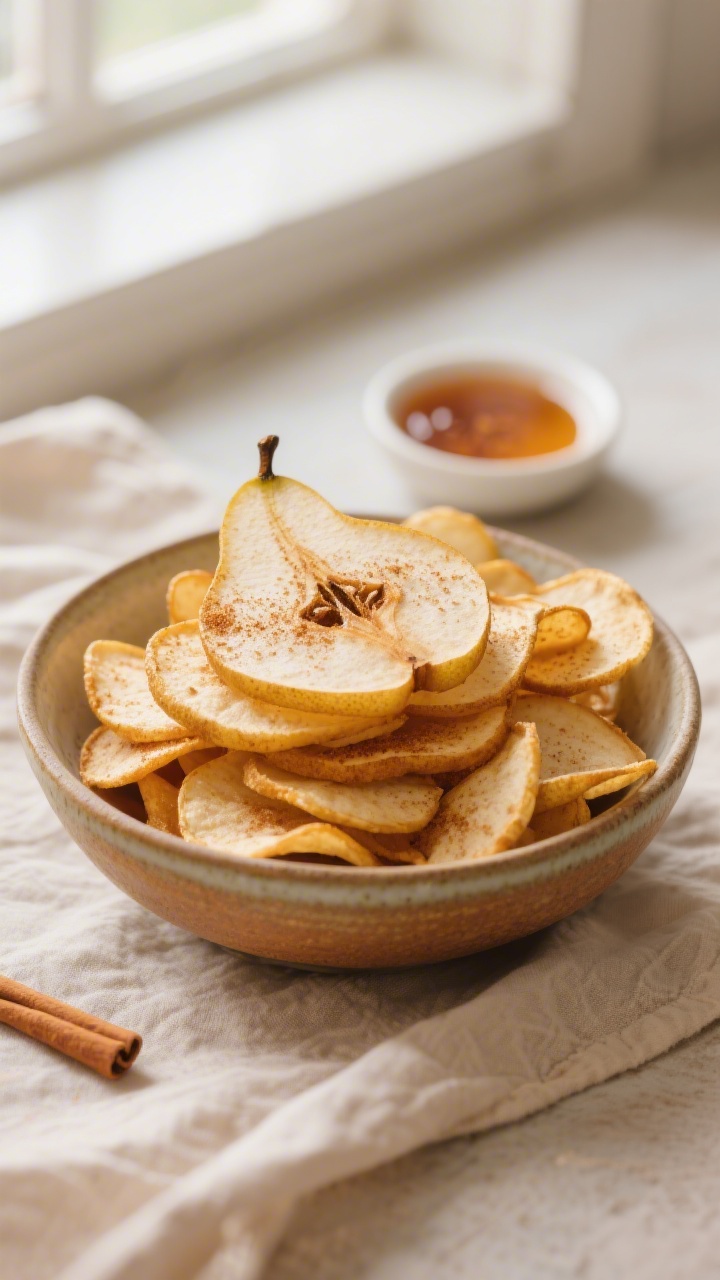
- Optional spices: 1/2 teaspoon ground cinnamon, pumpkin spice, or a pinch of cardamom
- Optional add-ons: A light sprinkle of flaky sea salt or vanilla powder
- Equipment: Air fryer, sharp knife or mandoline, small bowl, parchment liner or light oil spray
Instructions
- Preheat your air fryer to 300°F (150°C) for 3–5 minutes.
A warm basket kickstarts even drying and helps prevent steaming.
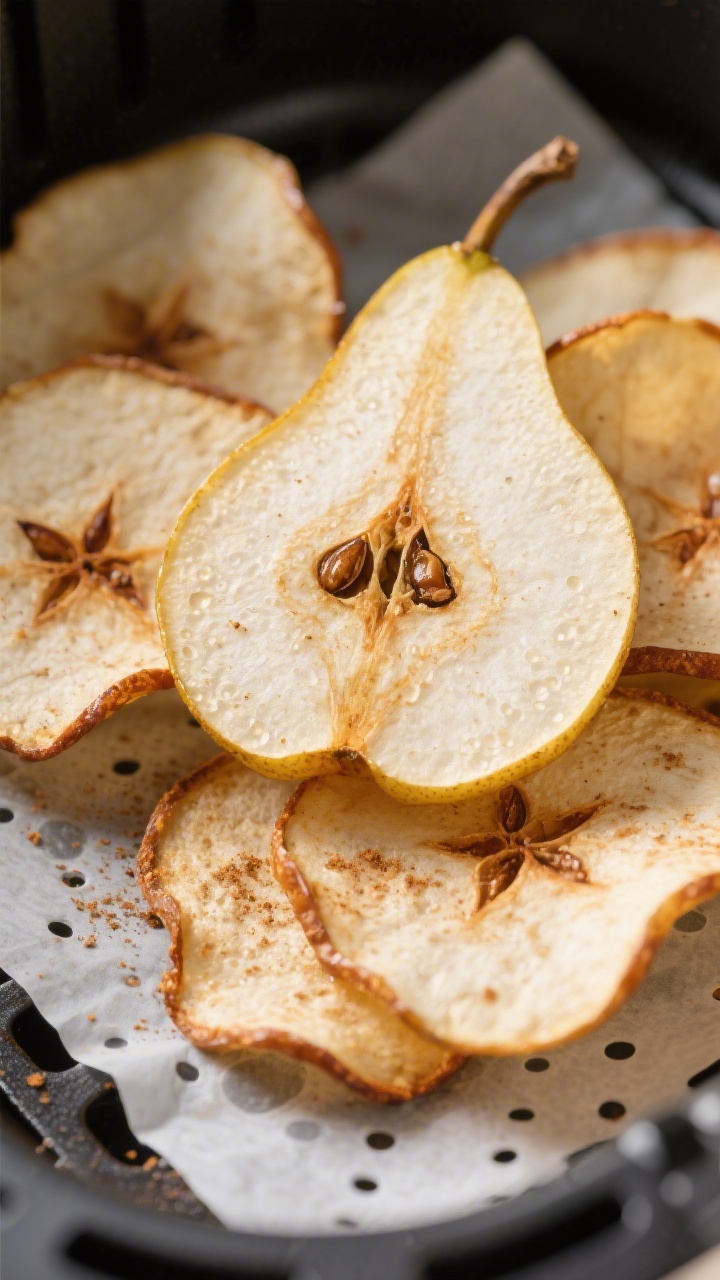
- Prep the pears. Rinse and dry them. You can leave the skin on for extra fiber and a pretty edge. Slice off the stem and base.
Using a sharp knife or mandoline, slice into thin rounds, about 1/16–1/8 inch thick. Thinner slices get crispier.
- Core if you like. If you’re slicing into rounds, the seeds will form a cute star in the center. You can poke them out with the tip of a knife, or leave them for looks and extra crunch.
- Mix the lemon bath. In a small bowl, stir together the lemon juice and water.
This keeps the pears from oxidizing. If using a sweetener, whisk it in now to lightly coat and help with caramelization.
- Toss gently. Dip or brush both sides of each slice with the lemon mixture. If using spices, sprinkle a small amount over the slices.
Don’t overdo it—too much sugar or spice can burn.
- Prepare the basket. Place a perforated parchment liner in the basket or give it a quick spray of oil. This helps prevent sticking, especially if you added a sweetener.
- Arrange the slices. Lay pears in a single layer with minimal overlap. Crowding leads to soggy chips.
Work in batches as needed.
- Air fry. Cook at 300°F (150°C) for 12–16 minutes. Flip halfway through to promote even drying. Start checking at the 10-minute mark; thin slices may finish sooner.
- Finish low and slow if needed. If the slices are still soft, reduce to 275°F (135°C) and continue for 3–6 more minutes. Look for edges that feel dry and centers with little to no bend.
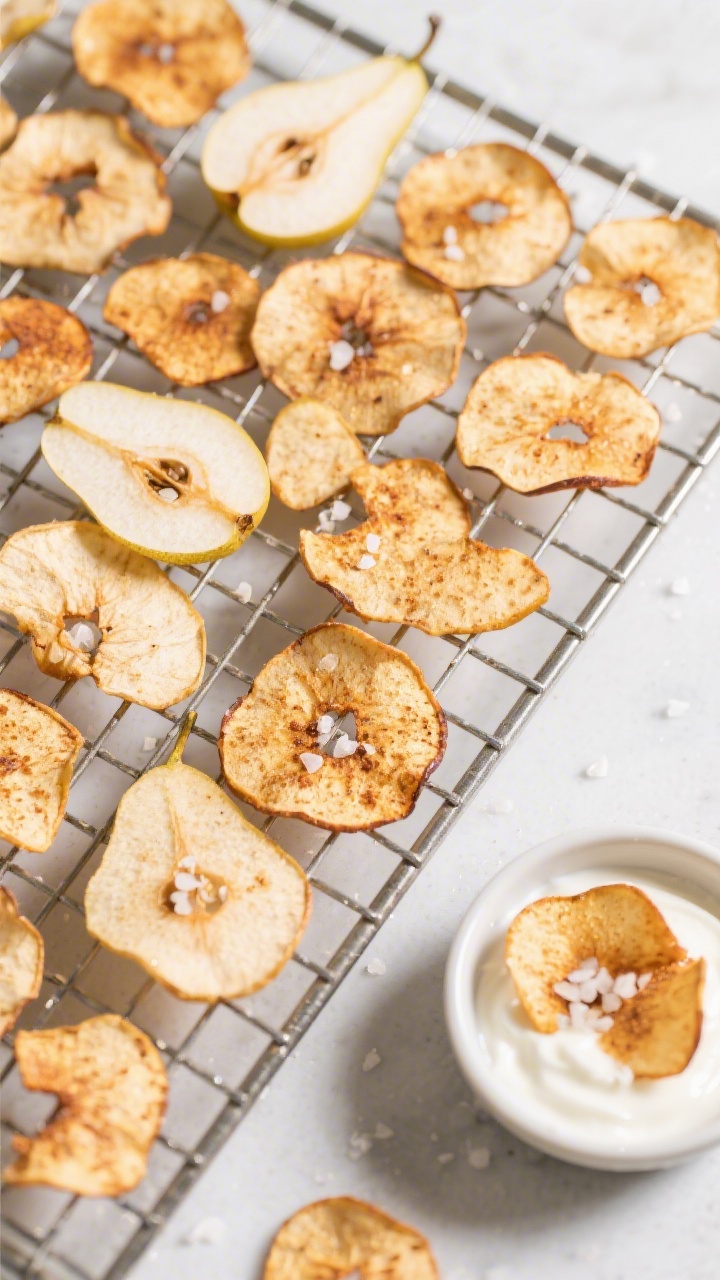
- Cool to crisp. Transfer chips to a wire rack and let them cool completely, about 10–15 minutes.
They crisp up more as they cool. If still a bit soft, return to the air fryer for 2–3 more minutes at 275°F (135°C).
- Repeat with remaining slices. Keep each batch consistent in thickness for uniform results.
How to Store
- Room temperature: Store cooled chips in an airtight container for up to 5 days. Add a small packet of silica gel (food-safe) or a teaspoon of uncooked rice wrapped in a paper towel to absorb moisture.
- Re-crisping: If they soften, pop them back in the air fryer at 275°F (135°C) for 2–4 minutes, then cool again on a rack.
- Avoid the fridge: Refrigeration adds moisture and can make chips chewy.
Benefits of This Recipe
- Fast and fuss-free: Ready in under 30 minutes with minimal prep.
- Wholesome snack: Made from whole fruit, with fiber and natural sweetness.
- Customizable: Sweet or savory, spiced or plain—make it your own.
- Budget-friendly: A great way to use up pears before they over-ripen.
- Kid-approved: Crunchy, sweet, and easy to pack for school or work.
Pitfalls to Watch Out For
- Slices too thick: They’ll stay chewy.
Aim for 1/16–1/8 inch for crisp chips.
- Overcrowding the basket: This traps steam and prevents crisping. Keep a single, even layer.
- Too much sugar or honey: Excess sweetener can burn. Use a light hand or skip it.
- Skipping the cool-down: Chips crisp as they cool.
Don’t judge doneness right out of the fryer.
- High heat from the start: Going above 320°F (160°C) can darken the edges before the centers dry.
Alternatives
- Flavor twists: Try cinnamon-sugar, chai spice, cocoa powder with a pinch of sugar, or a dusting of chili and lime zest for a sweet-heat combo.
- Savory route: Lightly brush with olive oil and sprinkle sea salt, cracked pepper, and a hint of smoked paprika.
- Different pears: Bosc and Anjou hold up best, but Bartlett works if it’s still firm. Softer pears will need slightly lower heat and a longer time.
- No lemon? Use orange juice or a splash of apple cider vinegar to prevent browning.
- No air fryer? Bake on parchment-lined sheets at 225°F (110°C) for 60–90 minutes, flipping halfway, until dry and lightly golden. Prop the oven door open with a wooden spoon for the last 15 minutes to release steam.
FAQ
Do I need to peel the pears?
No.
The peel adds color, fiber, and a nice texture. If you prefer a smoother chip, you can peel them, but it’s optional.
How do I get them super crispy?
Slice thin and even, avoid crowding, flip halfway, and let them cool fully on a rack. If they’re still soft, return them to the air fryer at a lower temperature for a few minutes.
Can I make them without any added sugar?
Absolutely.
Pears are sweet on their own. The chips will still caramelize slightly and taste great without extra sugar.
What if my chips keep turning brown too fast?
Lower the temperature to 275°F (135°C) and extend the time. Make sure your slices got a light lemon dip and avoid heavy sugar coatings that can burn.
Which pear variety is best?
Bosc and Anjou are favorites because they’re firm and hold their shape.
Bartlett can work if it’s not too ripe. Overripe pears tend to get mushy.
How thin should I slice the pears?
Aim for 1/16–1/8 inch (1.5–3 mm). A mandoline helps with consistency, but a sharp knife and a steady hand work too.
Can I double the recipe?
Yes, but cook in batches.
Overloading the basket creates steam and leads to chewy chips. Store finished chips while you air fry the next batch.
Are these chips good for kids?
Yes. They’re crunchy, lightly sweet, and free from artificial additives.
Great for lunch boxes or after-school snacks.
Can I use frozen pears?
Not ideal. Frozen pears release extra moisture and can get soggy. Fresh, firm pears give the best results.
How can I prevent sticking?
Use a perforated parchment liner or lightly spray the basket.
Avoid heavy syrup coatings that caramelize and glue the slices down.
In Conclusion
Air Fryer Pear Chips are a quick, wholesome snack with a satisfying crunch and natural sweetness. With a handful of ingredients and a few smart tips, you can make a batch in minutes. Keep the slices thin, don’t crowd the basket, and let them cool to finish crisping.
They’re a simple win for busy days, lunch boxes, and guilt-free nibbling. Once you make them at home, you’ll keep coming back to this easy, reliable recipe.
Air Fryer Pear Chips – Light, Crispy, and Naturally Sweet
Ingredients
- 2–3 ripe but firm pears (Bosc or Anjou are ideal; they hold shape well)
- 1 tablespoon lemon juice (to prevent browning)
- 1–2 teaspoons water (to dilute the lemon if needed)
- Optional sweetener: 1–2 teaspoons maple syrup, honey, or coconut sugar
- Optional spices: 1/2 teaspoon ground cinnamon, pumpkin spice, or a pinch of cardamom
- Optional add-ons: A light sprinkle of flaky sea salt or vanilla powder
- Equipment: Air fryer, sharp knife or mandoline, small bowl, parchment liner or light oil spray
Instructions
- Preheat your air fryer to 300°F (150°C) for 3–5 minutes.A warm basket kickstarts even drying and helps prevent steaming.
- Prep the pears. Rinse and dry them. You can leave the skin on for extra fiber and a pretty edge. Slice off the stem and base.Using a sharp knife or mandoline, slice into thin rounds, about 1/16–1/8 inch thick. Thinner slices get crispier.
- Core if you like. If you’re slicing into rounds, the seeds will form a cute star in the center. You can poke them out with the tip of a knife, or leave them for looks and extra crunch.
- Mix the lemon bath. In a small bowl, stir together the lemon juice and water.This keeps the pears from oxidizing. If using a sweetener, whisk it in now to lightly coat and help with caramelization.
- Toss gently. Dip or brush both sides of each slice with the lemon mixture. If using spices, sprinkle a small amount over the slices.Don’t overdo it—too much sugar or spice can burn.
- Prepare the basket. Place a perforated parchment liner in the basket or give it a quick spray of oil. This helps prevent sticking, especially if you added a sweetener.
- Arrange the slices. Lay pears in a single layer with minimal overlap. Crowding leads to soggy chips.Work in batches as needed.
- Air fry. Cook at 300°F (150°C) for 12–16 minutes. Flip halfway through to promote even drying. Start checking at the 10-minute mark; thin slices may finish sooner.
- Finish low and slow if needed. If the slices are still soft, reduce to 275°F (135°C) and continue for 3–6 more minutes. Look for edges that feel dry and centers with little to no bend.
- Cool to crisp. Transfer chips to a wire rack and let them cool completely, about 10–15 minutes.They crisp up more as they cool. If still a bit soft, return to the air fryer for 2–3 more minutes at 275°F (135°C).
- Repeat with remaining slices. Keep each batch consistent in thickness for uniform results.
Printable Recipe Card
Want just the essential recipe details without scrolling through the article? Get our printable recipe card with just the ingredients and instructions.