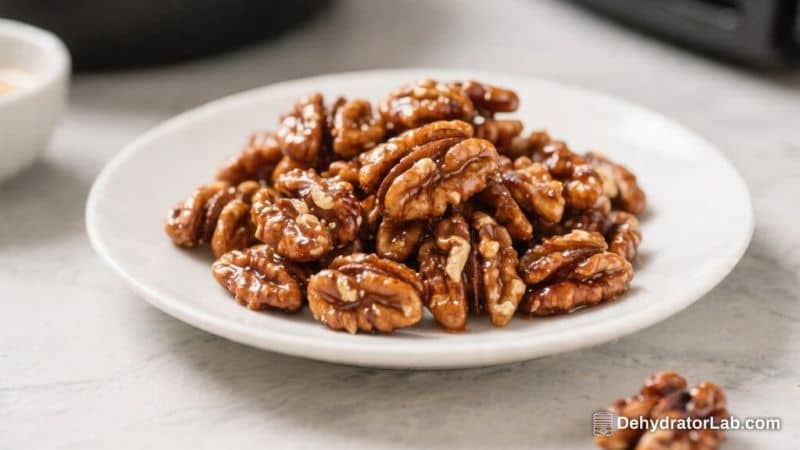
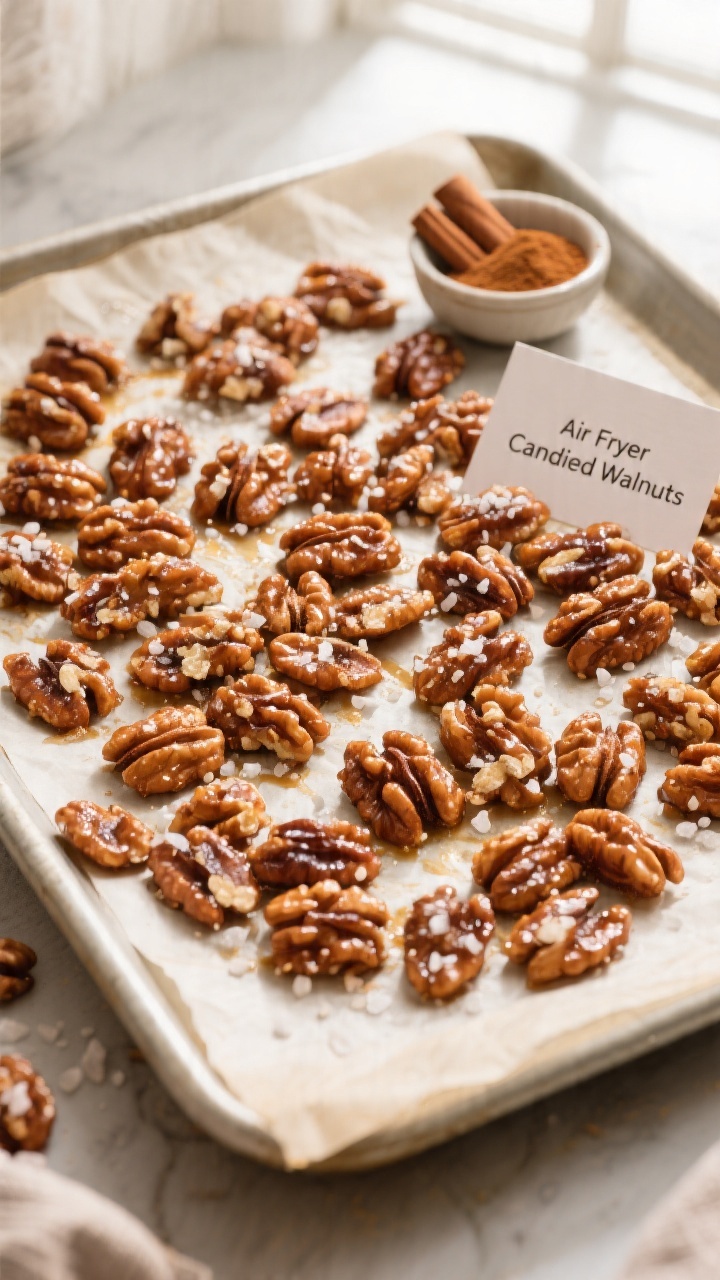
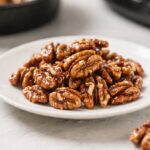
If you love a quick treat that tastes like it came from a specialty shop, these air fryer candied walnuts are for you. They’re crisp, shiny, and sweet with a hint of warm spice, and they come together in about 15 minutes. No stovetop stirring for ages and no tricky thermometers—just toss, air fry, and cool.
They’re perfect for snacking, sprinkling on salads, or gifting in a cute jar. Once you make a batch, you’ll find excuses to keep them around.
In this article:
What Makes This Special
- Fast and fuss-free: The air fryer speeds up caramelization and crisps the coating without constant stirring.
- Big flavor, minimal ingredients: Just a handful of pantry staples make glossy, crunchy walnuts every time.
- Versatile: Eat them as a snack, top yogurt or oatmeal, elevate a cheese board, or add crunch to salads.
- Cleaner than stovetop candying: Less mess, less oil, and no splatter.
- Customizable: Adjust sweetness, swap spices, or add a touch of heat to suit your taste.
Ingredients
- 2 cups walnut halves (lightly broken pieces are fine)
- 1/3 cup granulated sugar (or use half white, half brown for a deeper caramel note)
- 1 tablespoon maple syrup or honey (helps the coating stick and adds shine)
- 1 large egg white (room temperature; for a crisp shell—see Alternatives for vegan swap)
- 1 teaspoon ground cinnamon
- 1/4 teaspoon fine sea salt
- 1/4 teaspoon vanilla extract (optional but lovely)
- Pinch of cayenne or ground ginger (optional, for gentle heat or warmth)
- Nonstick spray or a light brush of neutral oil for the air fryer basket
Step-by-Step Instructions
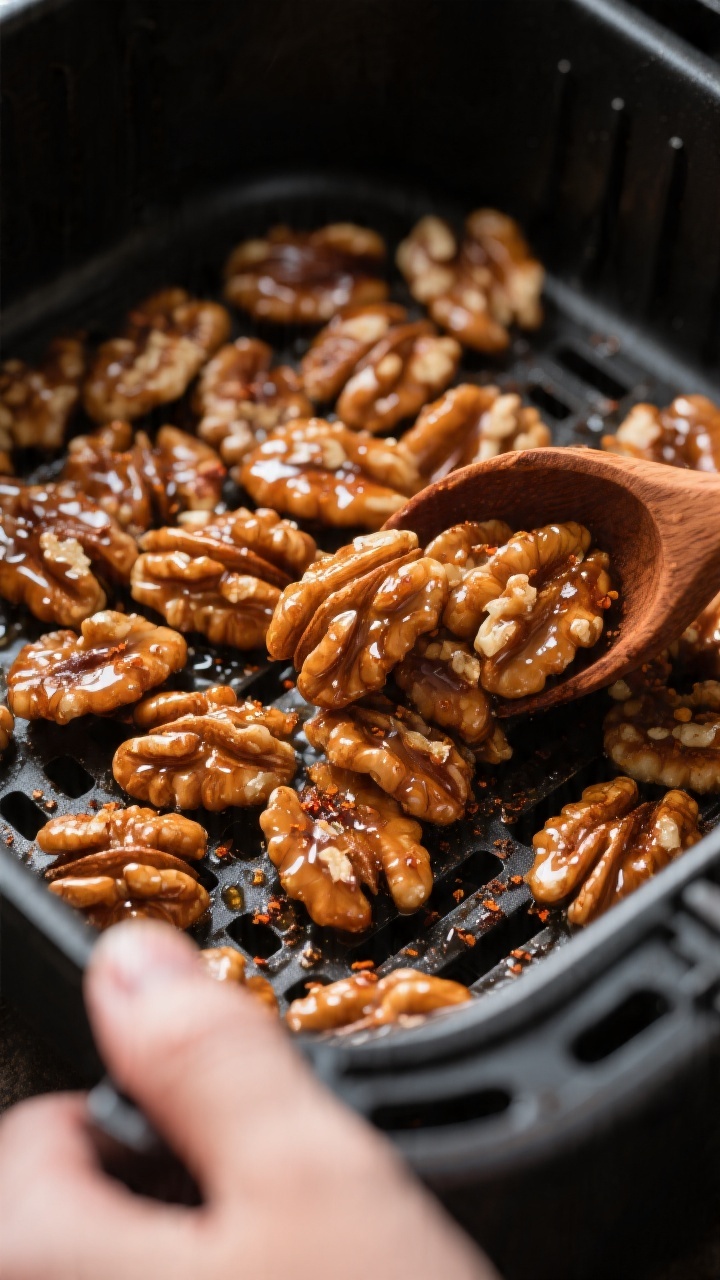
- Preheat the air fryer: Set to 300°F (150°C). A slightly lower temperature helps prevent scorching the sugar.
- Prep the basket: Lightly spray or brush the air fryer basket or tray to reduce sticking.
- Whisk the coating: In a medium bowl, whisk the egg white until frothy and light, about 30–45 seconds.
Stir in sugar, maple syrup (or honey), cinnamon, salt, vanilla, and optional cayenne or ginger until a thick, glossy mixture forms.
- Coat the walnuts: Add walnuts and toss until every piece is evenly covered. The mixture should cling without pooling at the bottom.
- Arrange in the basket: Spread walnuts in a single layer. Some touching is fine, but avoid a deep pile so they crisp evenly.
- Air fry, stir, repeat: Cook for 6 minutes, then open and gently stir or shake to break up clusters.
Cook another 4–6 minutes, stirring once more if needed. Total time is usually 10–12 minutes.
- Watch for doneness: They’re ready when the coating looks dry and set, and the nuts are toasty and fragrant. If they still look wet, add 1–2 minutes, checking closely to avoid burning.
- Cool completely: Transfer walnuts to a parchment-lined baking sheet. Spread out and let cool 20–30 minutes.
The coating will harden as it cools, turning glassy and crisp.
- Break and enjoy: Once fully cool, break apart any large clusters. Taste and sprinkle a pinch of extra salt if you like contrast.
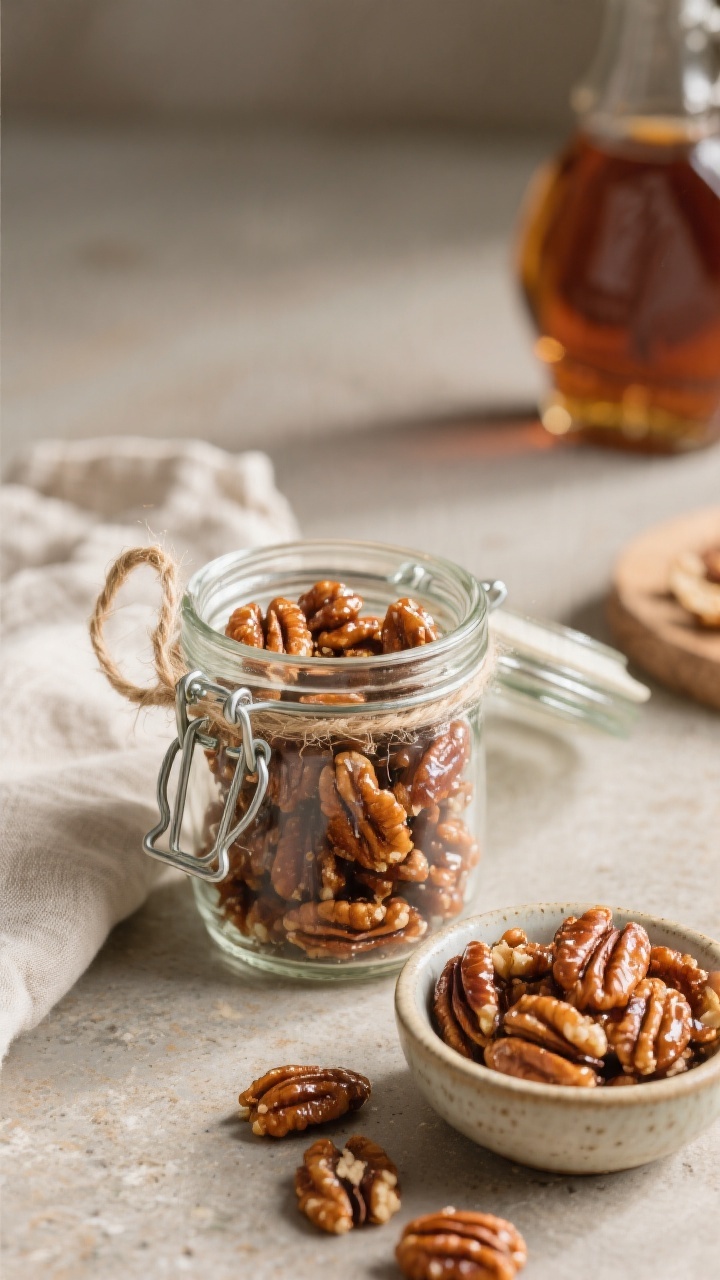
How to Store
- Room temperature: Keep in an airtight container for up to 2 weeks. Add a small sheet of parchment to absorb any excess moisture.
- Freezer: Store in a freezer-safe bag for up to 2 months.
Thaw uncovered at room temperature for 10–15 minutes to keep them crisp.
- Avoid humidity: Moisture softens the shell. Reseal the container promptly after snacking.
Why This is Good for You
- Heart-healthy fats: Walnuts are rich in omega-3 ALA, which supports heart and brain health.
- Protein and fiber: Together they help you feel satisfied, making a little go a long way.
- Less oil, more control: Air frying eliminates deep-frying and lets you manage sweetness and salt to taste.
- Antioxidants and minerals: Walnuts provide manganese, copper, and polyphenols that support overall wellness.
What Not to Do
- Don’t crank up the heat: High temps can scorch sugar and turn the nuts bitter. Stick to 300°F.
- Don’t skip stirring: Without a mid-cook stir, you’ll get clumps and uneven caramelization.
- Don’t leave them in the hot basket: Residual heat can overcook the sugar.
Move to a parchment-lined sheet to cool.
- Don’t rush the cooling: Warm nuts seem soft. They crisp as they cool—give them time.
- Don’t overcrowd: If your air fryer is small, cook in two batches for better texture.
Alternatives
- No egg white: Swap the egg white with 1 tablespoon aquafaba (liquid from canned chickpeas), whipped until frothy. It creates a similar crisp shell.
- Different sweeteners: Use all brown sugar for a deeper caramel, coconut sugar for a toasty note, or monk fruit/erythritol blends to lower sugar (watch closely; alternative sweeteners can brown faster or stay tacky).
- Spice blends: Try pumpkin pie spice, chai spice, or add orange zest for a bright twist.
For heat, add extra cayenne or a pinch of smoked paprika.
- Other nuts: Pecans candy beautifully; almonds work too but may need 1–2 extra minutes.
- Vegan option: Use aquafaba and maple syrup instead of egg white and honey.
FAQ
Why are my candied walnuts sticky after cooling?
They likely didn’t cook long enough or the basket was too crowded. Return them to the air fryer for 1–2 minutes at 300°F, then cool again on parchment. Humidity can also cause stickiness—store in an airtight container.
Can I skip the egg white?
Yes.
Use 1 tablespoon whipped aquafaba to mimic the binding and crisping effect. If you omit both, the coating may be thinner and less crunchy.
How do I prevent burning?
Keep the temperature at 300°F, stir halfway, and watch the last few minutes closely. Sugar goes from perfect to burnt quickly, especially in powerful air fryers.
Can I halve or double the recipe?
You can halve easily.
To double, cook in batches so the walnuts stay in a single layer; overcrowding leads to uneven texture.
What’s the best way to use candied walnuts?
Snack by the handful, top salads with goat cheese and apples, sprinkle over yogurt or vanilla ice cream, or add to a holiday cheese board. They also make great homemade gifts.
Do I need to roast the walnuts first?
No. They’ll toast as they candy.
If you want extra depth, lightly toast them at 300°F for 3–4 minutes before coating.
Can I reduce the sugar?
Yes, but the coating may be thinner and less glossy. Try reducing to 1/4 cup sugar plus 1 tablespoon maple syrup and adjust to taste.
Final Thoughts
Air fryer candied walnuts deliver all the crunchy, caramelized goodness you crave with hardly any effort. A few pantry staples, a quick toss, and a short air fry are all it takes.
Keep a jar on hand for easy snacking or last-minute dishes that need a little sweetness and crunch. Once you see how simple and reliable this method is, it’ll become a go-to in your kitchen. For more crunchy snacks, try our Honey Roasted Cashews or Seasoned Pecans.
Air Fryer Candied Walnuts – Crunchy, Sweet, and Ready in Minutes
Ingredients
- 2 cups walnut halves (lightly broken pieces are fine)
- 1/3 cup granulated sugar (or use half white, half brown for a deeper caramel note)
- 1 tablespoon maple syrup or honey (helps the coating stick and adds shine)
- 1 large egg white (room temperature; for a crisp shell—see Alternatives for vegan swap)
- 1 teaspoon ground cinnamon
- 1/4 teaspoon fine sea salt
- 1/4 teaspoon vanilla extract (optional but lovely)
- Pinch of cayenne or ground ginger (optional, for gentle heat or warmth)
- Nonstick spray or a light brush of neutral oil for the air fryer basket
Instructions
- Preheat the air fryer: Set to 300°F (150°C). A slightly lower temperature helps prevent scorching the sugar.
- Prep the basket: Lightly spray or brush the air fryer basket or tray to reduce sticking.
- Whisk the coating: In a medium bowl, whisk the egg white until frothy and light, about 30–45 seconds.Stir in sugar, maple syrup (or honey), cinnamon, salt, vanilla, and optional cayenne or ginger until a thick, glossy mixture forms.
- Coat the walnuts: Add walnuts and toss until every piece is evenly covered. The mixture should cling without pooling at the bottom.
- Arrange in the basket: Spread walnuts in a single layer. Some touching is fine, but avoid a deep pile so they crisp evenly.
- Air fry, stir, repeat: Cook for 6 minutes, then open and gently stir or shake to break up clusters.Cook another 4–6 minutes, stirring once more if needed. Total time is usually 10–12 minutes.
- Watch for doneness: They’re ready when the coating looks dry and set, and the nuts are toasty and fragrant. If they still look wet, add 1–2 minutes, checking closely to avoid burning.
- Cool completely: Transfer walnuts to a parchment-lined baking sheet. Spread out and let cool 20–30 minutes.The coating will harden as it cools, turning glassy and crisp.
- Break and enjoy: Once fully cool, break apart any large clusters. Taste and sprinkle a pinch of extra salt if you like contrast.
Printable Recipe Card
Want just the essential recipe details without scrolling through the article? Get our printable recipe card with just the ingredients and instructions.