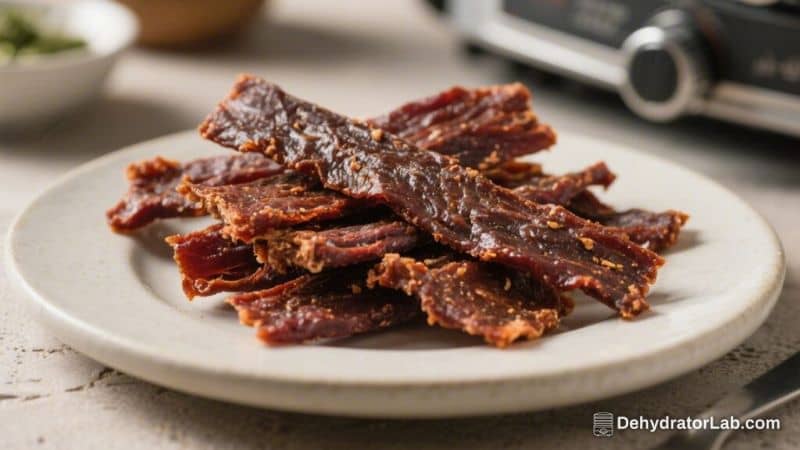
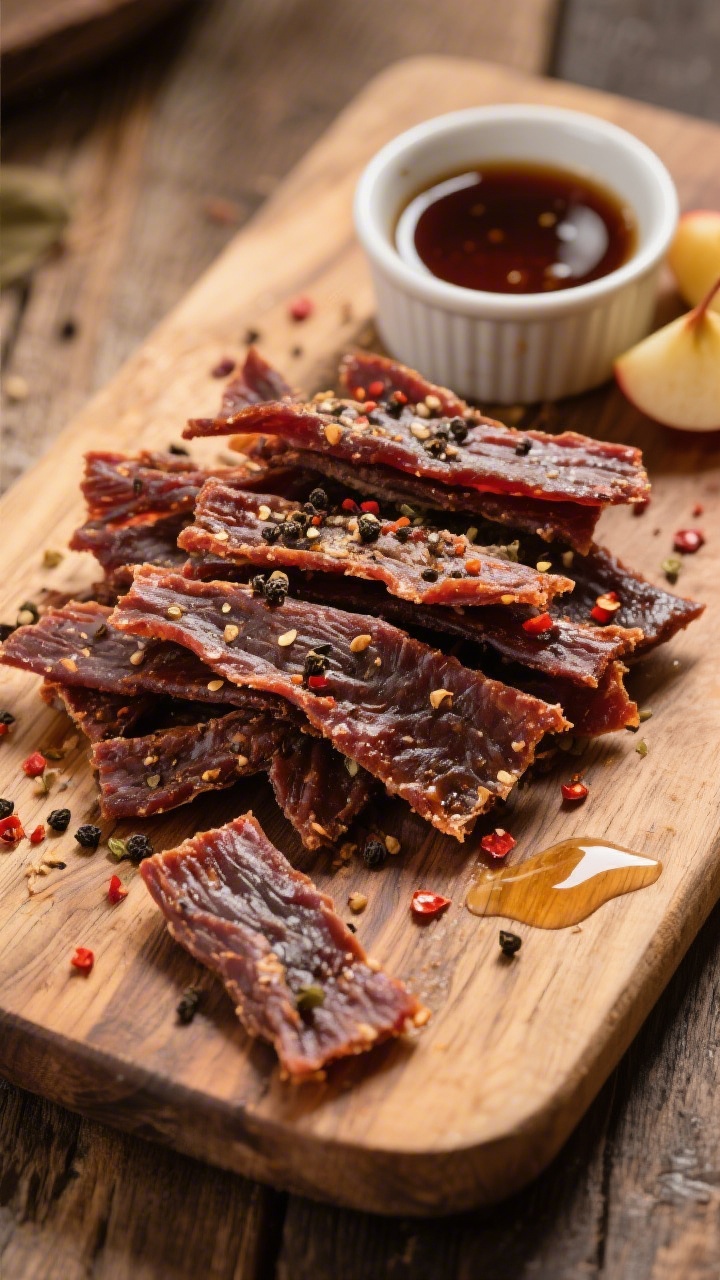
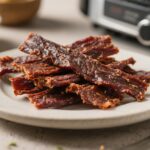
If you love jerky but don’t want to babysit an oven or buy a dehydrator, this air fryer venison jerky is for you. It’s lean, savory, and surprisingly simple to make at home. With a quick marinade and a few hours of gentle air frying, you’ll have a snack that’s high in protein and big on flavor.
The texture is pleasantly chewy, not brittle, and the seasoning hits all the right notes—salty, slightly sweet, and a little smoky.
In this article:
Why This Recipe Works
- Air fryer convenience: It mimics a dehydrator’s steady airflow, drying the meat evenly and faster than an oven.
- Balanced marinade: Soy sauce, brown sugar, and spices create a classic jerky profile with umami and a hint of sweetness.
- Lean meat advantage: Venison is naturally low in fat, so it dries cleanly and keeps a great chew.
- Temperature control: A low setting prevents overcooking and keeps the jerky tender while removing moisture.
- Customizable flavor: You can easily adjust heat, smoke, and sweetness to your taste.
What You’ll Need
- 2 pounds venison (backstrap, hindquarter, or other lean cut), trimmed of all silver skin and fat
- 1/2 cup soy sauce (low-sodium preferred)
- 2 tablespoons Worcestershire sauce
- 2 tablespoons brown sugar
- 1 tablespoon apple cider vinegar
- 1 teaspoon garlic powder
- 1 teaspoon onion powder
- 1 teaspoon black pepper, freshly ground
- 1 teaspoon smoked paprika (or regular paprika plus a drop or two of liquid smoke)
- 1/2–1 teaspoon crushed red pepper flakes (adjust for heat)
- Optional: 1 teaspoon liquid smoke for a deeper smoky note
- Optional: 1 teaspoon kosher salt if using low-sodium soy and you prefer saltier jerky
- Nonstick spray or a light brush of neutral oil for the basket
- Zip-top bag or shallow dish for marinating
- Paper towels and a wire rack (helpful for pat-drying)
Step-by-Step Instructions
- Partially freeze the venison. Place the trimmed venison in the freezer for 60–90 minutes. You want it firm, not rock-solid. This makes thin, even slicing much easier.
- Slice the meat. Cut the venison against the grain for a more tender chew or with the grain for a classic, slightly tougher jerky bite.
Aim for slices about 1/8 to 1/4 inch thick and as uniform as possible.
- Mix the marinade. In a bowl, whisk soy sauce, Worcestershire, brown sugar, apple cider vinegar, garlic powder, onion powder, black pepper, smoked paprika, and red pepper flakes. Add liquid smoke if using.
- Marinate. Add the meat to a zip-top bag or dish, pour in the marinade, and toss to coat. Press out air, seal, and refrigerate for at least 6 hours, ideally 12–24 hours.
Turn the bag once or twice for even coverage.
- Drain and dry. Remove slices from the marinade and lay them on paper towels or a wire rack. Pat dry thoroughly. Dry surfaces = better drying and less steaming in the air fryer.
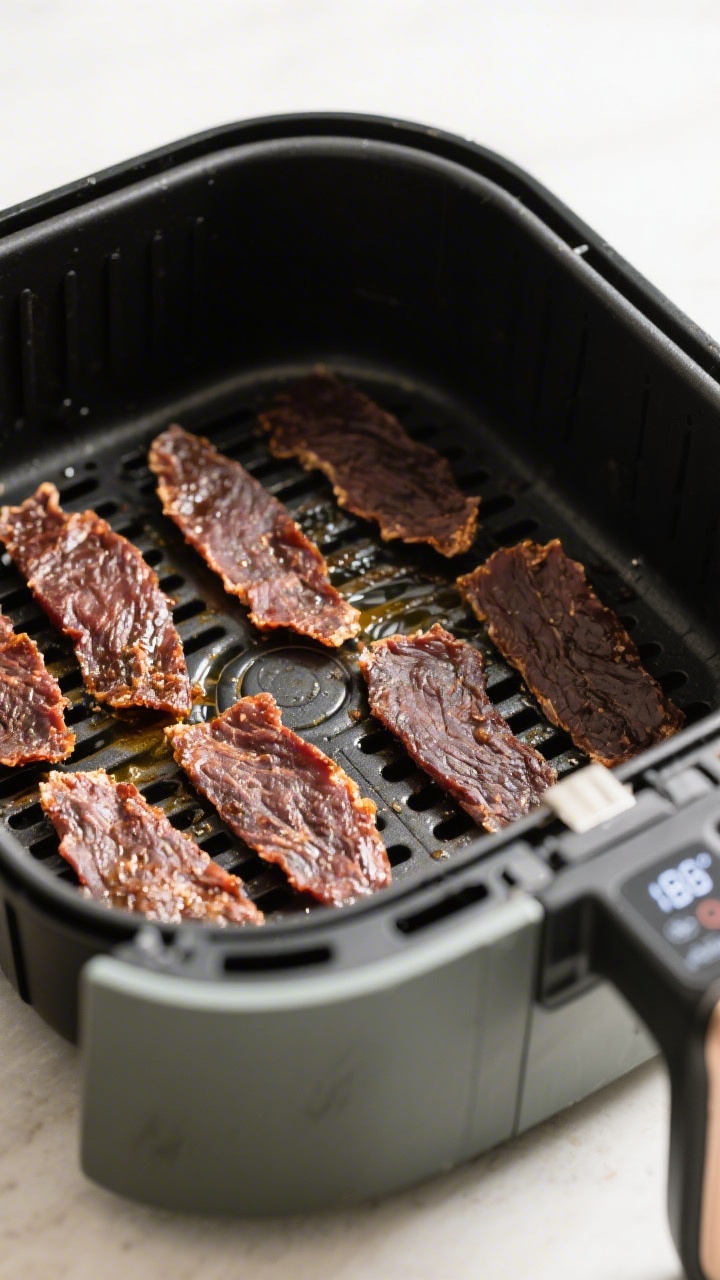
- Preheat the air fryer. Set to 175–180°F (80–82°C) if your model allows, or the lowest temperature setting. Lightly oil or spray the basket or trays to prevent sticking.
- Arrange the slices. Lay the venison in a single layer with a little space between pieces.
Don’t overlap. If you have trays, use them; if not, work in batches.
- Air fry low and slow. Cook for 2–4 hours, flipping every 30–45 minutes. Time varies by thickness and air fryer model.
You’re drying, not frying.
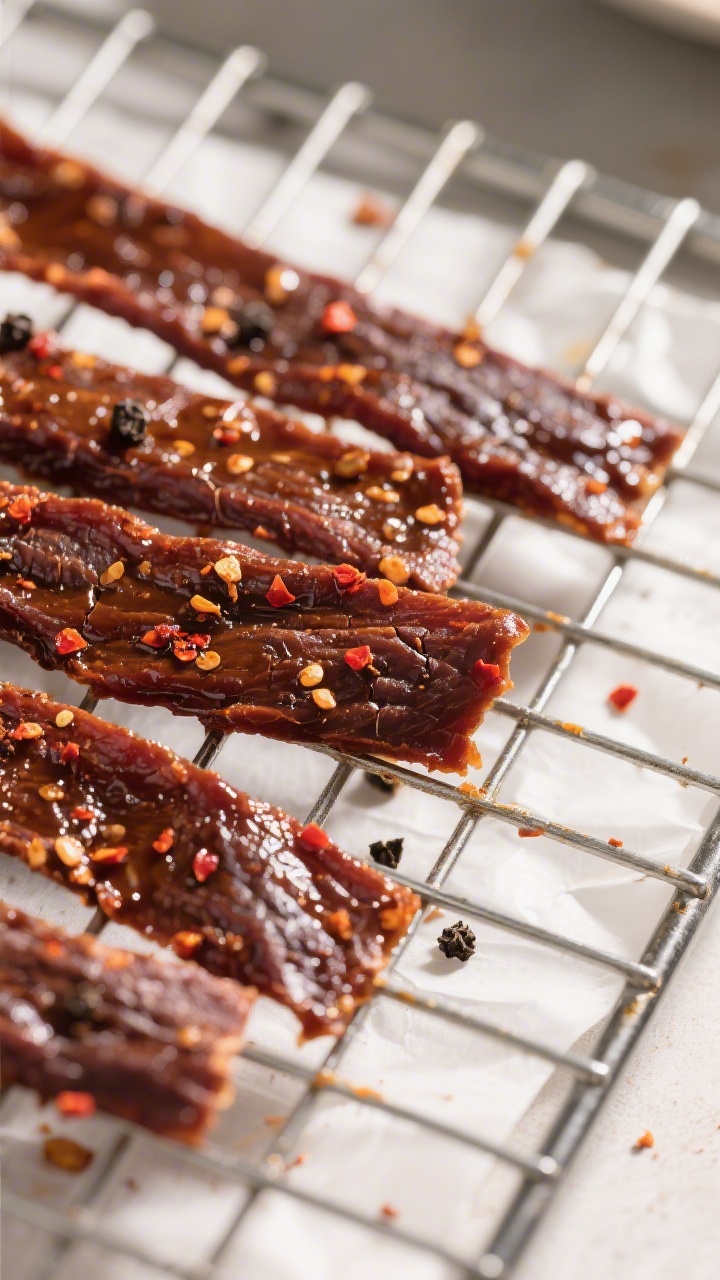
- Check for doneness. Jerky should be dry to the touch, firm, and darkened but not brittle. Bend a piece: it should flex and crack slightly along the surface fibers without snapping.
- Cool completely. Place finished jerky on a clean wire rack to cool. This helps set the texture and avoids trapping steam in storage.
- Condition (optional but recommended). After cooling, place jerky loosely in a clean jar for 24 hours at room temperature, shaking once or twice.
This equalizes moisture across pieces for longer storage.
How to Store
- Short-term: Keep in an airtight container at room temperature for up to 1 week, away from heat and sunlight.
- Refrigerated: Store in a sealed bag or jar for 2–3 weeks. Add a small food-safe desiccant pack if you have one.
- Frozen: For longer storage, freeze up to 3 months. Portion into snack-size bags and squeeze out air before freezing.
- Watch for moisture: If condensation appears in the container, the jerky wasn’t fully dried.
Return to the air fryer at low temp for 20–30 minutes, then cool and re-store.
Why This is Good for You
- High protein, low fat: Venison is very lean, making this a satisfying, lower-calorie snack compared to many store-bought options.
- Iron and B vitamins: Venison offers iron, B12, and niacin, which support energy and metabolism.
- Control over ingredients: You manage the salt, sugar, and additives—no mystery preservatives.
- Smart snacking: A few pieces curb hunger and help maintain steady energy between meals.
What Not to Do
- Don’t skip trimming. Any fat left on the meat can go rancid and spoil flavor and shelf life.
- Don’t slice too thick or too uneven. Thick pieces take much longer and dry inconsistently.
- Don’t crowd the basket. Overlapping pieces trap steam and prevent proper drying.
- Don’t crank up the heat. High temps cook the meat instead of drying it, leading to tough, overdone jerky.
- Don’t store before it’s cool. Warm jerky in a sealed container creates condensation and mold risk.
Alternatives
- Different meats: Try lean beef (eye of round, top round), elk, or moose. Keep slices thin and fat trimmed.
- Flavor twists:
- Sweet heat: Add honey or maple and extra chili flakes or chipotle powder.
- Teriyaki: Swap part of the soy with mirin, add grated ginger, and a touch more brown sugar.
- Pepper-heavy: Coarse-cracked black pepper and extra Worcestershire.
- Smoky BBQ: Add BBQ seasoning and a little liquid smoke.
- Lower sodium: Use low-sodium soy sauce, reduce added salt, and boost flavor with vinegar, spices, and smoke.
- No sugar: Skip brown sugar and lean on spices, or use a zero-calorie sweetener designed for cooking.
- Gluten-free: Use tamari or coconut aminos instead of soy sauce, and ensure your Worcestershire is gluten-free.
FAQ
How thin should I slice the venison?
Aim for 1/8 to 1/4 inch. Thinner slices dry faster and chewier; thicker slices take longer and can be more tender.
Keep the thickness consistent so everything finishes around the same time.
What temperature should I use if my air fryer won’t go below 200°F (93°C)?
Use the lowest possible setting and reduce batch size so air circulates well. Check frequently and crack the lid briefly every 20–30 minutes to release steam. Expect a shorter total time—watch closely to avoid cooking the meat.
How do I know when the jerky is done?
It should be dry to the touch, darker in color, and bend without snapping.
A slight surface crack on bending is a good sign. If it tears easily or feels wet, keep drying.
Can I skip the sugar?
Yes. Sugar adds balance and slight tenderness, but it isn’t required.
If skipping, consider adding a bit more Worcestershire or vinegar for flavor depth.
Is curing salt necessary?
For classic jerky flavor and extended shelf life, some people use Prague Powder #1 in small amounts. It’s optional for home batches eaten quickly. If you use it, follow manufacturer guidelines precisely.
Do I need to pre-cook the venison?
No.
Jerky is dried at low temps. If food safety is a concern, you can heat the marinated slices in a 275°F (135°C) oven until they reach an internal temperature of 160°F (71°C), then finish drying in the air fryer.
Why is my jerky tough?
It may have been sliced with the grain, dried at too high a temperature, or overdried. Next time, slice against the grain, keep temps low, and start checking early.
Can I double the recipe?
Yes, but work in batches.
Jerky needs space and airflow. Stack too many trays or crowd the basket and it won’t dry evenly.
In Conclusion
Air fryer venison jerky is a simple, reliable way to turn lean game into a tasty, high-protein snack. With a balanced marinade, low temperature, and patience, you’ll get consistent results without special equipment.
Customize the seasoning, keep your slices even, and let the air fryer do the steady work. Once you make a batch, it’s hard to go back to store-bought. For other game meat options, try this Elk Jerky or this Bison Jerky.
Air Fryer Venison Jerky – Lean, Flavorful, and Fast
Ingredients
- 2 pounds venison (backstrap, hindquarter, or other lean cut), trimmed of all silver skin and fat
- 1/2 cup soy sauce (low-sodium preferred)
- 2 tablespoons Worcestershire sauce
- 2 tablespoons brown sugar
- 1 tablespoon apple cider vinegar
- 1 teaspoon garlic powder
- 1 teaspoon onion powder
- 1 teaspoon black pepper, freshly ground
- 1 teaspoon smoked paprika (or regular paprika plus a drop or two of liquid smoke)
- 1/2–1 teaspoon crushed red pepper flakes (adjust for heat)
- Optional: 1 teaspoon liquid smoke for a deeper smoky note
- Optional: 1 teaspoon kosher salt if using low-sodium soy and you prefer saltier jerky
- Nonstick spray or a light brush of neutral oil for the basket
- Zip-top bag or shallow dish for marinating
- Paper towels and a wire rack (helpful for pat-drying)
Instructions
- Partially freeze the venison. Place the trimmed venison in the freezer for 60–90 minutes. You want it firm, not rock-solid. This makes thin, even slicing much easier.
- Slice the meat. Cut the venison against the grain for a more tender chew or with the grain for a classic, slightly tougher jerky bite.Aim for slices about 1/8 to 1/4 inch thick and as uniform as possible.
- Mix the marinade. In a bowl, whisk soy sauce, Worcestershire, brown sugar, apple cider vinegar, garlic powder, onion powder, black pepper, smoked paprika, and red pepper flakes. Add liquid smoke if using.
- Marinate. Add the meat to a zip-top bag or dish, pour in the marinade, and toss to coat. Press out air, seal, and refrigerate for at least 6 hours, ideally 12–24 hours.Turn the bag once or twice for even coverage.
- Drain and dry. Remove slices from the marinade and lay them on paper towels or a wire rack. Pat dry thoroughly. Dry surfaces = better drying and less steaming in the air fryer.
- Preheat the air fryer. Set to 175–180°F (80–82°C) if your model allows, or the lowest temperature setting. Lightly oil or spray the basket or trays to prevent sticking.
- Arrange the slices. Lay the venison in a single layer with a little space between pieces.Don’t overlap. If you have trays, use them; if not, work in batches.
- Air fry low and slow. Cook for 2–4 hours, flipping every 30–45 minutes. Time varies by thickness and air fryer model.You’re drying, not frying.
- Check for doneness. Jerky should be dry to the touch, firm, and darkened but not brittle. Bend a piece: it should flex and crack slightly along the surface fibers without snapping.
- Cool completely. Place finished jerky on a clean wire rack to cool. This helps set the texture and avoids trapping steam in storage.
- Condition (optional but recommended). After cooling, place jerky loosely in a clean jar for 24 hours at room temperature, shaking once or twice.This equalizes moisture across pieces for longer storage.
Printable Recipe Card
Want just the essential recipe details without scrolling through the article? Get our printable recipe card with just the ingredients and instructions.