Canned tuna is handy, but it’s not always the most practical for backpacking, emergency kits, or quick meal prep. Dehydrating canned tuna transforms it into a light, shelf-stable, and versatile protein you can pack or store for months. It rehydrates fast, tastes great with the right seasonings, and pairs well with pasta, rice, or crackers.
If you’ve never dehydrated tuna before, don’t worry—it’s simple, budget-friendly, and beginner-friendly. Once you try it, you’ll find yourself making a batch for camping trips, work lunches, or just to have ready in the pantry.
In this article:
Why This Recipe Works
- Low moisture content = long shelf life: Removing moisture slows spoilage and makes tuna safe to store for far longer.
- Lightweight and compact: Perfect for backpacking and travel. A full can of tuna turns into a small bag of flakes.
- Quick rehydration: Tuna absorbs hot water in minutes and is ready to mix into meals with minimal fuss.
- Neutral, flexible flavor: Season it before drying, or keep it plain and season when you use it.
- Budget-friendly: Uses inexpensive pantry tuna and doesn’t require special ingredients.
Shopping List
- Canned tuna (in water is ideal; solid or chunk light or albacore)
- Lemon juice (optional, for brightness)
- Seasonings (optional: garlic powder, onion powder, pepper, smoked paprika, dill, or chili flakes)
- Olive oil (optional—use sparingly; fat can reduce shelf life)
- Salt (to taste)
- Parchment paper or silicone dehydrator sheets
- Dehydrator (preferred) or oven that can maintain low temperatures
- Resealable bags or airtight containers
- Oxygen absorbers or vacuum sealer (optional, for long-term storage)
How to Make It
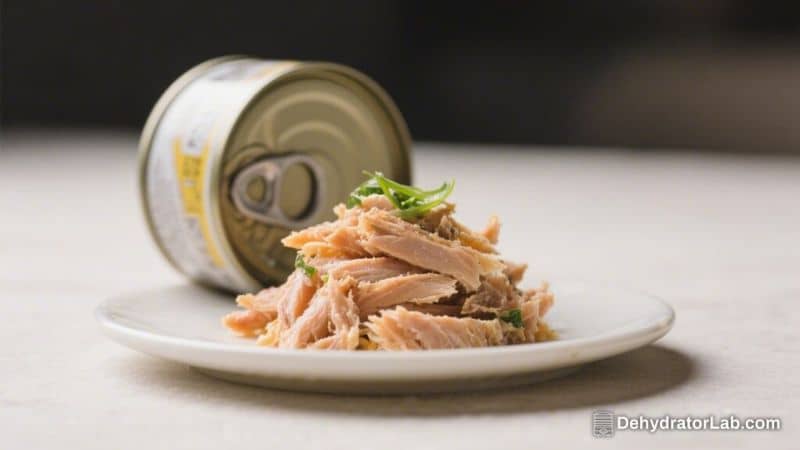
- Drain the tuna well. Open the cans and press out as much liquid as possible.
Use tuna packed in water for best results. Less moisture means faster, safer drying.
- Flake the tuna. Break it up in a bowl with a fork. Aim for small, even flakes.
This helps it dry uniformly and rehydrate quickly.
- Season lightly. Add a squeeze of lemon juice and a pinch of salt, pepper, and your favorite spices if you like. Avoid heavy oil or mayo—fat slows drying and shortens storage life. If using oil, keep it to 1/2 teaspoon per can at most.
- Prepare your trays. Line dehydrator trays with parchment or silicone sheets to prevent small flakes from falling through.
If using an oven, line baking sheets with parchment.
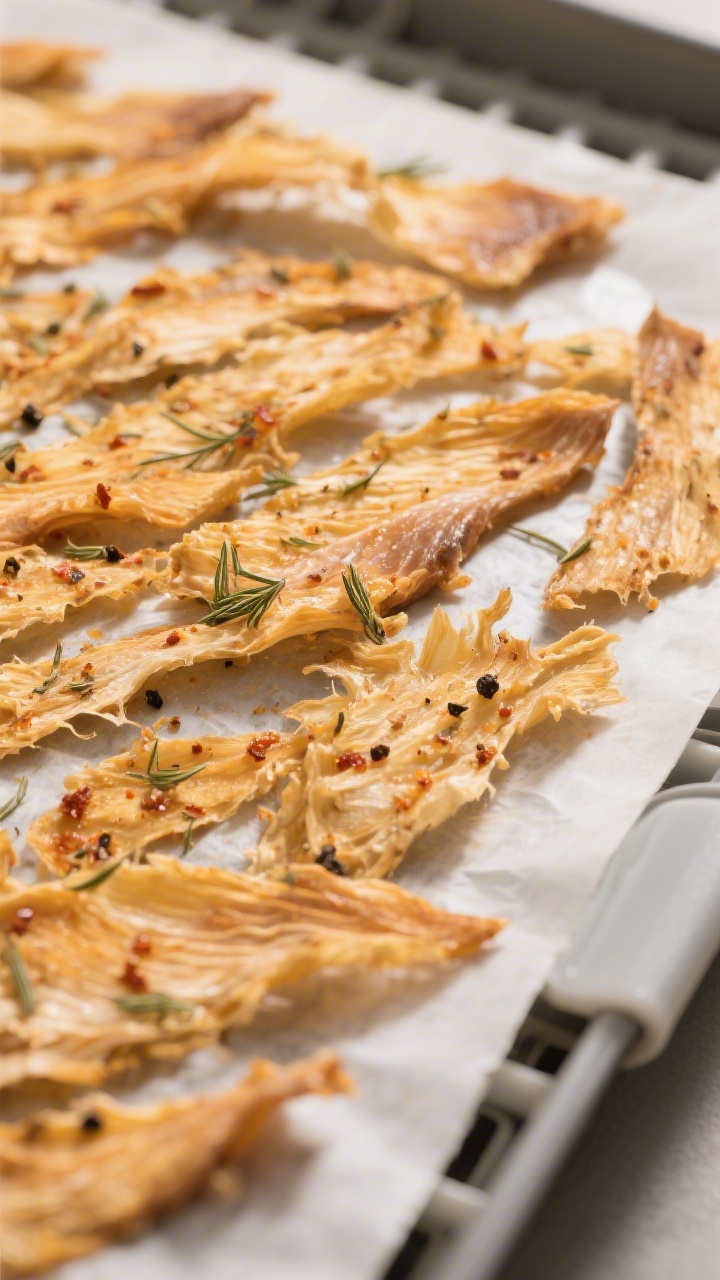
- Spread the tuna thin. Scatter tuna in a thin, even layer, no clumps. The thinner the layer, the more evenly it dries.
- Dehydrate at 145°F–155°F (63°C–68°C) for 4–6 hours. Rotate trays halfway through. Tuna is done when completely dry, hard, and brittle with no soft or cool spots.
- Oven method: Set the oven to its lowest temperature (ideally 170°F/75°C).
Prop the door slightly open with a wooden spoon to release moisture. Dry for 4–6 hours or until brittle, checking often near the end.
- Cool and condition. Let tuna cool completely. Then “condition” by placing the dried tuna in a large jar for 3–5 days, shaking daily.
If condensation appears, return it to the dehydrator to dry more.
- Package for storage. Transfer to airtight bags or jars. For longest life, vacuum seal with an oxygen absorber. Label with the date.
- Rehydrate when ready to use. Add hot water in a 1:1 ratio by volume, stir, and let sit 5–10 minutes.
Drain any excess water and season to taste.
Storage Instructions
- Short-term: Store in an airtight container at room temperature in a cool, dark place for up to 1–2 months.
- Medium-term: Vacuum-sealed bags stored in a pantry can last 3–6 months.
- Long-term: For best longevity, vacuum seal with oxygen absorbers and store in a cool environment (50–70°F). Use within 6–12 months for best flavor.
- Refrigeration: Not required if fully dry and sealed, but it will extend shelf life.
- After opening: Use within 1–2 weeks. Reseal well and keep in a cool cupboard or fridge.
- Rehydrated tuna: Treat like fresh.
Refrigerate and use within 2 days.

Benefits of This Recipe
- High-protein, low-weight fuel: Ideal for hiking, camping, and travel meals.
- Versatile base: Works in pasta, wraps, rice bowls, mashed potatoes, salads, or as a savory topping.
- Saves space and reduces waste: No cans to pack out or store.
- Custom flavor: Season simply or build bold flavors before or after drying.
- Fast meal prep: Rehydrates in minutes for a quick protein boost.
Pitfalls to Watch Out For
- Not draining well: Excess moisture leads to longer drying times and can risk spoilage.
- Using too much oil: Fat resists dehydration and shortens shelf life. Keep it minimal.
- Thick layers on trays: Clumping causes uneven drying and potential mold later.
- Stopping too soon: If tuna isn’t fully dry and brittle, it won’t store safely. When in doubt, dry longer.
- Skipping conditioning: It’s an extra step that helps catch hidden moisture pockets before storage.
- Poor storage: Warm, humid environments degrade texture and flavor.
Seal well and store cool and dry.
Variations You Can Try
- Smoky paprika tuna: Mix in smoked paprika, garlic powder, and black pepper before drying. Great for tacos or rice bowls.
- Lemon-dill: Add lemon zest, dill, and a touch of onion powder. Perfect for pasta salad after rehydrating.
- Spicy chili-lime: Use chili flakes, lime zest, and a pinch of cumin.
Excellent in wraps with crunchy veggies.
- Herb and garlic: Italian seasoning with garlic and parsley works nicely for tomato-based pasta dishes.
- Curry tuna: Stir in mild curry powder and a touch of turmeric. Rehydrate with hot broth for a quick curried rice.
FAQ
Can I dehydrate tuna packed in oil?
Yes, but it’s not ideal. Oil resists dehydration and can reduce shelf life.
If it’s what you have, drain very thoroughly, blot with paper towels, and expect slightly shorter storage time.
How do I know when the tuna is fully dehydrated?
It should be completely dry, firm, and brittle. No soft or cool spots. If you squeeze a flake and it bends instead of crumbles, it likely needs more time.
Is it safe to dehydrate canned tuna?
Yes.
Canned tuna is already cooked. Dry it at 145°F–155°F until fully dry, cool it, condition it, and store it properly in airtight packaging.
What’s the best way to rehydrate dehydrated tuna?
Cover with hot water at about a 1:1 ratio by volume, stir, and let sit 5–10 minutes. Drain excess water and season.
For extra flavor, use hot broth instead of water.
Will the tuna smell strong while dehydrating?
It may have a noticeable aroma. Good ventilation helps. Using lemon and mild seasonings can make the smell more pleasant.
Can I add mayonnaise or fresh herbs before drying?
Avoid mayo and fresh, high-moisture add-ins.
They inhibit drying and shorten shelf life. Add creamy or fresh elements after rehydrating.
What meals can I make with rehydrated tuna?
Stir it into ramen, couscous, or rice; mix with instant mashed potatoes; fold into tortillas with hot sauce; toss with pasta and olive oil; or make a quick tuna salad with shelf-stable mayo packets once rehydrated.
How long does dehydrated tuna last?
If fully dried and vacuum sealed in a cool, dark place, aim for 6–12 months for best quality. Always check smell and appearance before use.
Do I need a dehydrator, or can I use an oven?
A dehydrator is easiest and most consistent.
An oven works if it holds low temperatures and you vent moisture by cracking the door. Expect slightly longer drying times.
Can I dehydrate other canned fish the same way?
Yes. Salmon and chicken work similarly.
Drain well, flake small, dry thoroughly, and store airtight. Oily fish may have a shorter shelf life.
Final Thoughts
Dehydrated canned tuna is a simple way to stock lightweight, reliable protein for any situation. With minimal gear and a few pantry staples, you’ll turn basic cans into a compact ingredient that slips into trail meals, busy weeknight dinners, and emergency kits.
Keep the layers thin, go easy on the oil, and dry until truly brittle. Once you see how fast it rehydrates and how many dishes it supports, you’ll want a bag ready to go at all times.

Dehydrated Canned Tuna – Lightweight, Shelf-Stable Protein for Meals Anywhere
Ingredients
- Canned tuna (in water is ideal; solid or chunk light or albacore)
- Lemon juice (optional, for brightness)
- Seasonings (optional: garlic powder, onion powder, pepper, smoked paprika, dill, or chili flakes)
- Olive oil (optional—use sparingly; fat can reduce shelf life)
- Salt (to taste)
- Parchment paper or silicone dehydrator sheets
- Dehydrator (preferred) or oven that can maintain low temperatures
- Resealable bags or airtight containers
- Oxygen absorbers or vacuum sealer (optional, for long-term storage)
Instructions
- Drain the tuna well. Open the cans and press out as much liquid as possible.Use tuna packed in water for best results. Less moisture means faster, safer drying.
- Flake the tuna. Break it up in a bowl with a fork. Aim for small, even flakes.This helps it dry uniformly and rehydrate quickly.
- Season lightly. Add a squeeze of lemon juice and a pinch of salt, pepper, and your favorite spices if you like. Avoid heavy oil or mayo—fat slows drying and shortens storage life. If using oil, keep it to 1/2 teaspoon per can at most.
- Prepare your trays. Line dehydrator trays with parchment or silicone sheets to prevent small flakes from falling through.If using an oven, line baking sheets with parchment.
- Spread the tuna thin. Scatter tuna in a thin, even layer, no clumps. The thinner the layer, the more evenly it dries.
- Dehydrate at 145°F–155°F (63°C–68°C) for 4–6 hours. Rotate trays halfway through. Tuna is done when completely dry, hard, and brittle with no soft or cool spots.
- Oven method: Set the oven to its lowest temperature (ideally 170°F/75°C).Prop the door slightly open with a wooden spoon to release moisture. Dry for 4–6 hours or until brittle, checking often near the end.
- Cool and condition. Let tuna cool completely. Then “condition” by placing the dried tuna in a large jar for 3–5 days, shaking daily.If condensation appears, return it to the dehydrator to dry more.
- Package for storage. Transfer to airtight bags or jars. For longest life, vacuum seal with an oxygen absorber. Label with the date.
- Rehydrate when ready to use. Add hot water in a 1:1 ratio by volume, stir, and let sit 5–10 minutes.Drain any excess water and season to taste.
Printable Recipe Card
Want just the essential recipe details without scrolling through the article? Get our printable recipe card with just the ingredients and instructions.