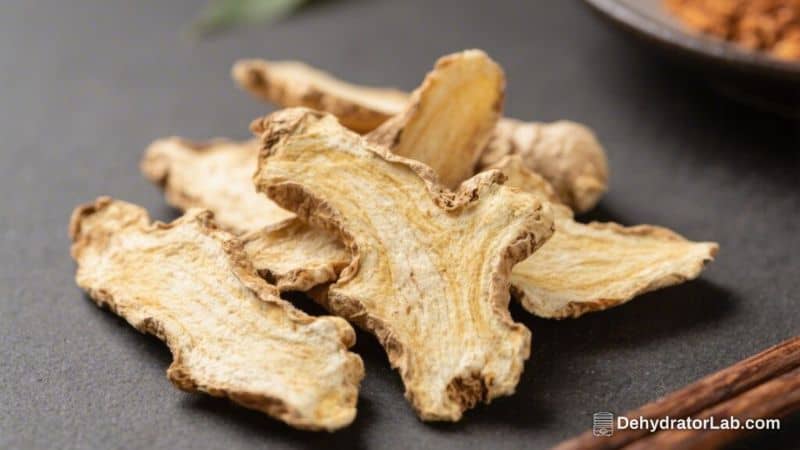
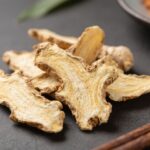
Fresh ginger is bright, spicy, and incredibly useful—but it doesn’t always get used up in time. Dehydrated ginger root slices solve that problem with a pantry-friendly form that keeps for months and tastes just as bold. These thin, dried slices are perfect for teas, broths, marinades, spice blends, baking, and even homemade remedies.
They’re easy to make, budget-friendly, and they free up fridge space. If you love ginger, this is a low-effort, high-reward staple you’ll want on hand.
In this article:
Why This Recipe Works
This method keeps the flavor strong while removing moisture for long storage. By slicing the ginger evenly, you get consistent drying and a balanced bite.
A quick blanch or soak can tame sharp heat if you prefer a milder taste, but it’s optional. Using low, steady heat maintains aroma compounds and color. The result is crisp, clean slices that rehydrate well and deliver vibrant ginger flavor in both sweet and savory dishes.
What You’ll Need
- Fresh ginger root (firm, smooth skin, heavy for its size)
- Water (for rinsing and optional blanching)
- Lemon juice (optional, to help preserve color)
- Sugar or honey (optional, for lightly sweetened slices)
- Sea salt (optional, for savory applications)
- Equipment: Knife or mandoline, cutting board, peeler or spoon, dehydrator or oven, parchment or silicone mats, airtight jars or vacuum-seal bags
Step-by-Step Instructions
- Select quality ginger. Choose fresh roots that are plump and unwrinkled.
Avoid soft spots or mold. Young ginger is milder; mature ginger is spicier and more fibrous.
- Wash and peel (optional). Rinse well to remove dirt. Peel with a spoon edge if you want a cleaner look.
Leaving the skin on adds a touch of earthiness and saves time.
- Slice evenly. Cut thin, uniform slices, about 1–2 mm thick. Use a mandoline for best consistency. Even thickness ensures even drying and prevents chewy spots.
- Optional pre-treatment. For brighter color and a softer bite, blanch slices in simmering water for 1–2 minutes, then drain and pat dry. For light sweetness, toss warm slices with a teaspoon of sugar or a drizzle of honey.
For savory uses, a pinch of salt is nice.
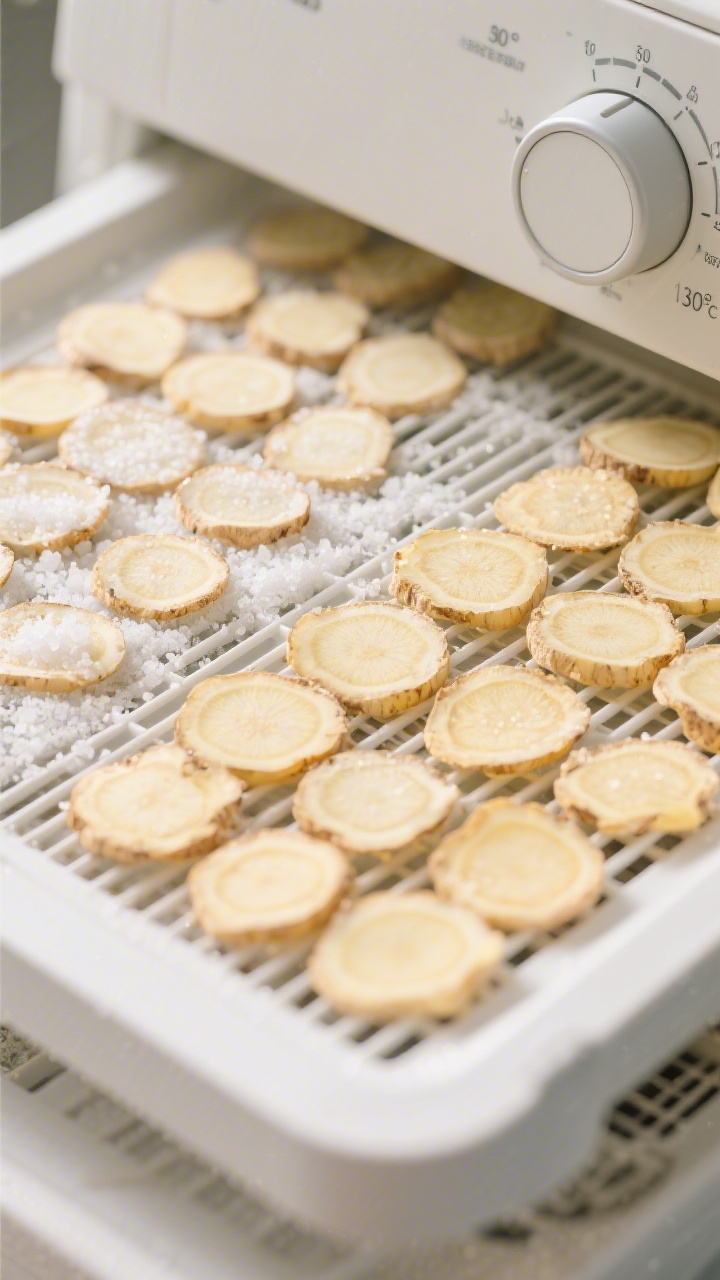
- Arrange for drying. Lay slices in a single layer on dehydrator trays or a parchment-lined baking sheet. Do not overlap or they’ll dry unevenly.
- Dehydrate at low heat.
- Dehydrator: 125–135°F (52–57°C) for 4–8 hours.
- Oven: Lowest setting (usually 170–200°F / 75–95°C). Prop the door slightly open with a wooden spoon to improve airflow. Expect 2–5 hours depending on thickness.
Check hourly after the first few hours.
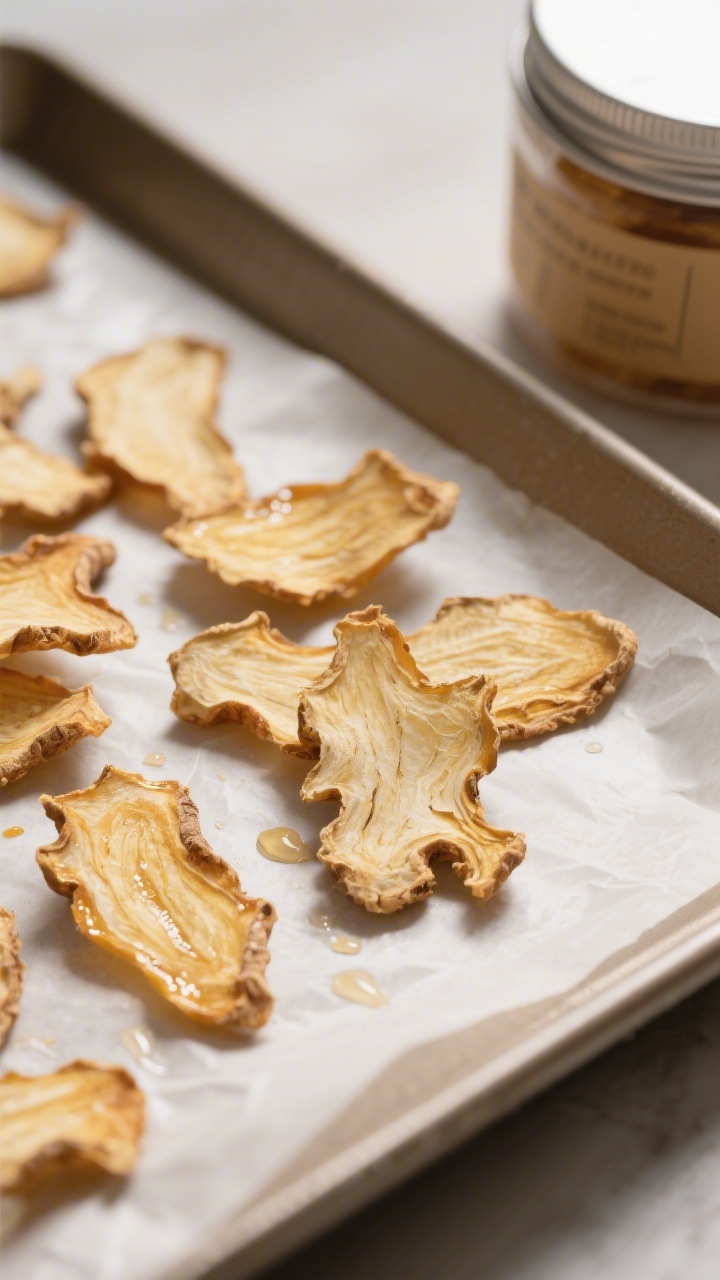
- Test for doneness. Slices should be dry, leathery to crisp, and snap cleanly when bent. No visible moisture and no sticky feel.
Thicker slices may be slightly pliable but not damp.
- Cool completely. Let slices cool to room temperature on the trays. Packing warm slices leads to condensation and spoilage.
- Condition the batch. Place dried slices loosely in a jar for 5–7 days, shaking daily. If you see fogging or clumps, return slices to heat to finish drying.
This step equalizes residual moisture.
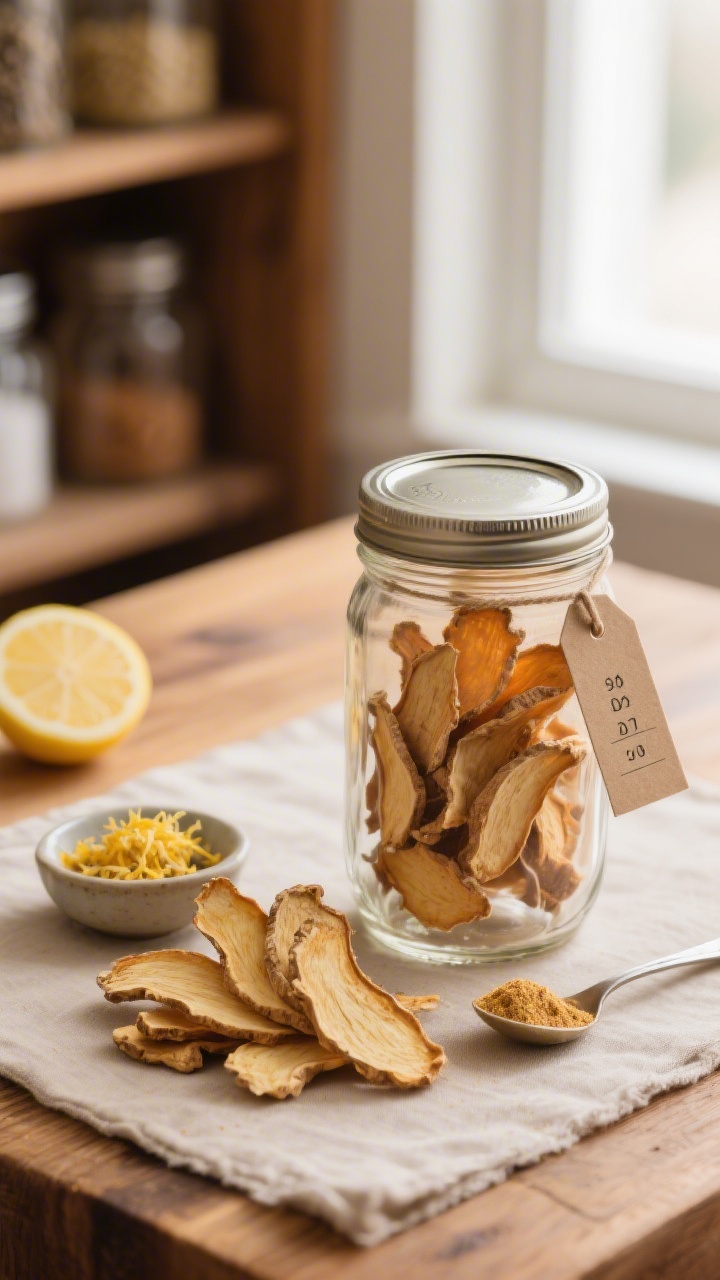
- Store properly. Once conditioned, seal in airtight containers, label with the date, and keep in a cool, dark pantry.
How to Store
- Airtight is essential: Use mason jars, vacuum bags, or well-sealed tins to block moisture and aroma loss.
- Keep it cool and dark: Pantries or cupboards away from heat and sunlight preserve flavor longer.
- Shelf life: Up to 1 year for best flavor; safe longer if kept fully dry and sealed.
- Freeze for extra insurance: If you live in a humid climate, freeze the slices in airtight bags to prevent rehydration.
Benefits of This Recipe
- Less waste: Turn extra ginger into a long-lasting pantry staple.
- Big flavor, small effort: Dehydration concentrates aroma and heat with minimal work.
- Versatility: Use in tea, stocks, marinades, pickling brines, cookies, or spice rubs.
- Budget-friendly: Buy in bulk when ginger is cheap and preserve it for months.
- Customizable: Control heat, sweetness, and thickness to suit your cooking style.
Common Mistakes to Avoid
- Uneven slicing: Thick and thin pieces dry at different rates, causing some to burn and others to stay chewy.
- Overcrowding: Overlapping slices trap moisture and slow drying. Keep a single, spaced layer.
- Too much heat: High temps can brown the ginger and dull its aroma. Stick to low and slow.
- Skipping the cool-down: Sealing warm slices creates condensation and mold risk.
- Ignoring conditioning: This simple step helps avoid surprise moisture pockets later.
Alternatives
- Oven-only method: If you don’t have a dehydrator, the oven works.
Use convection if available and keep the door slightly open for airflow.
- Air-dry (dry climates): Thread slices on string or place on racks in a well-ventilated, dry room. This may take several days and is weather-dependent.
- Powdered ginger: After dehydrating, grind slices in a spice grinder for homemade ginger powder. Sieve for a fine texture.
- Candied-dry hybrid: Simmer slices in simple syrup, drain, then dehydrate until dry and tack-free for sweet snacks or baking mix-ins.
- Flavor infusions: Before drying, briefly soak slices in lemon juice, apple cider vinegar, or a mild sugar-salt brine for a unique twist.
FAQ
How thin should I slice the ginger?
Aim for 1–2 mm.
Thinner slices dry faster and crisper; slightly thicker slices stay a bit chewy when rehydrated. Consistency matters more than exact thickness.
Do I have to peel the ginger?
No. Peeling is optional.
The skin is edible and adds a subtle, earthy note. If you prefer a cleaner look and milder taste, peel with a spoon to remove just the thin outer layer.
Can I use old or wrinkled ginger?
It’s best to use fresh, firm roots. Old ginger can be woody and less aromatic.
If it’s only slightly wrinkled but still firm and smells good, it will work, though flavor may be milder.
How do I use the dried slices?
Steep in boiling water for tea, toss into soups and broths, grind into powder for baking, or add to marinades and braises. For quick recipes, pre-soak in hot water for 10–15 minutes to soften.
What temperature should I use in the oven?
Use the lowest possible setting, ideally 170–200°F (75–95°C). If your oven runs hot, crack the door for airflow and to prevent browning.
How do I know they’re fully dry?
The slices should feel dry and snap or crack cleanly.
No tackiness or cool, damp spots. If in doubt, keep drying in 20–30 minute increments and recheck.
Can I sweeten the slices?
Yes. Toss warm, blanched slices with a small amount of sugar or honey before drying.
This adds a light glaze and makes a great snack or baking ingredient.
Is blanching necessary?
No. It’s optional. Blanching slightly softens heat and helps preserve color, but skipping it gives you a punchier, spicier result.
How long do they last?
Up to a year when kept fully dry in airtight containers, away from heat and light.
For humid climates, freeze for best quality.
Can I grind them into powder later?
Absolutely. Grind only what you need to keep the rest fresh. Store powder in a small, airtight jar and use within a few months for best flavor.
Final Thoughts
Dehydrated ginger root slices are a small project with a big payoff.
With a bit of slicing and gentle heat, you’ll have a bright, spicy ingredient ready for tea, cooking, baking, and more. Keep a jar in your pantry, and you’ll never worry about fresh ginger going soft in the crisper again. Simple, dependable, and endlessly useful—this is one of those kitchen habits that sticks.
Dehydrated Ginger Root Slices – Simple, Zesty, and Long-Lasting
Ingredients
- Fresh ginger root (firm, smooth skin, heavy for its size)
- Water (for rinsing and optional blanching)
- Lemon juice (optional, to help preserve color)
- Sugar or honey (optional, for lightly sweetened slices)
- Sea salt (optional, for savory applications)
- Equipment: Knife or mandoline, cutting board, peeler or spoon, dehydrator or oven, parchment or silicone mats, airtight jars or vacuum-seal bags
Instructions
- Select quality ginger. Choose fresh roots that are plump and unwrinkled.Avoid soft spots or mold. Young ginger is milder; mature ginger is spicier and more fibrous.
- Wash and peel (optional). Rinse well to remove dirt. Peel with a spoon edge if you want a cleaner look.Leaving the skin on adds a touch of earthiness and saves time.
- Slice evenly. Cut thin, uniform slices, about 1–2 mm thick. Use a mandoline for best consistency. Even thickness ensures even drying and prevents chewy spots.
- Optional pre-treatment. For brighter color and a softer bite, blanch slices in simmering water for 1–2 minutes, then drain and pat dry. For light sweetness, toss warm slices with a teaspoon of sugar or a drizzle of honey.For savory uses, a pinch of salt is nice.
- Arrange for drying. Lay slices in a single layer on dehydrator trays or a parchment-lined baking sheet. Do not overlap or they’ll dry unevenly.
- Dehydrate at low heat. Dehydrator: 125–135°F (52–57°C) for 4–8 hours.
- Oven: Lowest setting (usually 170–200°F / 75–95°C). Prop the door slightly open with a wooden spoon to improve airflow. Expect 2–5 hours depending on thickness.
- Test for doneness. Slices should be dry, leathery to crisp, and snap cleanly when bent. No visible moisture and no sticky feel.Thicker slices may be slightly pliable but not damp.
- Cool completely. Let slices cool to room temperature on the trays. Packing warm slices leads to condensation and spoilage.
- Condition the batch. Place dried slices loosely in a jar for 5–7 days, shaking daily. If you see fogging or clumps, return slices to heat to finish drying.This step equalizes residual moisture.
- Store properly. Once conditioned, seal in airtight containers, label with the date, and keep in a cool, dark pantry.
Related reading: dehydrated turmeric powder, rosemary sea salt dehydrated, and dehydrator reviews.
Printable Recipe Card
Want just the essential recipe details without scrolling through the article? Get our printable recipe card with just the ingredients and instructions.