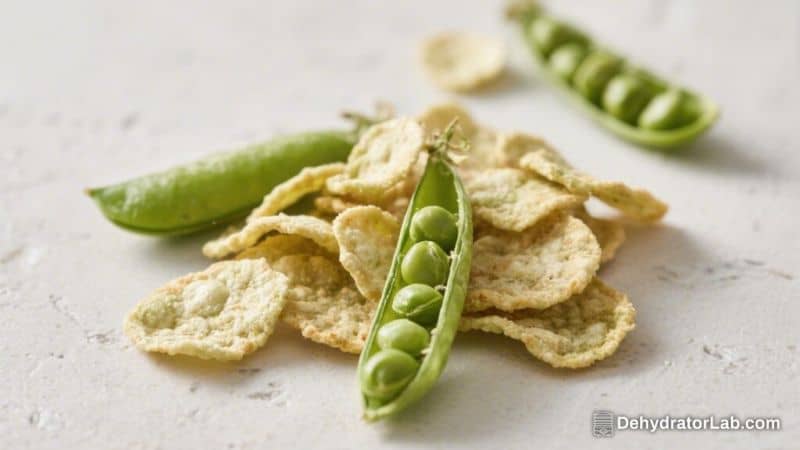
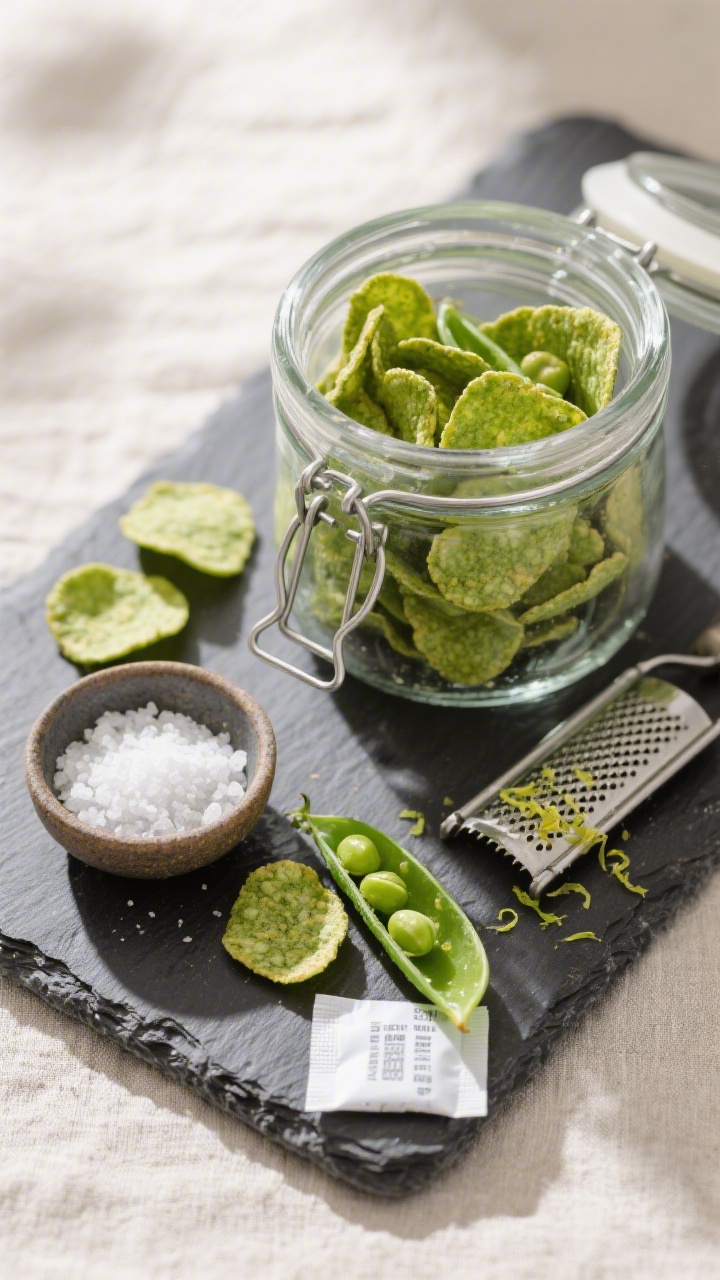
Green pea crisps are the kind of snack you can feel good about eating. They’re light, salty, and surprisingly satisfying, without the heaviness of fried chips. With a dehydrator or a low oven, you can make a batch that tastes fresher than store-bought.
You’ll control the seasoning, the crunch, and the quality of ingredients. If you like a snack that’s crisp, clean, and easy to grab by the handful, this recipe is for you.
In this article:
What Makes This Recipe So Good
- Pure, clean crunch: Dehydration locks in flavor and texture without oil. You get a snappy, dry crunch instead of a greasy bite.
- Simple ingredients: Just peas, a little oil or aquafaba, and spices.
Nothing artificial or complicated.
- Customizable flavor: Go classic with salt and pepper, or try chili-lime, garlic parmesan, or smoky paprika.
- Budget-friendly: Frozen peas are cheap, consistent in quality, and available year-round.
- Meal-prep friendly: Make a big batch once and snack well all week.
What You’ll Need
- Frozen green peas: 4 cups (about 600 g), not canned. Thaw before using.
- Olive oil or aquafaba: 1–2 tablespoons. Oil gives a richer flavor; aquafaba keeps it ultra-light.
- Kosher salt: 1/2 to 1 teaspoon, to taste.
- Black pepper: 1/2 teaspoon, freshly ground.
- Garlic powder: 1/2 teaspoon.
- Onion powder: 1/2 teaspoon.
- Smoked paprika: 1/2 teaspoon (optional for a smoky note).
- Lemon zest: From 1/2 lemon (optional for brightness).
- Dehydrator or oven: A dehydrator is easiest; an oven works too.
- Parchment paper or silicone mats: For oven use to prevent sticking.
Step-by-Step Instructions
- Thaw and drain the peas. Place frozen peas in a colander.
Rinse briefly with cool water to separate, then let them sit for 10–15 minutes to thaw. Pat dry with clean towels. The drier they are, the faster they crisp.
- Preheat your equipment. For a dehydrator, set to 125–135°F (52–57°C).
For an oven, set to the lowest setting, ideally 170–200°F (77–93°C). Use convection if you have it.
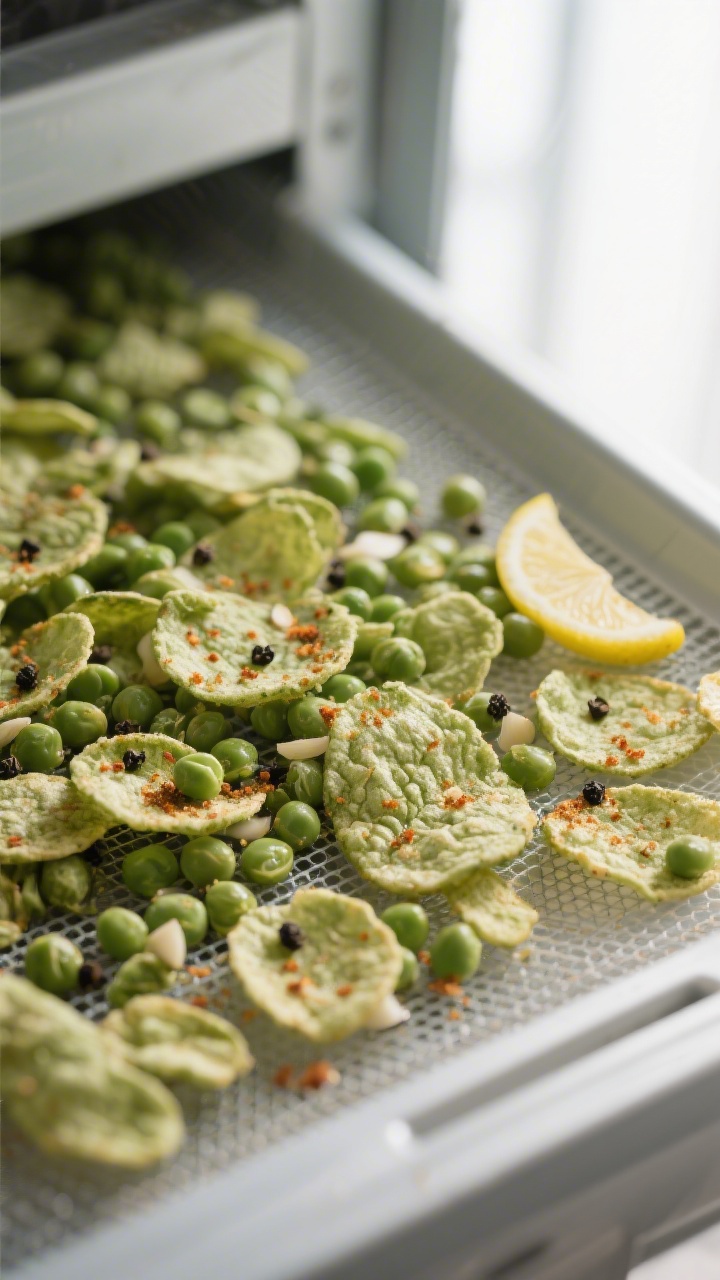
- Season the peas. In a large bowl, toss peas with olive oil or aquafaba to lightly coat. Add salt, pepper, garlic powder, onion powder, and smoked paprika.
Toss gently so you don’t mash them. Add lemon zest if using.
- Arrange in a single layer. Spread peas on dehydrator trays lined with mesh screens, or on parchment-lined baking sheets. Keep them in a single, even layer with a little space between for airflow.
- Dehydrate.
- Dehydrator: 6–8 hours, rotating trays halfway.
Start checking at 5 hours. They should feel very dry and crisp when cool.
- Oven: 2.5–4 hours, stirring every 45 minutes. Prop the door open slightly with a wooden spoon to let moisture escape if safe to do so.
- Dehydrator: 6–8 hours, rotating trays halfway.
- Cool completely. Let the peas cool on the trays for 20–30 minutes.
They crisp further as they cool. Test a few; if any feel chewy, return them to dry a little longer.
- Adjust seasoning. Taste and add a pinch more salt or a squeeze of lemon zest if needed. Avoid adding wet ingredients now, which can soften the crisp.
- Store properly. Transfer to an airtight container or a jar with a tight lid.
Add a small desiccant packet if you have one to keep them extra crisp.
Keeping It Fresh
Moisture is the enemy of crisp snacks. Store your green pea crisps in an airtight container at room temperature, away from steam or sunlight. If your kitchen is humid, add a food-safe desiccant packet or a piece of paper towel to absorb excess moisture.
They’re best within 1–2 weeks, but stay crunchy longer if fully dried. If they soften, re-crisp in a 200°F (93°C) oven for 8–10 minutes, then cool and store again.
Health Benefits
- Fiber-rich: Green peas offer soluble and insoluble fiber, which supports digestion and keeps you full longer.
- Plant protein: A solid source of protein for a legume-based snack, great for replacing chips or crackers.
- Micronutrients: Peas are high in vitamin K, vitamin C, B vitamins, and minerals like manganese and phosphorus.
- Lower in fat: Because they’re dehydrated, not fried, you get a crunchy snack with far less oil.
- Simple ingredients: No preservatives or mystery additives when you make them at home.
Common Mistakes to Avoid
- Skipping the dry step: Wet peas take longer to crisp and can steam instead of dehydrate. Pat them dry well.
- Piling peas too thick: Overcrowding blocks airflow and leads to uneven texture.
Keep a single layer.
- Too much oil: A heavy hand makes them leathery instead of crisp. Use just enough to lightly coat.
- Rushing the process: If they’re still a little soft when warm, they won’t stay crisp in storage. Dry until truly brittle.
- Storing before cooling: Trapped steam softens the batch.
Always cool fully first.
Variations You Can Try
- Chili-Lime: Add 1/2 teaspoon chili powder, a pinch of cayenne, and lime zest. Sprinkle lime juice only at serving to keep crispness.
- Garlic Parmesan: Toss with 1/2 teaspoon garlic powder and 2 tablespoons finely grated parmesan after drying. Parmesan sticks better if the peas are still slightly warm.
- Everything Bagel: Add 1 tablespoon everything bagel seasoning and a touch of extra salt.
- Herby Lemon:</-strong> Mix in dried dill, parsley, and lemon zest for a bright, savory finish.
- Smoky BBQ: Use smoked paprika, a pinch of brown sugar, onion powder, and a touch of mustard powder.
FAQ
Can I use canned peas?
It’s not ideal.
Canned peas are too soft and waterlogged, and they won’t crisp well. Frozen peas give the best texture and flavor.
Do I need a dehydrator?
No. A low oven works fine.
Keep the temperature low, stir occasionally, and vent the door slightly to help moisture escape.
How do I know when they’re done?
They should feel very dry and crisp once cooled, with no chewiness. If they bend or feel leathery, dry them longer.
Can I make them oil-free?
Yes. Use aquafaba or skip the coating entirely.
Seasoning may not stick as well, so add spices midway through drying and again right after.
Are they freezer-friendly?
Freezing isn’t recommended. It introduces moisture that can ruin the crisp. Store at room temperature in a sealed container instead.
What can I serve them with?
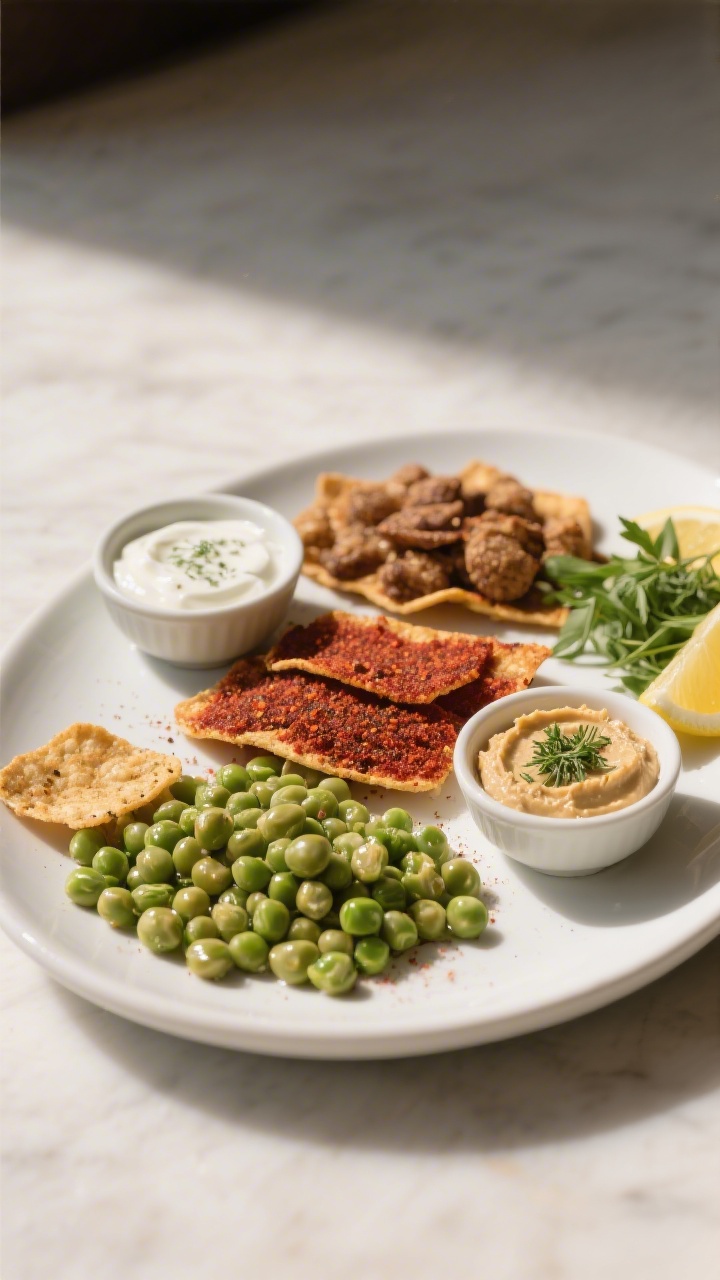
They’re great on their own, but also good as a crunchy topping for salads, grain bowls, or creamy dips like hummus or yogurt-tahini sauce.
Final Thoughts
Dehydrated green pea crisps are simple, flexible, and genuinely tasty.
With a few pantry spices and some patience, you’ll get a crunchy snack that beats most bagged options. Make a batch on the weekend, tweak the flavors to match your mood, and keep a jar on the counter. It’s an easy habit that makes better snacking feel effortless.

Dehydrated Green Pea Crisps – A Simple, Crunchy Snack You’ll Love
Ingredients
- Frozen green peas: 4 cups (about 600 g), not canned. Thaw before using.
- Olive oil or aquafaba: 1–2 tablespoons. Oil gives a richer flavor; aquafaba keeps it ultra-light.
- Kosher salt: 1/2 to 1 teaspoon, to taste.
- Black pepper: 1/2 teaspoon, freshly ground.
- Garlic powder: 1/2 teaspoon.
- Onion powder: 1/2 teaspoon.
- Smoked paprika: 1/2 teaspoon (optional for a smoky note).
- Lemon zest: From 1/2 lemon (optional for brightness).
- Dehydrator or oven: A dehydrator is easiest; an oven works too.
- Parchment paper or silicone mats: For oven use to prevent sticking.
Instructions
- Thaw and drain the peas. Place frozen peas in a colander.Rinse briefly with cool water to separate, then let them sit for 10–15 minutes to thaw. Pat dry with clean towels. The drier they are, the faster they crisp.
- Preheat your equipment. For a dehydrator, set to 125–135°F (52–57°C).For an oven, set to the lowest setting, ideally 170–200°F (77–93°C). Use convection if you have it.
- Season the peas. In a large bowl, toss peas with olive oil or aquafaba to lightly coat. Add salt, pepper, garlic powder, onion powder, and smoked paprika.Toss gently so you don’t mash them. Add lemon zest if using.
- Arrange in a single layer. Spread peas on dehydrator trays lined with mesh screens, or on parchment-lined baking sheets. Keep them in a single, even layer with a little space between for airflow.
- Dehydrate. Dehydrator: 6–8 hours, rotating trays halfway.Start checking at 5 hours. They should feel very dry and crisp when cool.
- Oven: 2.5–4 hours, stirring every 45 minutes. Prop the door open slightly with a wooden spoon to let moisture escape if safe to do so.
- Cool completely. Let the peas cool on the trays for 20–30 minutes.They crisp further as they cool. Test a few; if any feel chewy, return them to dry a little longer.
- Adjust seasoning. Taste and add a pinch more salt or a squeeze of lemon zest if needed. Avoid adding wet ingredients now, which can soften the crisp.
- Store properly. Transfer to an airtight container or a jar with a tight lid.Add a small desiccant packet if you have one to keep them extra crisp.
Printable Recipe Card
Want just the essential recipe details without scrolling through the article? Get our printable recipe card with just the ingredients and instructions.