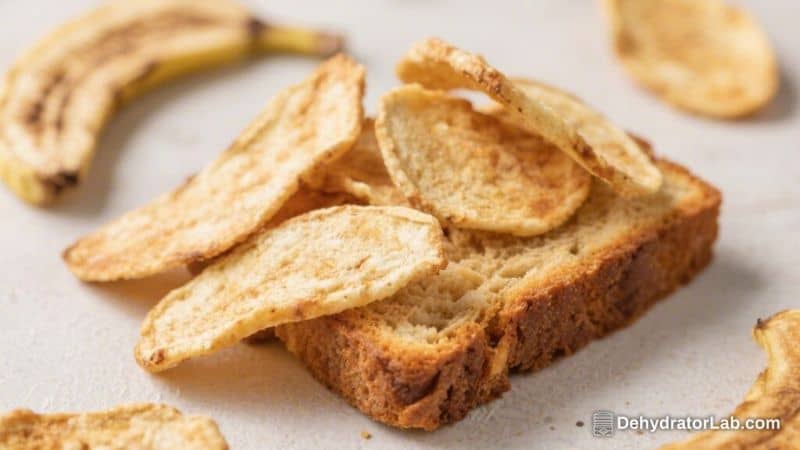
If you love banana bread but want something lighter and snackable, these Dehydrated Banana Bread Chips hit the spot. They’re crisp, sweet, and carry that warm banana bread flavor in every bite. No oven heat waves, no slicing a loaf—just simple prep and a dehydrator (or a low-temp oven) doing the work.
They’re a great way to use up ripe bananas and perfect for lunchboxes, road trips, or a little afternoon crunch. Best part: they’re naturally sweet, easy to customize, and store beautifully.
In this article:
What Makes This Special
These chips capture the comfort of banana bread without the heaviness. A light coating of cinnamon, vanilla, and a touch of maple gives them that classic baked-bread vibe.
Dehydrating keeps the sugars concentrated and the texture crisp, so you get a satisfying snap with every piece. They’re also budget-friendly, low-waste, and a fun alternative to store-bought snacks. Whether you’re into meal prep or just love a healthier treat, this one fits right in.
Shopping List
- Bananas: 5–6 medium, ripe but still firm (yellow with brown speckles)
- Lemon juice: 1–2 tablespoons, for a quick anti-browning dip
- Pure maple syrup or honey: 1–2 tablespoons (optional, for light sweetness and caramelization)
- Ground cinnamon: 1–2 teaspoons
- Vanilla extract: 1 teaspoon
- Pinch of salt: to balance the sweetness
- Optional add-ins: ground nutmeg, allspice, or cardamom; finely chopped pecans or walnuts; cocoa powder; shredded coconut
- Nonstick spray or parchment: for dehydrator trays or baking sheets
How to Make It
- Pick the right bananas. Choose bananas that are ripe with brown freckles but still hold their shape.
Overripe bananas turn mushy and don’t slice cleanly.
- Prep a quick dip. In a shallow bowl, mix 1–2 tablespoons lemon juice with 1/2 cup water. This helps prevent browning and keeps the chips looking bright.
- Make the “banana bread” coating. In a small bowl, stir together maple syrup (or honey), cinnamon, vanilla, and a pinch of salt. Taste and adjust the cinnamon or sweetness to your liking.
- Slice evenly. Peel bananas and slice into 1/8–1/4-inch rounds.
Thinner slices get crispier; thicker slices turn more chewy. Aim for consistent thickness so they dehydrate evenly.
- Quick dip, quick drain. Briefly dip slices in the lemon water, then lay on a clean towel and pat dry. Don’t soak—30 seconds is enough.
- Coat lightly. Gently toss banana slices with the cinnamon-vanilla mixture.
A light, even coat is key. Too much liquid slows dehydration.
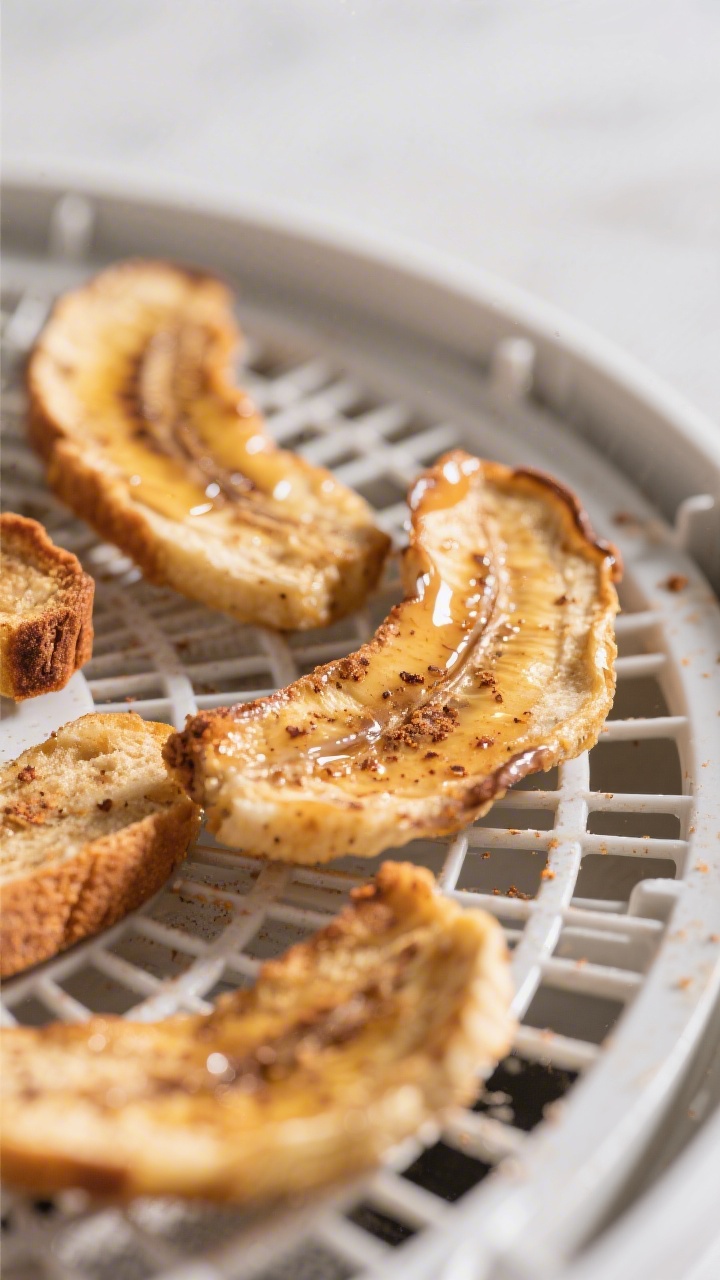
- Arrange on trays. Line dehydrator trays with nonstick mesh or lightly oiled parchment. Place slices in a single layer, not touching.
For an oven, line baking sheets with parchment and arrange the same way.
- Dehydrate low and slow. Set dehydrator to 135°F (57°C). Dry for 6–10 hours, flipping halfway, until slices are dry and mostly crisp with just a hint of bend. In an oven, set to the lowest temp (usually 170–200°F/75–95°C), prop the door slightly open with a wooden spoon for airflow, and bake 2.5–4.5 hours, flipping once.
Watch closely near the end.
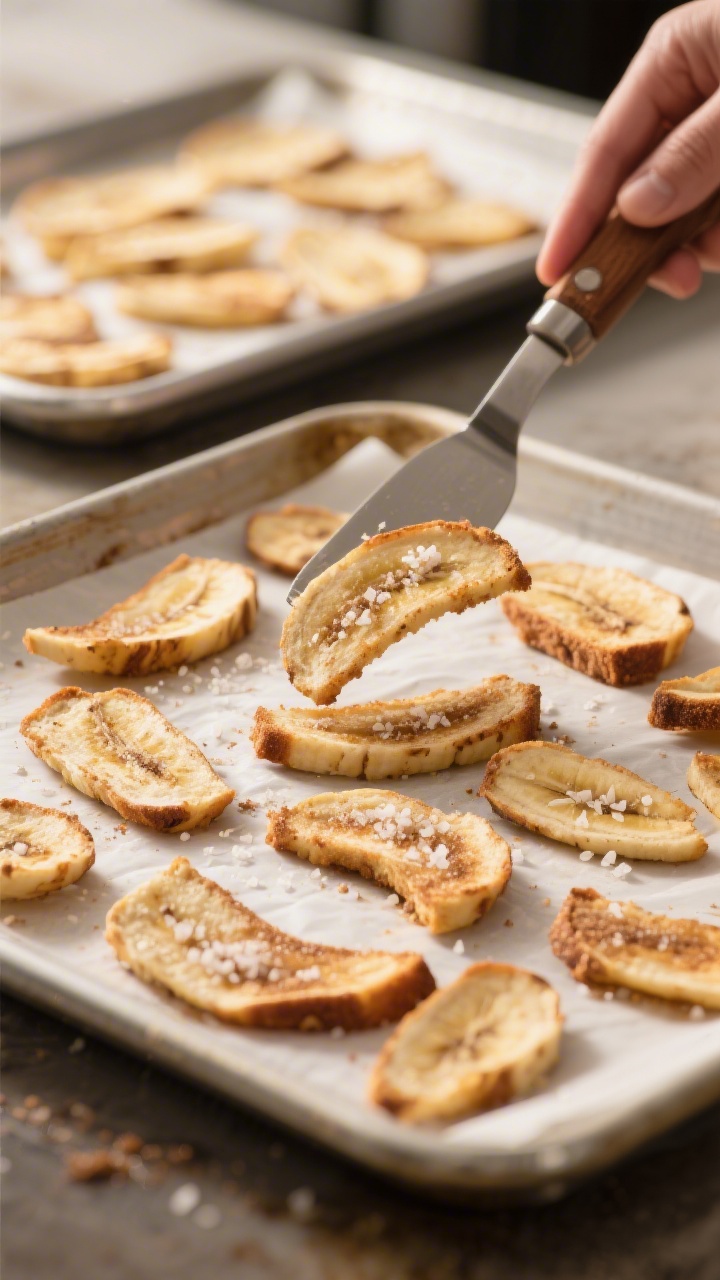
- Test for doneness. Chips are ready when they feel dry, not tacky, and snap or crack when bent after cooling. If they’re leathery, give them another 30–60 minutes and recheck.
- Cool and condition. Let chips cool completely on the trays. Then place them in a loosely covered container for 24 hours, shaking once or twice.
If condensation appears, return them to the dehydrator for another hour. This step helps even out any remaining moisture.
- Store. Once fully dry, seal in an airtight jar or bag. Add a food-safe desiccant packet if you have one for best crispness.
Keeping It Fresh
Store fully cooled chips in an airtight container at room temperature for up to 2 weeks.
For best crunch, keep them away from humidity and heat. If they soften over time, you can re-crisp them in a dehydrator at 135°F (57°C) for 30–60 minutes, or in a 200°F (95°C) oven for 10–15 minutes. For longer storage, freeze in a zip-top bag; they thaw quickly and stay crisp if well-dried.
Benefits of This Recipe
- Simple, wholesome ingredients: Mostly fruit and warm spices, with optional natural sweetener.
- Low-waste and budget-friendly: Uses ripe bananas you might otherwise toss.
- Portable and kid-friendly: Easy to pack, not messy, and naturally sweet.
- Customizable flavor: Cinnamon, vanilla, nuts, cocoa, or coconut make each batch unique.
- Better control over sweetness: You decide how much maple or honey to use—or skip it entirely.
Common Mistakes to Avoid
- Slicing too thick or unevenly: Leads to under-dried centers and inconsistent texture.
- Overloading with syrup: A heavy coating makes chips sticky and slows drying.
Keep it light.
- Skipping the flip: Not flipping halfway can trap moisture and cause chewy spots.
- Storing before fully cool: Warm chips create condensation that softens everything.
- Using overly soft bananas: They mash in the bowl and won’t form clean chips.
Recipe Variations
- Chocolate-Dusted: Toss slices with 1 teaspoon cocoa powder plus cinnamon and vanilla. Add a tiny pinch of sugar if you want balance.
- Nutty Crunch: Press a few finely chopped pecans or walnuts onto each slice before drying. Tastes like banana nut bread.
- Spiced Chai: Use cinnamon, cardamom, ginger, and a whisper of clove.
A little vanilla ties it together.
- Coconut Crisp: Sprinkle unsweetened shredded coconut on top of coated slices. Lightly press so it adheres.
- Maple Sea Salt: Brush with maple, then finish with a tiny pinch of flaky salt before dehydrating for a sweet-salty pop.
- Zippy Citrus: Add orange zest to the coating for bright aroma that cuts the sweetness.
FAQ
Can I make these without a dehydrator?
Yes. Use your oven’s lowest setting and prop the door slightly open to improve airflow.
Expect a shorter total time than a dehydrator but keep a close eye to prevent over-browning, especially around the edges.
How do I get them extra crispy?
Slice thinner (about 1/8 inch), use a very light coating, and dry until they feel firm, then cool fully before storing. If they still seem soft after conditioning, return to the dehydrator for another 30–60 minutes.
Do I have to use lemon juice?
No, but it helps with color and adds a slight brightness. If you skip it, work quickly after slicing and start dehydrating right away to minimize browning.
Are they healthy?
They’re made from whole fruit with optional natural sweetener, so they’re a smart snack choice.
Keep portions in mind—dehydration concentrates sugars, so a little goes a long way in terms of sweetness and energy.
Can I use plantains instead of bananas?
Yes, but use ripe yellow or black-spotted plantains for sweetness. Green plantains will be starchy and not very sweet, producing a different style of chip.
How can I prevent sticking?
Use nonstick mesh liners, parchment, or a light spray of neutral oil on trays. Make sure slices aren’t overlapping and flip them halfway through drying.
What if my chips turned chewy?
They likely need more time or had too much syrup.
Return them to the dehydrator until fully dry, then cool completely. Store with a desiccant packet if your climate is humid.
Can I add protein or fiber?
You can dust with a little finely ground flaxseed or hemp hearts before drying. Keep the layer very light to avoid gumminess and extend drying time if needed.
How many bananas do I need per tray?
It varies, but 2–3 medium bananas usually fill a standard dehydrator tray in a single layer.
Avoid crowding to maintain airflow and even drying.
What’s the best way to serve them?
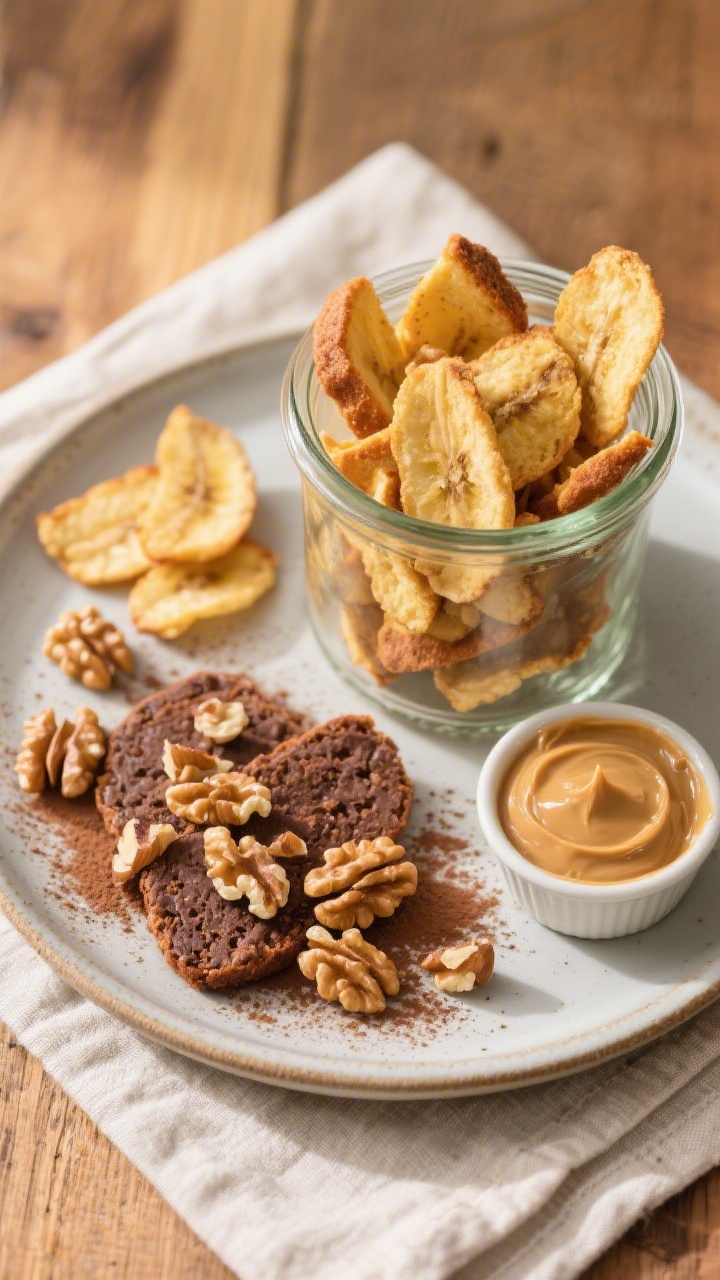
Enjoy them straight from the jar, crumble over yogurt, pair with nut butter, or mix into trail mix. They also make a fun crunchy garnish for smoothies or oatmeal.
Final Thoughts
Dehydrated Banana Bread Chips bring the cozy flavor of a homemade loaf to a crisp, packable snack. They’re easy to make, endlessly customizable, and a smart way to use ripe bananas.
With a little patience and low heat, you’ll get a jar of chips that taste like comfort in a bite. Keep a batch on hand for quick snacking or sharing—they tend to disappear fast.
Dehydrated Banana Bread Chips – A Sweet, Crispy Snack With Cozy Flavor
Ingredients
- Bananas: 5–6 medium, ripe but still firm (yellow with brown speckles)
- Lemon juice: 1–2 tablespoons, for a quick anti-browning dip
- Pure maple syrup or honey: 1–2 tablespoons (optional, for light sweetness and caramelization)
- Ground cinnamon: 1–2 teaspoons
- Vanilla extract: 1 teaspoon
- Pinch of salt: to balance the sweetness
- Optional add-ins: ground nutmeg, allspice, or cardamom; finely chopped pecans or walnuts; cocoa powder; shredded coconut
- Nonstick spray or parchment: for dehydrator trays or baking sheets
Instructions
- Pick the right bananas. Choose bananas that are ripe with brown freckles but still hold their shape.Overripe bananas turn mushy and don’t slice cleanly.
- Prep a quick dip. In a shallow bowl, mix 1–2 tablespoons lemon juice with 1/2 cup water. This helps prevent browning and keeps the chips looking bright.
- Make the “banana bread” coating. In a small bowl, stir together maple syrup (or honey), cinnamon, vanilla, and a pinch of salt. Taste and adjust the cinnamon or sweetness to your liking.
- Slice evenly. Peel bananas and slice into 1/8–1/4-inch rounds.Thinner slices get crispier; thicker slices turn more chewy. Aim for consistent thickness so they dehydrate evenly.
- Quick dip, quick drain. Briefly dip slices in the lemon water, then lay on a clean towel and pat dry. Don’t soak—30 seconds is enough.
- Coat lightly. Gently toss banana slices with the cinnamon-vanilla mixture.A light, even coat is key. Too much liquid slows dehydration.
- Arrange on trays. Line dehydrator trays with nonstick mesh or lightly oiled parchment. Place slices in a single layer, not touching.For an oven, line baking sheets with parchment and arrange the same way.
- Dehydrate low and slow. Set dehydrator to 135°F (57°C). Dry for 6–10 hours, flipping halfway, until slices are dry and mostly crisp with just a hint of bend. In an oven, set to the lowest temp (usually 170–200°F/75–95°C), prop the door slightly open with a wooden spoon for airflow, and bake 2.5–4.5 hours, flipping once.Watch closely near the end.
- Test for doneness. Chips are ready when they feel dry, not tacky, and snap or crack when bent after cooling. If they’re leathery, give them another 30–60 minutes and recheck.
- Cool and condition. Let chips cool completely on the trays. Then place them in a loosely covered container for 24 hours, shaking once or twice.If condensation appears, return them to the dehydrator for another hour. This step helps even out any remaining moisture.
- Store. Once fully dry, seal in an airtight jar or bag. Add a food-safe desiccant packet if you have one for best crispness.
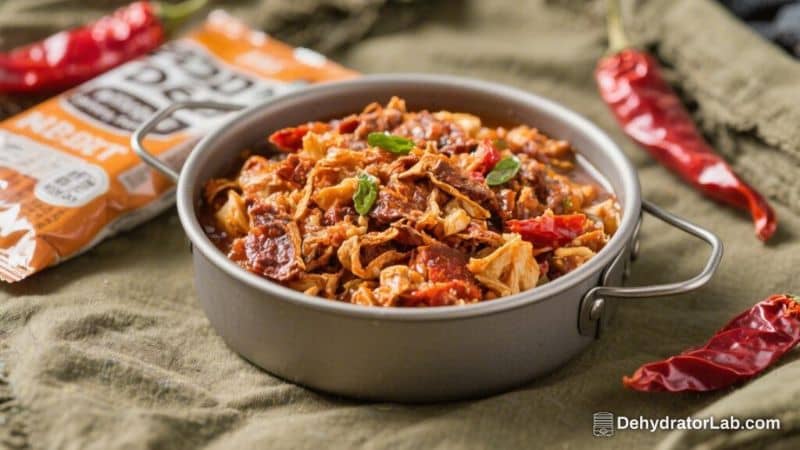
Related reading: dehydrated poblano pepper strips, dehydrated scallions, and best fruits to dehydrate.
Printable Recipe Card
Want just the essential recipe details without scrolling through the article? Get our printable recipe card with just the ingredients and instructions.