In this article:
How to Dehydrate Kiwi in a Food Dehydrator
So, you’ve found yourself with a surplus of kiwis. Maybe you got a little overexcited at the farmer’s market, or perhaps your Costco run had a more significant impact on your fruit bowl than you intended.
Now, you’re staring at these fuzzy little orbs, wondering how on earth you’re going to eat them all before they stage a mutiny and turn into a science experiment in your kitchen.
I’ve been there. Trust me.
But what if I told you there’s a way to transform that pile of ripe kiwi into sweet, chewy, shelf-stable jewels that taste like summer candy? That’s the magic of a food dehydrator. Dehydrating kiwi is surprisingly simple, and the results are downright addictive. Let’s turn those kiwis into your new favorite snack.
Why Bother Dehydrating Kiwi, Anyway?
I get it. It’s easier to just eat the fruit fresh. But hear me out. Dehydrating kiwi isn’t just a preservation method; it’s an upgrade. It intensifies the natural sugar, creating a flavor explosion that fresh kiwi just hints at. You get these gorgeous emerald-green slices that are chewy, tangy, and sweet all at once.
Think of them as nature’s fruit roll-ups, but without any of the weird additives. They’re perfect for hiking lunches, lunchbox stuffers, or just a healthy treat to satisfy a sweet tooth. Plus, they look seriously impressive. Bring a bag of these to a party and watch people’s eyes light up. You’ll look like a DIY snack wizard.
Gearing Up: What You’ll Need
Before we start slicing, let’s make sure you have the right tools for the job. This isn’t a complicated process, but having the right equipment makes all the difference.
The Main Event: Your Food Dehydrator
You don’t need a top-of-the-line, spaceship-looking dehydrator to make this work. A basic model with adjustable temperature and a timer works perfectly. You can check out our reviews and choose one from there.
I started with a simple circular one with stackable trays, and it served me well for years. The key feature you want is the adjustable temperature control.
The Supporting Cast
- Fresh Kiwis: The star of the show! Aim for ripe but firm fruit. If they’re too soft, they’ll turn to mush when you slice them.
- A Sharp Knife: A good paring or chef’s knife is non-negotiable. A dull knife will crush the kiwi instead of slicing it.
- Cutting Board: For obvious reasons.
- Vegetable Peeler or Spoon: Your choice for de-fuzzing the little guys.
- Mandoline Slicer (Optional, but Highly Recommended): Want perfectly uniform slices in record time? A mandoline is your best friend. Just, you know, watch your fingertips. I speak from experience. :/
Got everything? Great. Let’s get to the fun part.
Step-by-step Tutorial
Step 1: The Great Kiwi Prep
This is where we get our hands dirty. Proper preparation is the secret to getting those perfect, chewy slices instead of sticky, leathery blobs.
Peeling is a Must
I know, the skin has nutrients. But for dehydrating, you really need to peel them. The skin becomes tough and leathery, and let’s be honest, it kinda ruins the texture of the final product. You can use a standard vegetable peeler or my favorite lazy method: slice off the top and bottom, then slide a spoon between the skin and the flesh and rotate it around. The skin pops right off! It’s weirdly satisfying.
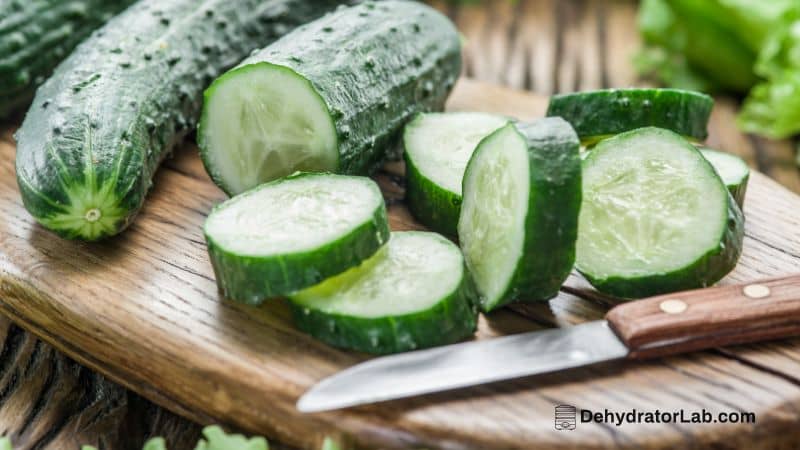
Slicing for Success
Consistency is the name of the game here. You want all your slices to be the same thickness so they dehydrate at the same rate.
- Ideal Thickness: Aim for 1/4-inch thick slices. Any thicker, and they take forever to dry. Any thinner, and they can become brittle and chip-like.
- The Mandoline Advantage: This is where a mandoline slicer earns its keep. You get a whole kiwi sliced uniformly in under 30 seconds. It’s a game-changer.
- Pro-Tip: If you’re using a knife, just take your time. Eyeball it and try to keep everything even.
Ever wondered why some of your dehydrated fruit ends up too sticky or too crisp? Nine times out of ten, it’s because the slice thickness was all over the place. Uniform slices = uniform results. It’s that simple.
Step 2: The Blanching Debate (To Dip or Not to Dip?)
Here’s a little secret many recipes don’t tell you: kiwi contains a natural enzyme that breaks down protein. It’s the same enzyme that makes raw kiwi a terrible addition to Jell-O or yogurt (it prevents them from setting). This enzyme can also cause the vibrant green color of your dehydrated kiwi to fade to a sad, brownish-green over time.
The solution? A quick blanching bath.
How to Blanch Kiwi Slices:
- Bring a pot of water to a rolling boil.
- Meanwhile, prepare an ice bath (a bowl of ice water).
- Carefully drop your kiwi slices into the boiling water for exactly 15-20 seconds. No longer!
- Quickly scoop them out and plunge them into the ice bath to stop the cooking process.
- Pat them completely dry with a clean kitchen towel or paper towels.
The Honest Truth
IMO, blanching is optional for flavor, but it’s essential if you care about color preservation. If you’re going to eat your kiwi chips within a week or two, you can probably skip it. But if you want them to stay that beautiful green for long-term storage, blanching is the way to go. It’s a tiny bit of extra work for a big visual payoff.
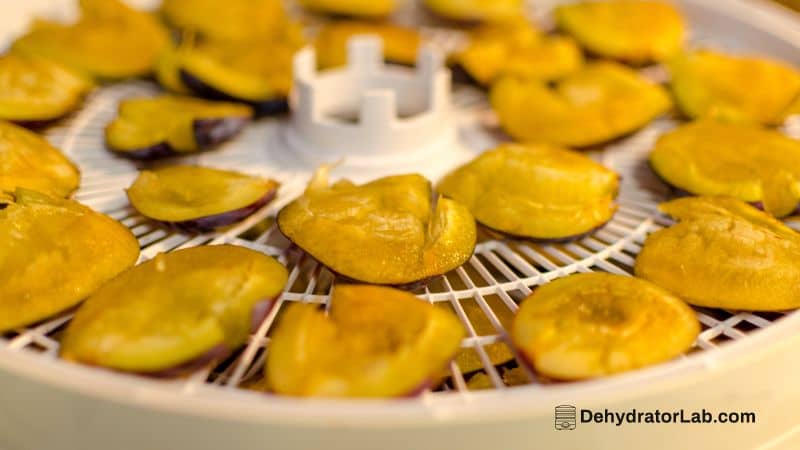
Step 3: Tray ‘Em Up and Dry ‘Em Out
Now for the easy part. Arrange your kiwi slices in a single layer on your dehydrator trays. Make sure they aren’t touching or overlapping, so the air can circulate freely around each slice.
The Golden Settings for Dehydrating Kiwi
This is where that adjustable temperature control becomes your bestie.
- Temperature: Set your dehydrator to 135°F (57°C).
- Time: This is the variable part. It will take anywhere from 6 to 12 hours.
Why such a big window? It depends on the humidity in your house, the thickness of your slices, and how juicy your kiwis were to begin with. This is not an exact science, and that’s okay! You’re not running a laboratory; you’re making a tasty snack.
Step 4: How to Know When They’re Done
You can’t just set a timer and walk away. You need to perform the “feel” test. A perfectly dehydrated kiwi slice should be leathery and pliable, but not sticky or tacky.
Here’s how to check:
- Take a slice off the tray after about 6 hours and let it cool for a few minutes. (The fruit will feel softer when it’s warm.)
- Bend it. It should bend easily without cracking.
- Tear it. You shouldn’t see any moist spots in the middle. If you squeeze a piece, no moisture should seep out.
If it’s still sticky or feels wet in the center, pop it back in and check again in an hour. They’re done when they have a texture similar to a fruit leather strip.
Storing Your Kiwi Masterpieces
You didn’t go through all this effort just to have your kiwi chips go bad. Proper storage is crucial.
- Conditioning (Yes, It’s a Thing): Before you seal them up for good, you need to “condition” your dehydrated fruit. This just means making sure the moisture level is even throughout all the pieces. Place the completely cooled kiwi slices in a large glass jar, fill it about 2/3 full, seal it, and give it a shake once a day for a week. If you see any condensation forming on the jar, you know they need to go back into the dehydrator.
- Long-Term Storage: After conditioning, store your kiwi slices in an airtight container—glass jars or mylar bags with oxygen absorbers work best. Keep them in a cool, dark, and dry place. Properly dehydrated and stored, they can last for up to a year… if you can resist eating them that long. FYI, mine never last more than a month.
Let’s Fix Common Problems (Troubleshooting)
Things don’t always go perfectly, and that’s fine. Here are quick fixes for the most common issues:
- Problem: The kiwi is too crisp/brittle.
- Solution: You over-dried them. They’re basically kiwi chips! Still edible, but not the chewy texture we were going for. Next time, check them a few hours earlier.
- Problem: The kiwi is sticky and moist.
- Solution: They need more time. Simple as that. Pop them back in the dehydrator. This is why the “feel” test is so important.
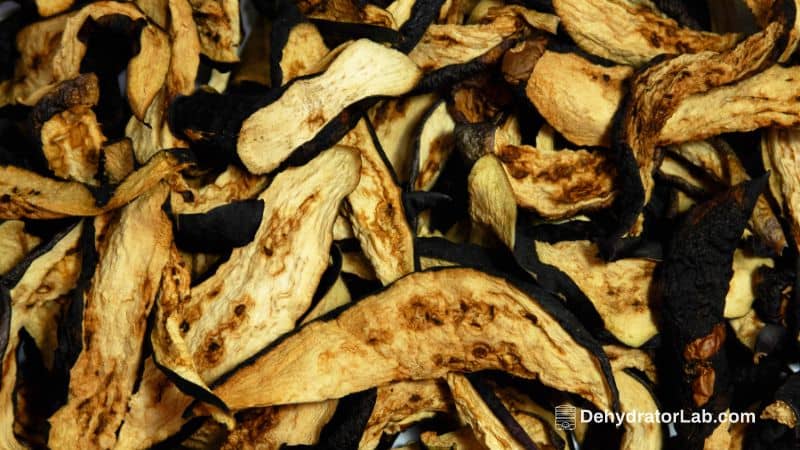
- Problem: The kiwi turned brown.
- Solution: You probably skipped the blanching step. They’re still perfectly safe to eat and will taste fine, but they just won’t be as pretty.
Get Creative – Flavor Variations
Once you’ve mastered the basic recipe, why not play around? Before dehydrating, you can lightly spritz the slices with lime juice for a zesty kick, or sprinkle them with a tiny, tiny bit of chili powder for a sweet-and-spicy treat. The possibilities are endless.
So, there you have it. Dehydrating kiwi isn’t just a way to save fruit from certain doom; it’s a way to create a genuinely delicious, healthy snack that beats anything you can buy in a store. It’s a simple process that rewards a little bit of patience with a huge payoff.
Now go forth and dehydrate! Your future self, rummaging for a perfect snack in a few months, will thank you. Honestly, what are you waiting for? Those kiwis aren’t going to slice themselves. 🙂