Skip the long marinating time and still get tasty, chewy jerky right from your air fryer. This no-marinade version leans on a quick dry rub and gentle drying to bring out bold, meaty flavor without the wait. It’s ideal for busy days, last-minute snacks, or when you want full control over salt and spice.
With the right cut of beef and a few pantry spices, you’ll have high-protein jerky in a fraction of the time it usually takes.
In this article:
Why This Recipe Works
- No waiting around: Traditional jerky often needs 8–24 hours of marinating. This dry-rub approach skips that while still packing in flavor.
- Better texture control: Dry seasoning pulls moisture from the surface, helping the meat dry evenly and develop that classic chew.
- Air fryer efficiency: Consistent airflow speeds up dehydration compared to a standard oven, especially at lower temps with vents open.
- Customizable salt and spice: You control sodium levels and heat. It’s easy to make mild, peppery, smoky, or low-sugar jerky.
- Great for small batches: Perfect when you don’t want to run a full dehydrator or heat your kitchen for hours.
Ingredients
- 1.5–2 pounds beef, trimmed of fat (top round, eye of round, or sirloin tip are best)
- 2 teaspoons kosher salt (reduce to 1.5 teaspoons if sensitive to salt)
- 1 teaspoon freshly ground black pepper
- 1 teaspoon smoked paprika (adds a subtle smoky note)
- 1 teaspoon garlic powder
- 1 teaspoon onion powder
- 1/2 teaspoon red pepper flakes or cayenne (optional for heat)
- 1 teaspoon brown sugar or coconut sugar (optional, for light balance)
- 1 tablespoon Worcestershire sauce or low-sodium soy sauce (optional quick brush for umami without a long marinade)
- Nonstick spray or a little neutral oil for the air fryer racks
Instructions
- Partially freeze the beef: Place the meat in the freezer for 45–60 minutes until firm but not rock hard.
This makes thin slicing much easier.
- Trim and slice: Remove all visible fat, which can turn rancid during storage. Slice against the grain for a tender bite or with the grain for a chewier texture. Aim for 1/8 to 1/4 inch thick slices.
- Pat dry: Use paper towels to blot excess moisture.
Drier surfaces mean faster, more even dehydrating.
- Mix the dry rub: Combine salt, pepper, smoked paprika, garlic powder, onion powder, and optional red pepper flakes and sugar in a small bowl.
- Season thoroughly: In a large bowl, toss the beef slices with the dry rub, coating both sides. If using Worcestershire or soy, brush a very light layer on the meat first so the spices adhere. Don’t soak—this is not a marinade.
- Preheat the air fryer: Set to 175–180°F (80–82°C) if your model goes that low.
If not, use the lowest setting (often 200°F/93°C) and prop the lid/door slightly ajar with a heat-safe utensil to increase airflow and reduce heat buildup.
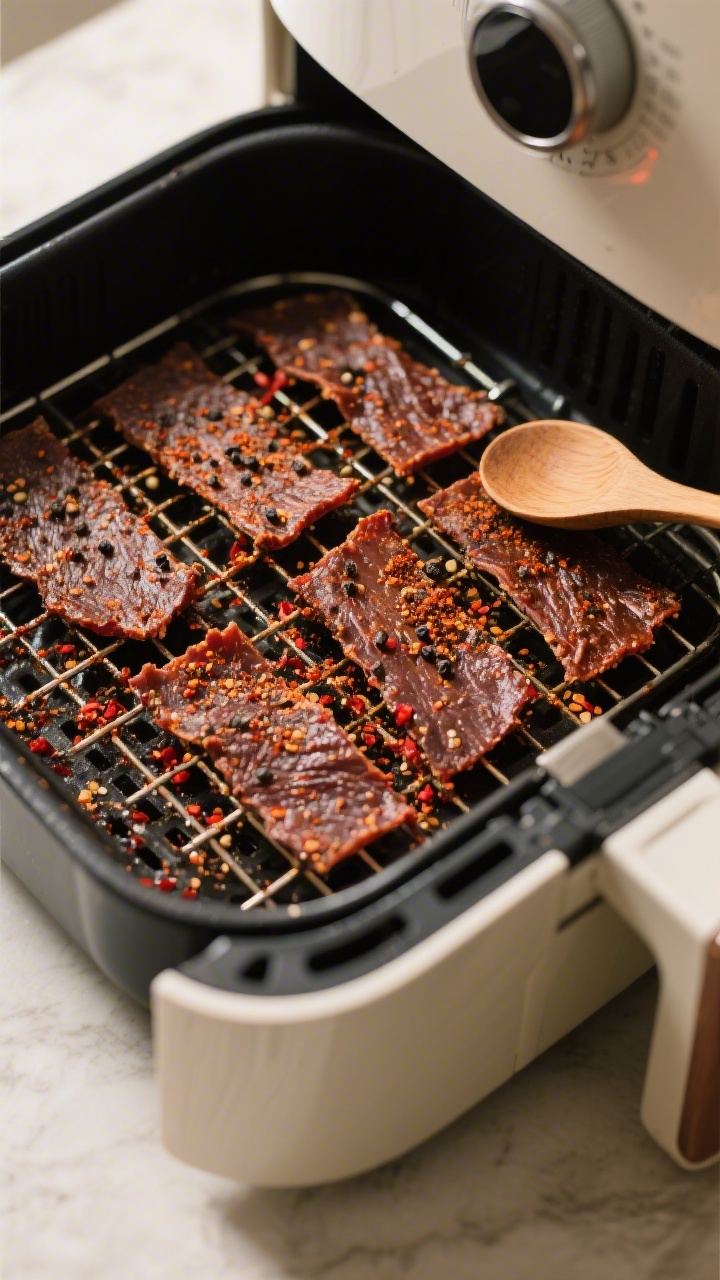
- Arrange the slices: Lightly oil the racks or basket. Lay strips in a single layer without overlap. Work in batches if needed.
For basket models, consider a perforated parchment liner to reduce sticking, but keep airflow in mind.
- Dry the jerky: Cook for 2–3 hours at 175–180°F, flipping every 45–60 minutes and rotating racks if your unit has multiple levels. If your lowest temp is 200°F, start checking at 1.5 hours and reduce time as needed.
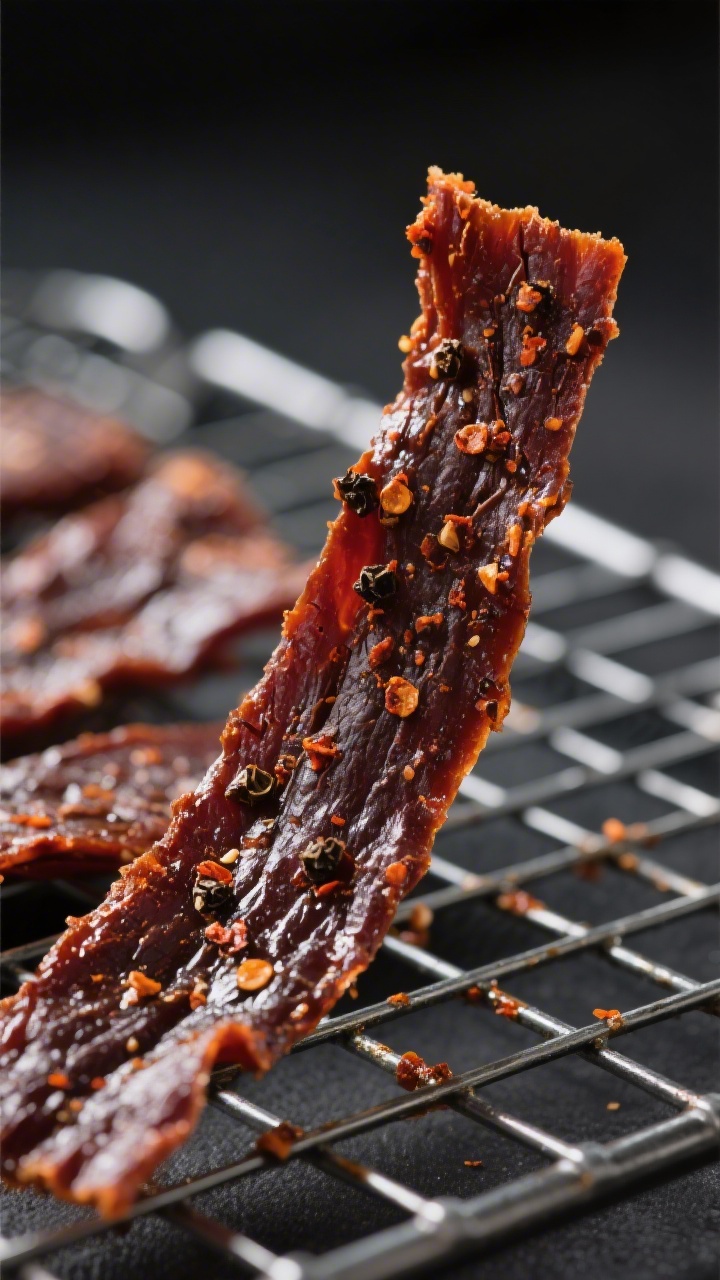
- Check for doneness: Jerky is ready when it’s dry to the touch, darker in color, and bends without snapping. When bent, it should crack slightly but not break clean through.
If it feels damp or spongy, keep drying in 15-minute increments.
- Cool and condition: Let jerky cool completely on a rack. Then place it loosely in a clean jar or bag at room temperature for 24 hours, opening once to release excess moisture. This “conditioning” helps equalize moisture so pieces store safely and consistently.
- Store properly: Transfer to airtight containers.
See storage guidelines below.
How to Store
- Short term: In an airtight container at room temperature for up to 3 days if fully dried and your kitchen is cool and dry.
- Refrigerator: Up to 2 weeks in a sealed bag or jar. Add a small food-safe desiccant pack if you have one.
- Freezer: Up to 3 months. Portion into freezer bags, press out air, and label with the date.
- Watch for moisture: If you see condensation or feel tackiness after storage, return jerky to the air fryer at low temp for 10–15 minutes to drive off moisture.
Health Benefits
- High in protein: Jerky delivers a satisfying protein boost that supports muscle repair and keeps you full between meals.
- Lower sugar than store-bought: Skipping a sweet marinade keeps added sugars low.
Any sugar in this recipe is optional and minimal.
- Controlled sodium: You decide how much salt to use, which can be a big win over commercial options.
- No preservatives needed: Properly dried and stored jerky stays fresh without artificial additives.
- Portable snack: A compact, shelf-stable source of nutrients for hikes, travel, or busy workdays.
What Not to Do
- Don’t skip trimming fat: Fat doesn’t dry like lean meat and can go rancid, shortening shelf life.
- Don’t overcrowd the basket: Overlapping slices trap moisture and cause uneven drying or steaming.
- Don’t rush the process: Too-high heat cooks the beef instead of drying it, leading to tough, brittle jerky.
- Don’t store before cooling: Sealing warm jerky traps steam and encourages mold.
- Don’t ignore thickness: Mixed thicknesses dry at different speeds. Keep slices uniform for reliable results.
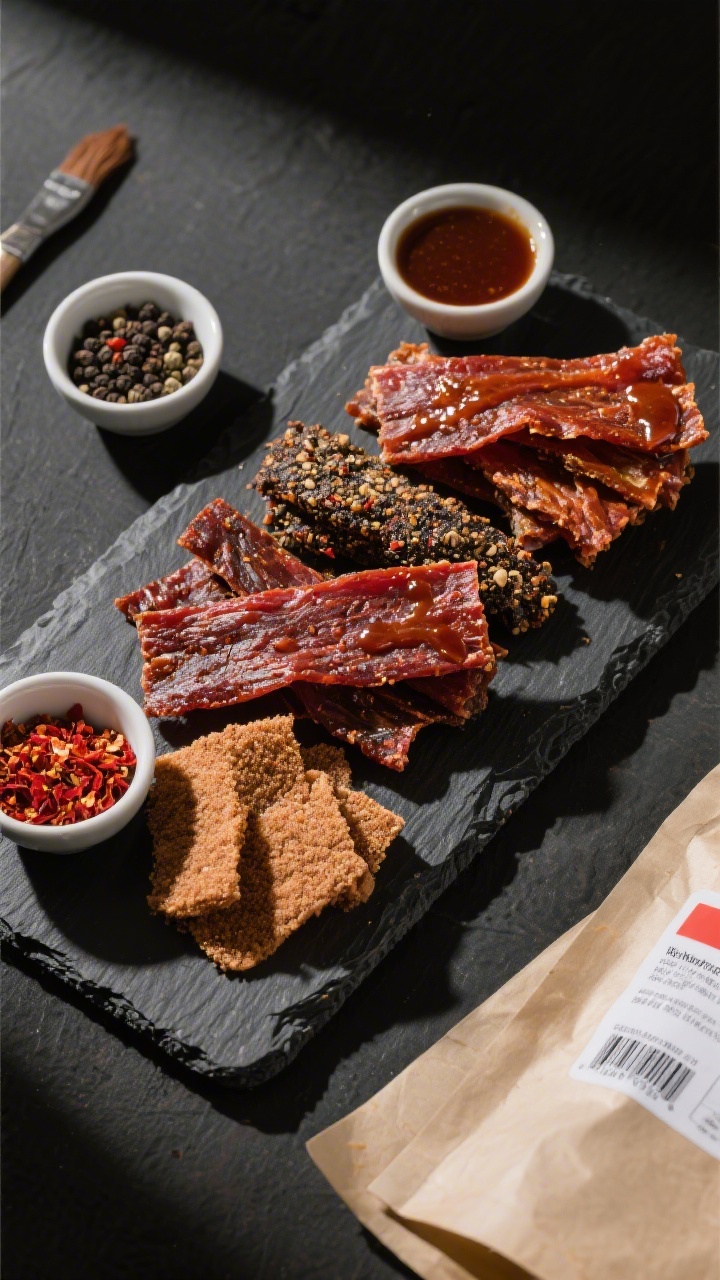
Variations You Can Try
- Pepper-crusted: Add extra coarse black pepper for a bold edge.
- Sweet heat: Sprinkle a touch more brown sugar and a pinch of cayenne for a classic balance.
- Coffee rub: Mix 1 teaspoon finely ground espresso with the spices for a rich, roasty note.
- Everything bagel spice: Swap paprika and onion powder for 2 teaspoons everything seasoning; reduce salt accordingly.
- Low-sodium: Cut salt to 1 teaspoon and rely on garlic, smoked paprika, and black pepper for flavor.
- Game meats: Use venison, bison, or elk; choose very lean cuts and mind food safety (see FAQs).
FAQ
Can I make jerky in the air fryer without any soy or Worcestershire?
Yes. Stick to the dry rub and consider adding a touch more smoked paprika and black pepper for depth.
A pinch of citric acid or lemon zest can also brighten flavor without liquid.
What’s the best cut of beef for no-marinade jerky?
Lean, affordable roasts like top round, eye of round, and sirloin tip work best. They slice cleanly, dry evenly, and have minimal fat to trim.
How thin should I slice the beef?
Aim for 1/8 to 1/4 inch. Thinner slices dry faster and are less chewy; thicker slices have a hearty bite but take longer.
My air fryer doesn’t go below 200°F.
What should I do?
Use the lowest setting and increase airflow. Prop the door slightly ajar if safe, flip more often, and start checking early. You can also alternate 10 minutes on, 5 minutes off to prevent overcooking while still drying.
How do I know when the jerky is done?
It should feel dry and firm, darkened in color, and bend with slight cracking but not snap.
If it’s still moist or spongy, keep drying in short intervals.
Is it safe to make jerky without first cooking the meat?
Yes, if it’s fully dried and handled cleanly. For extra safety, you can heat strips to an internal temp of 165°F briefly at the start, then lower the temp to dehydrate. Always wash hands, tools, and surfaces.
Can I use this method for venison or other game?
Absolutely.
Ensure the meat is very lean and fresh. Because wild game can carry pathogens, consider a brief preheating step to 165°F before dehydrating.
How long will homemade jerky last?
At room temperature, properly dried jerky lasts about 3 days. In the fridge, up to 2 weeks; in the freezer, up to 3 months.
Keep it sealed and dry for best quality.
Why condition jerky after drying?
Conditioning equalizes moisture across pieces so none are overly wet inside. This helps prevent spoilage and gives a more consistent texture.
Can I add liquid smoke?
Yes, 1/4 to 1/2 teaspoon brushed lightly or mixed with a teaspoon of water to dab onto slices. Use sparingly—it’s potent.
Final Thoughts
Air fryer jerky without marinade proves that great flavor doesn’t need an overnight soak.
With a smart dry rub, steady airflow, and patience at a low temperature, you’ll get savory, portable jerky in just a few hours. Keep the slices uniform, trim fat well, and don’t rush the drying step. Once you master the basics, play with spices and cuts to make a signature batch that fits your taste and schedule. If you’re short on time, our Fast Jerky recipe is another great no-fuss option, and our Low Sodium Jerky is worth a try too.
Air Fryer Jerky Without Marinade – Simple, Savory, and Fast
Ingredients
- 1.5–2 pounds beef, trimmed of fat (top round, eye of round, or sirloin tip are best)
- 2 teaspoons kosher salt (reduce to 1.5 teaspoons if sensitive to salt)
- 1 teaspoon freshly ground black pepper
- 1 teaspoon smoked paprika (adds a subtle smoky note)
- 1 teaspoon garlic powder
- 1 teaspoon onion powder
- 1/2 teaspoon red pepper flakes or cayenne (optional for heat)
- 1 teaspoon brown sugar or coconut sugar (optional, for light balance)
- 1 tablespoon Worcestershire sauce or low-sodium soy sauce (optional quick brush for umami without a long marinade)
- Nonstick spray or a little neutral oil for the air fryer racks
Instructions
- Partially freeze the beef: Place the meat in the freezer for 45–60 minutes until firm but not rock hard.This makes thin slicing much easier.
- Trim and slice: Remove all visible fat, which can turn rancid during storage. Slice against the grain for a tender bite or with the grain for a chewier texture. Aim for 1/8 to 1/4 inch thick slices.
- Pat dry: Use paper towels to blot excess moisture.Drier surfaces mean faster, more even dehydrating.
- Mix the dry rub: Combine salt, pepper, smoked paprika, garlic powder, onion powder, and optional red pepper flakes and sugar in a small bowl.
- Season thoroughly: In a large bowl, toss the beef slices with the dry rub, coating both sides. If using Worcestershire or soy, brush a very light layer on the meat first so the spices adhere. Don’t soak—this is not a marinade.
- Preheat the air fryer: Set to 175–180°F (80–82°C) if your model goes that low.If not, use the lowest setting (often 200°F/93°C) and prop the lid/door slightly ajar with a heat-safe utensil to increase airflow and reduce heat buildup.
- Arrange the slices: Lightly oil the racks or basket. Lay strips in a single layer without overlap. Work in batches if needed.For basket models, consider a perforated parchment liner to reduce sticking, but keep airflow in mind.
- Dry the jerky: Cook for 2–3 hours at 175–180°F, flipping every 45–60 minutes and rotating racks if your unit has multiple levels. If your lowest temp is 200°F, start checking at 1.5 hours and reduce time as needed.
- Check for doneness: Jerky is ready when it’s dry to the touch, darker in color, and bends without snapping. When bent, it should crack slightly but not break clean through.If it feels damp or spongy, keep drying in 15-minute increments.
- Cool and condition: Let jerky cool completely on a rack. Then place it loosely in a clean jar or bag at room temperature for 24 hours, opening once to release excess moisture. This “conditioning” helps equalize moisture so pieces store safely and consistently.
- Store properly: Transfer to airtight containers.See storage guidelines below.
Printable Recipe Card
Want just the essential recipe details without scrolling through the article? Get our printable recipe card with just the ingredients and instructions.