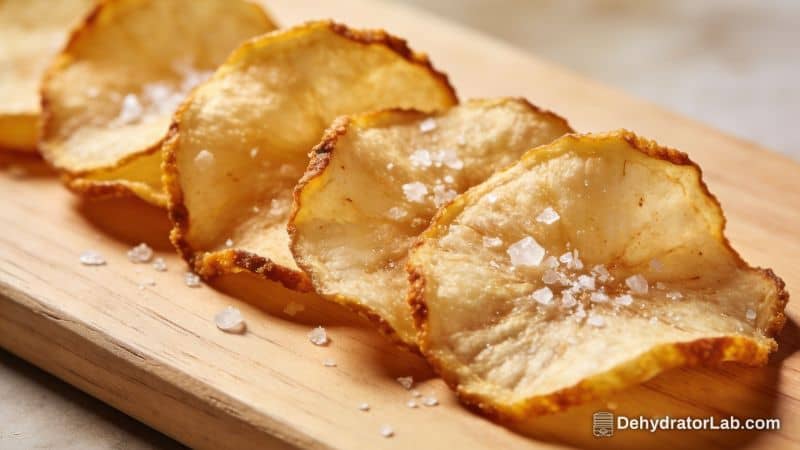
Cassava chips are the kind of snack that makes you wonder why you ever reached for a bag at the store. They’re light, crisp, and satisfyingly salty, with a subtle nutty flavor that’s different from potato but just as addictive. Using an air fryer keeps things simple and mess-free, and you still get that golden crunch you’re after.
If you’re new to cooking with cassava (also called yuca), don’t worry—this recipe walks you through it step by step. Once you try it, you’ll have a new go-to snack ready in minutes.
In this article:
Why This Recipe Works

- Air fryer = consistent crunch: You get even heat, great crisping, and less oil than deep frying.
- Soaking removes excess starch: This simple step keeps the chips from sticking and helps them crisp up beautifully.
- Thin slicing is the game-changer: Using a mandoline or very sharp knife ensures fast, even cooking.
- Flexible seasoning: A classic salt-and-pepper base works great, but the neutral flavor of cassava pairs well with all kinds of spices.
- Gluten-free and budget-friendly: Cassava is naturally gluten-free and usually cheaper than fancy store-bought chips.
What You’ll Need
- 1 large cassava (yuca) root, about 1 to 1.5 pounds
- 1 to 2 tablespoons neutral oil (avocado, grapeseed, or light olive oil)
- 1 teaspoon fine sea salt, plus more to taste
- 1/2 teaspoon black pepper (optional)
- 1/2 teaspoon garlic powder (optional, for savory depth)
- 1/4 teaspoon smoked paprika or chili powder (optional, for a little heat and color)
- Cold water and ice for soaking
- Cooking spray (optional, to prevent sticking)
Step-by-Step Instructions

- Prep the cassava safely. Cut off both ends of the cassava. Score the thick brown peel lengthwise, then wedge your thumb or a butter knife under the peel to lift and remove it in sections.
Under the brown skin, you’ll see a pinkish layer—peel that off too. Rinse the peeled root.
- Slice it thin. Cut the cassava into 2 to 3-inch sections. Using a mandoline set to about 1 mm (thin) or a sharp knife, slice into thin rounds.
Thinner slices mean crisper chips and faster cook times.
- Soak to remove starch. Place slices in a large bowl of ice-cold water and swish gently. Let them sit for 15 to 20 minutes. This step helps prevent clumping and boosts crunch.
- Dry thoroughly. Drain the slices and pat them completely dry with clean kitchen towels or paper towels.
Moisture is the enemy of crisp chips, so take your time here.
- Season lightly first. In a bowl, toss slices with 1 tablespoon oil, 1 teaspoon salt, and any optional seasonings. Start conservatively; you can always add more salt after frying.
- Preheat the air fryer. Set to 350°F (175°C) for 3 to 5 minutes. A preheated basket helps the chips start crisping right away.
- Arrange in a single layer. Lightly spray or brush the basket with oil.
Place slices in a single layer with minimal overlap. Work in batches to avoid steaming.
- Air fry until golden and crisp. Cook for 8 to 12 minutes, shaking the basket or flipping slices halfway. Watch closely from minute 7 onward—cassava can go from pale to golden quickly.
Done chips should be lightly browned at the edges and firmly crisp.
- Season and cool. While hot, sprinkle with a pinch more salt if needed. Transfer to a wire rack to cool for a few minutes; they’ll crisp up even more as they rest.
- Repeat with remaining slices. Keep cooked chips spread out while you finish the batches so they don’t trap steam.
Storage Instructions
- Room temperature: Once completely cool, store in an airtight container for up to 3 days. Add a small piece of paper towel to absorb any lingering moisture.
- Re-crisping: If they lose crunch, air fry at 325°F (165°C) for 2 to 3 minutes.
Let cool again before serving.
- Freezing: Not recommended. The texture suffers after thawing.
Why This is Good for You
- Better-for-you crunch: Air frying uses far less oil than deep frying, lowering overall calories and saturated fat.
- Naturally gluten-free: Cassava is safe for many people with gluten sensitivities or celiac disease.
- Steady energy: Cassava is rich in complex carbohydrates, which provide longer-lasting energy compared to many ultra-processed snacks.
- Minerals and fiber: Cassava offers potassium and a bit of fiber, especially if you don’t peel too thickly.
What Not to Do
- Don’t skip soaking. Without soaking, slices may stick together and cook unevenly.
- Don’t crowd the basket. Overlapping leads to limp, steamed chips instead of crisp ones.
- Don’t slice thick. Thick cuts take longer and often end up leathery. Thin slices are key.
- Don’t over-oil. Too much oil makes them heavy and can cause burning at the edges.
- Don’t walk away at the end. The last few minutes are crucial; check often to avoid over-browning.
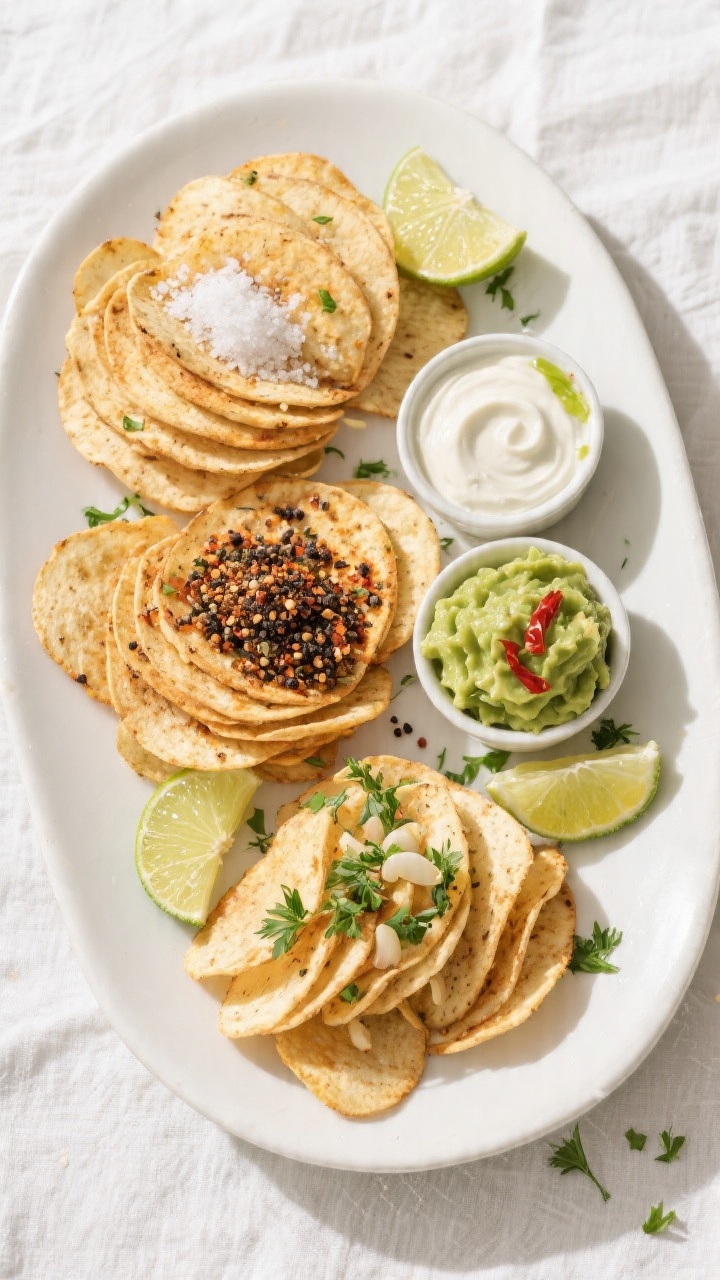
Recipe Variations
- Classic Sea Salt and Pepper: Keep it simple with fine sea salt and a crack of black pepper.
- Smoky Chili-Lime: Toss hot chips with chili powder, smoked paprika, and a squeeze of lime.
Add lime zest for extra zing.
- Garlic Herb: Mix garlic powder, dried parsley, and a pinch of onion powder. Finish with a tiny drizzle of olive oil.
- Sweet and Spicy: Dust with coconut sugar and cayenne. A pinch of cinnamon rounds it out.
- Everything Seasoning: Sprinkle a little everything bagel blend right after cooking while the chips are still warm.
- Truffle Salt: For a fancy twist, add a small pinch of truffle salt to hot chips.
A little goes a long way.
FAQ
Is cassava safe to eat?
Cassava is safe when properly prepared. Always peel it thoroughly and cook it; never eat it raw. This recipe involves peeling, soaking, and air frying, which is appropriate for safe consumption.
Can I use frozen cassava?
Yes.
Many stores sell peeled, frozen cassava. Thaw it first, slice thinly, and follow the same soaking and drying steps. Make sure it’s fully thawed so it slices evenly.
What if I don’t have a mandoline?
Use the sharpest knife you have and take your time.
Aim for very thin, even slices. If your slices are a bit thicker, add a couple of extra minutes and keep a close eye on them.
Why are my chips chewy instead of crispy?
They were likely sliced too thick, crowded in the basket, or not dried well after soaking. Reduce moisture, slice thinner, and cook in smaller batches for best results.
How do I prevent browning too fast?
Lower the temperature to 325°F (165°C) and extend the time slightly.
Lighter oiling and shaking halfway through also help prevent hot spots.
Can I make them oil-free?
You can, but they won’t be quite as crisp or evenly browned. If you skip oil, be sure the basket is nonstick and the slices are very dry. Check for doneness a bit earlier.
What dips go well with cassava chips?
Great pairings include guacamole, garlicky yogurt sauce, spicy mayo, mango salsa, or a simple lime-salt crema.
The neutral flavor of cassava plays nicely with bold dips.
Are cassava chips low-carb?
No. Cassava is a starchy root and higher in carbs. If you’re looking for low-carb chips, try zucchini or kale chips instead.
Can I bake these instead of air frying?
Yes.
Arrange slices on parchment-lined sheets, brush lightly with oil, and bake at 350°F (175°C) for 12 to 18 minutes, flipping once. Watch closely near the end.
How do I know when they’re done?
They should look lightly golden around the edges and feel firm and crisp when tapped. If they still bend, give them another minute and check again.
Wrapping Up
Air fryer cassava chips deliver big crunch with minimal effort.
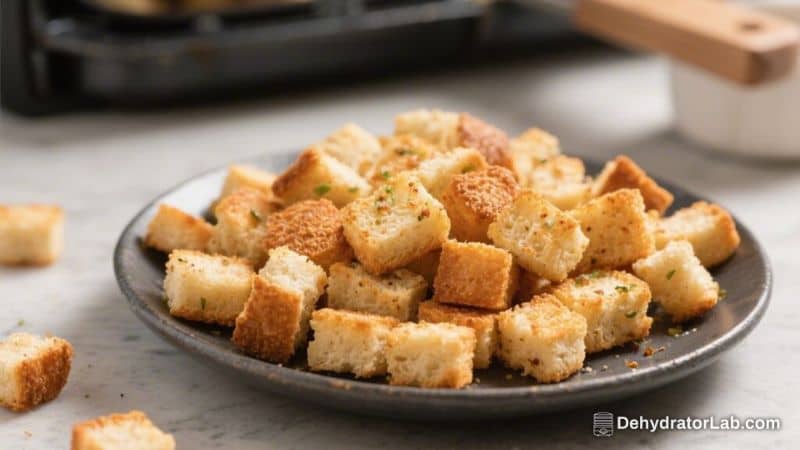
With a quick soak, thin slices, and a few minutes in the air fryer, you’ll have a snack that’s fresh, flavorful, and better than store-bought. Keep the seasoning simple or play with bold spices—either way, they’re hard to stop eating. Make a batch today, and you might just find your new favorite chip. If you’re exploring more global snacks, our Air Fryer Plantain Chips and Air Fryer Taro Chips are great next stops, and for a delicate, lacy crunch, try our Air Fryer Lotus Root Chips.

Air Fryer Cassava Chips – Crispy, Simple, and Naturally Gluten-Free
Ingredients
- 1 large cassava (yuca) root, about 1 to 1.5 pounds
- 1 to 2 tablespoons neutral oil (avocado, grapeseed, or light olive oil)
- 1 teaspoon fine sea salt, plus more to taste
- 1/2 teaspoon black pepper (optional)
- 1/2 teaspoon garlic powder (optional, for savory depth)
- 1/4 teaspoon smoked paprika or chili powder (optional, for a little heat and color)
- Cold water and ice for soaking
- Cooking spray (optional, to prevent sticking)
Instructions
- Prep the cassava safely. Cut off both ends of the cassava. Score the thick brown peel lengthwise, then wedge your thumb or a butter knife under the peel to lift and remove it in sections.Under the brown skin, you’ll see a pinkish layer—peel that off too. Rinse the peeled root.
- Slice it thin. Cut the cassava into 2 to 3-inch sections. Using a mandoline set to about 1 mm (thin) or a sharp knife, slice into thin rounds.Thinner slices mean crisper chips and faster cook times.
- Soak to remove starch. Place slices in a large bowl of ice-cold water and swish gently. Let them sit for 15 to 20 minutes. This step helps prevent clumping and boosts crunch.
- Dry thoroughly. Drain the slices and pat them completely dry with clean kitchen towels or paper towels.Moisture is the enemy of crisp chips, so take your time here.
- Season lightly first. In a bowl, toss slices with 1 tablespoon oil, 1 teaspoon salt, and any optional seasonings. Start conservatively; you can always add more salt after frying.
- Preheat the air fryer. Set to 350°F (175°C) for 3 to 5 minutes. A preheated basket helps the chips start crisping right away.
- Arrange in a single layer. Lightly spray or brush the basket with oil.Place slices in a single layer with minimal overlap. Work in batches to avoid steaming.
- Air fry until golden and crisp. Cook for 8 to 12 minutes, shaking the basket or flipping slices halfway. Watch closely from minute 7 onward—cassava can go from pale to golden quickly.Done chips should be lightly browned at the edges and firmly crisp.
- Season and cool. While hot, sprinkle with a pinch more salt if needed. Transfer to a wire rack to cool for a few minutes; they’ll crisp up even more as they rest.
- Repeat with remaining slices. Keep cooked chips spread out while you finish the batches so they don’t trap steam.
Printable Recipe Card
Want just the essential recipe details without scrolling through the article? Get our printable recipe card with just the ingredients and instructions.